Adding Another Interface to pfSense in VMware Workstation

In this module, we will look at the process of adding an additional interface to the pfSense VM when the VMware Workstation GUI only shows four available interfaces.
Adding Another Interface to pfSense in VMware Workstation
In: VMware, VMware Cybersecurity Lab Project, Home Lab, Computer Networking
ℹ️
This page is part of a larger series on building a cybersecurity lab using VMware Workstation Pro. Click here to be taken back to the project home page.

Previous Step

External Pentest Practice in Your VMware AD Lab
In this module of the VMware Workstation cybersecurity home lab project, we are going to look at the process of setting up a dual-homed target to serve as a pivot point into an Active Directory network.


Why am I Creating this Network?

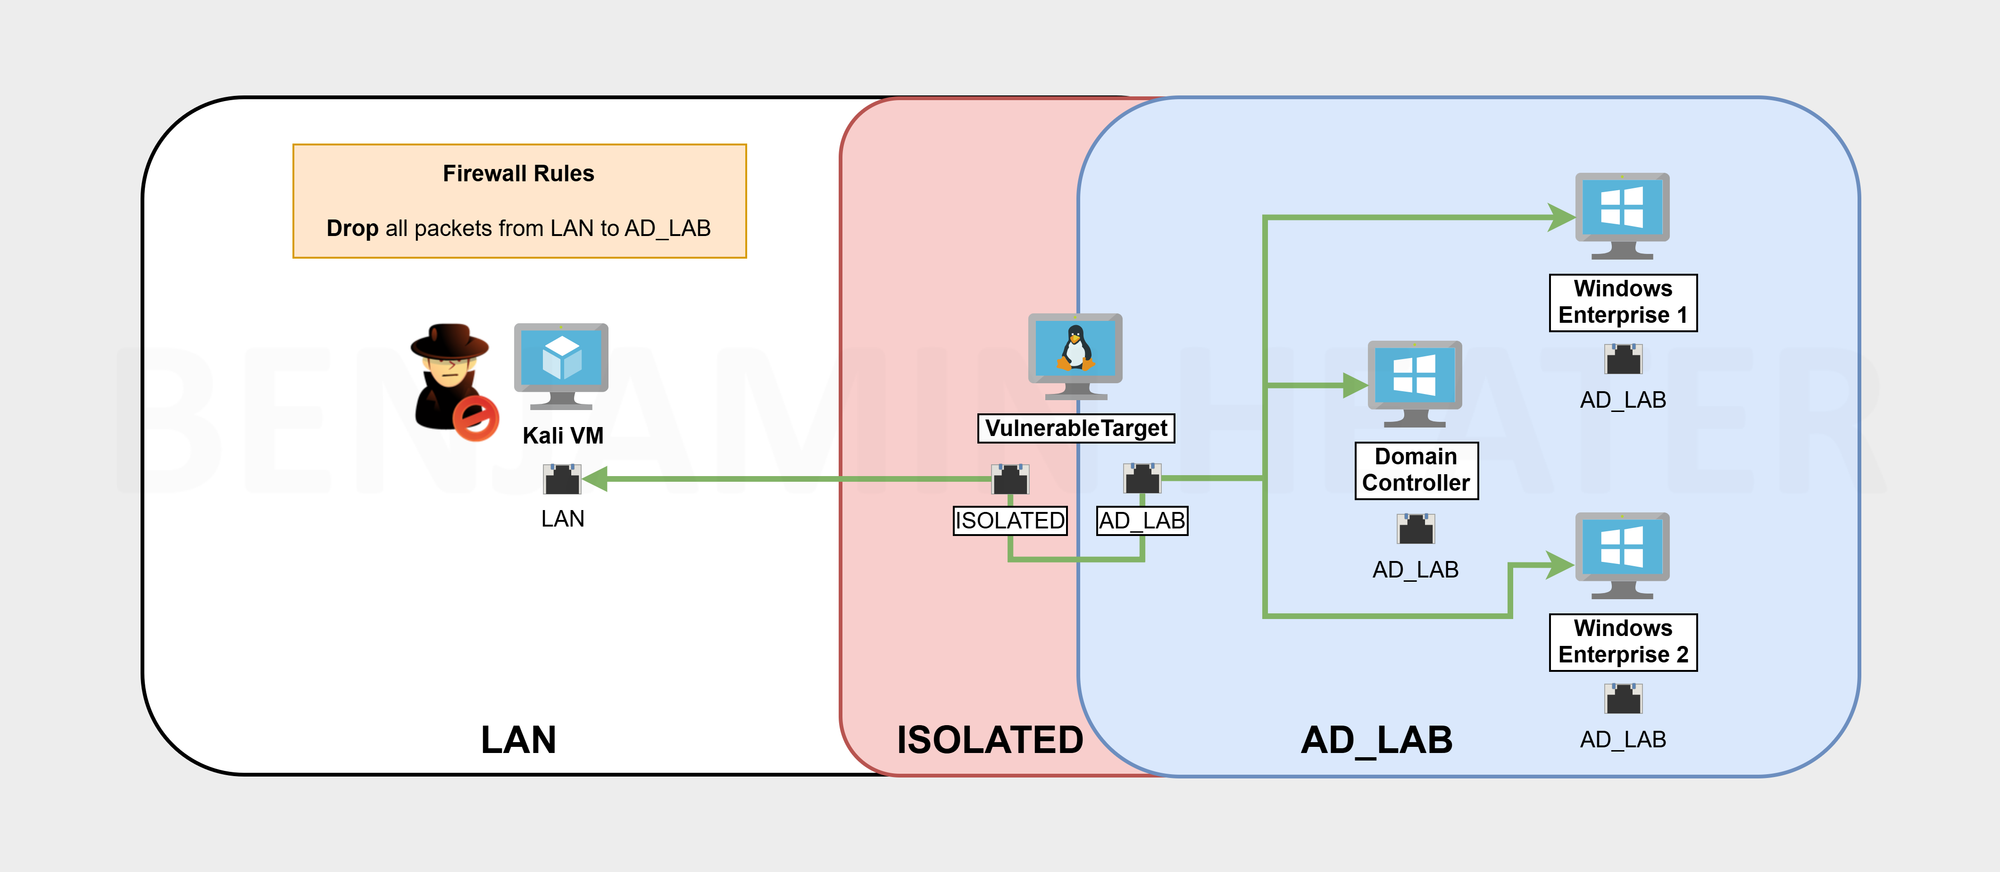
I am creating this network, because I want a LAN where I can put VMs to have Internet access while not being able to talk to any other devices other than Kali.


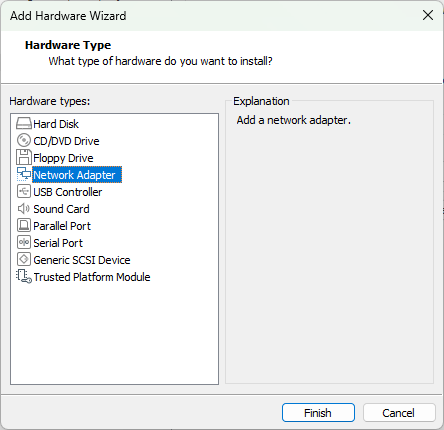
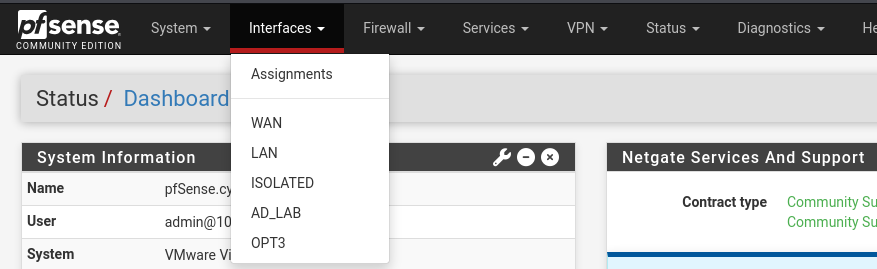
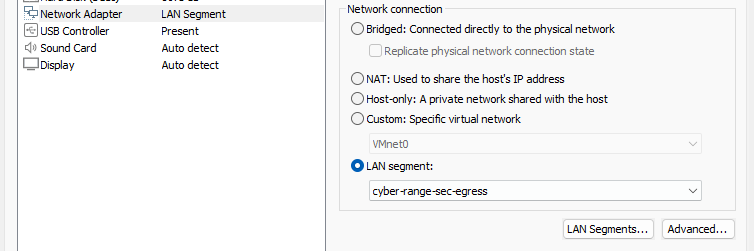
Adding the Interface

Right-click the pfSense VM > Settings
Click "Add..."
Choose "Network Adapter"
Click "Network Adapter 5" > and click "LAN Segments..."
Click "Add" and give it a name such as 
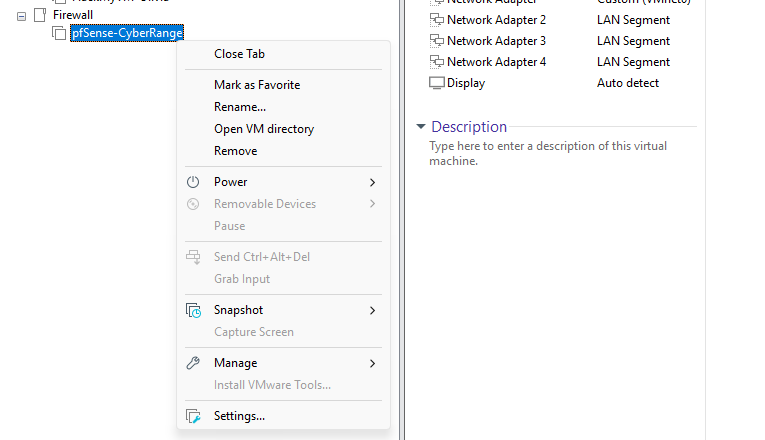
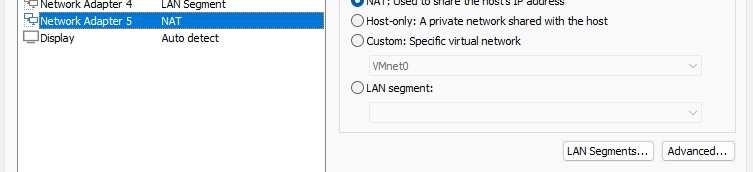
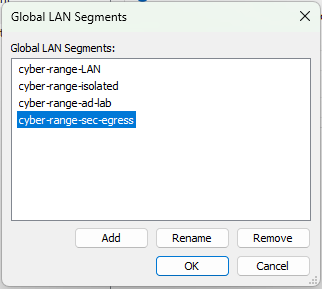
cyber-range-sec-egress > OK
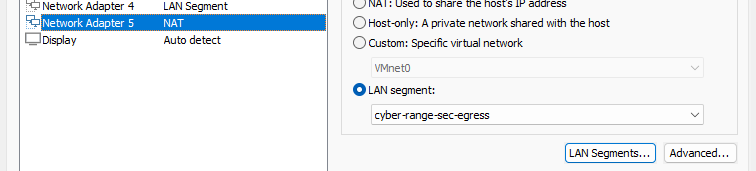
Finally, put "Network Adapter 5" on the cyber-range-sec-egress LAN Segment


Configure pfSense VM

Start up the pfSense VM...

Choose "1) Assign Interfaces"

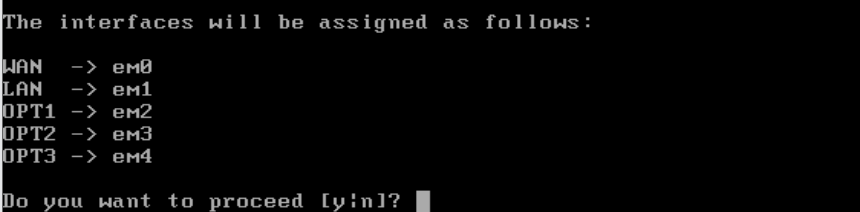
Should VLANs be set up now [y|n]? : n
Enter the WAN interface name or ‘a’ for auto-detection: em0
Enter the LAN interface name or ‘a’ for auto-detection: em1
Enter the Optional 1 interface name or ‘a’ for auto-detection: em2
Enter the Optional 2 interface name or ‘a’ for auto-detection: em3
Enter the Optional 3 interface name or ‘a’ for auto-detection: em4

Enter "y"
Note that "OPT3" exists, but is unconfigured
Choose "2) Set Interface(s) IP address"
Choose interface "5"
Enter "n", we'll statically assign an IP
Enter "24" for the subnet mask bit count
This is a "LAN", press ENTER
Enter "n", and press ENTER
Enter "y" and configure the DHCP pool size
Enter "n", as we want to keep using HTTPS on the web configurator
Configuration complete, press ENTER


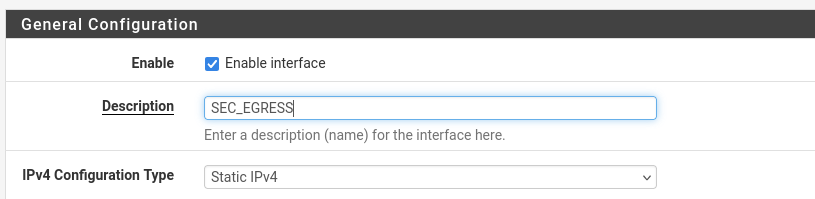
Additional Configurations

Change the Interface Name

ℹ️
For this part, we'll use the Kali VM to log into the pfSense web configurator and make some changes.
Go to Interfaces > OPT3
Update the Description field
Click Save and Apply Changes

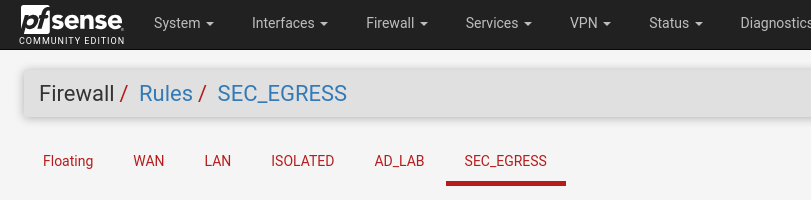
Add Some Firewall Rules

Go to Firewall > Rules > SEC_EGRESS

Click Add ⬆️

  • Action: Pass
  • Interface: SEC_EGRESS
  • Address Family: IPv4
  • Protocol: Any
  • Source: SEC_EGRESS subnets
  • Destination: SEC_EGRESS address
  • Description: Allow traffic out the gateway

Click Save


Click Add ⬇️

  • Action: Pass
  • Interface: SEC_EGRESS
  • Address Family: IPv4
  • Protocol: Any
  • Source: SEC_EGRESS net
  • Destination: Single host or alias = 10.0.0.2 (Kali VM IP)
  • Description: Allow packets to Kali VM

Click Save


Click Add ⬇️

  • Action: Pass
  • Interface: SEC_EGRESS
  • Address Family: IPv4
  • Protocol: Any
  • Source: SEC_EGRESS net
  • Destination: ✅Invert Match - Single host or alias = RFC1918
  • Description: Allow to any non-private IPv4 address

Click Save


Click Add ⬇️

  • Action: Block
  • Interface: SEC_EGRESS
  • Address Family: IPv4 + IPv6
  • Protocol: Any
  • Source: Any
  • Destination: Any
  • Description: Block packets to everything else

Click Save and Apply Changes


Firewall Rules Desired End State

🚨
Go back to your floating rules and add the SEC_EGRESS interface to the list of subnets that should not be allowed to access the firewall management ports.


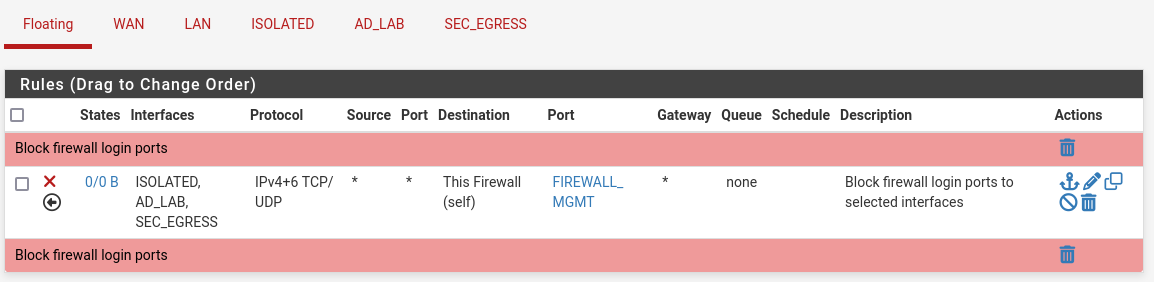
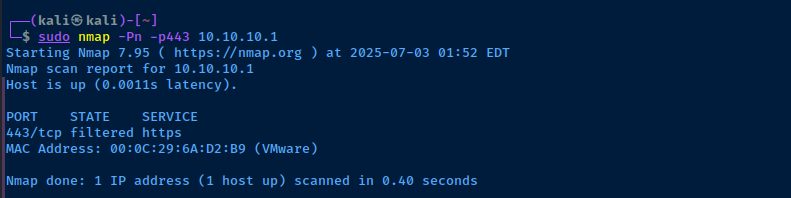
Test the New Interface

ℹ️
For this, we can use Kali to test the new subnet and firewall rules to ensure everything is working.
Right-click Kali VM > Settings > Change to cyber-range-sec-egress
sudo systemctl restart networking

Run this command to reload the networking stack on Kali

Kali gets a new IP on the 
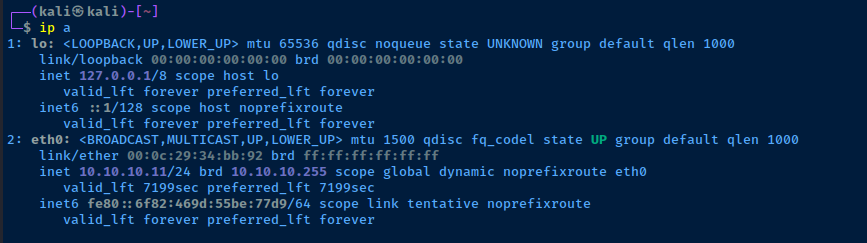
10.10.10.0/24 subnet
We have internet as designed
The floating rule is blocking our packets to the firewall login
💡
Change Kali back to 
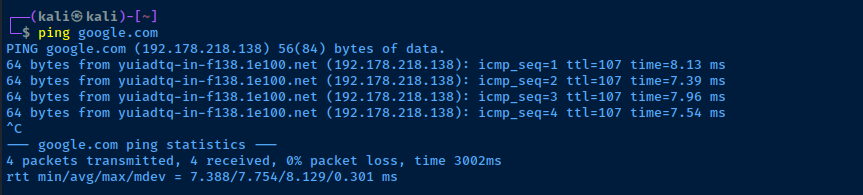
cyber-range-LAN when finished and re-run the sudo systemctl restart networking command.


Deleting an Interface

If for some reason you want to delete the interface, you really only need to reverse your steps.

  • Shutdown the pfSense VM
  • Right-click the pfSense VM
  • Delete the target network adapter
    • Network Adapter 5 in this example


Next Step

Adding a Comprehensive Wazuh SIEM and Network Intrusion Detection System (NIDS) to the VMware Lab
In this module, we will take a look at the process setting up a comprehensive Wazuh SIEM, including a NIDS and some HIDS agents, in our VMware Workstation Pro home lab.
Comments
More from 0xBEN
Building a Security Lab in VMware Workstation Pro
VMware

Building a Security Lab in VMware Workstation Pro

In this project, broken up into multiple modules, you will build a comprehensive cybersecurity home lab using VMware Workstation Pro. Upon completion, you will have an environment where you can safely practice penetration testing against a wide variety of targets, as well as detection in your SIEM.
Table of Contents
Great! You’ve successfully signed up.
Welcome back! You've successfully signed in.
You've successfully subscribed to 0xBEN.
Your link has expired.
Success! Check your email for magic link to sign-in.
Success! Your billing info has been updated.
Your billing was not updated.