
Identifying the Issue
You've imported a VM from Vulnhub into your Proxmox lab. You power it on and scan the target subnet for a new IP address, but you do not find one.
You log in and check your DHCP server's list of client MAC addresses for signs of your VM. It is nowhere to be found. The VM has booted without any errors and appears to be running. Something is clearly wrong at the network level.
What's the Issue?
The issue is related to the latest way the Linux kernel attempts network interfaces known as, Predictable Network Interface Names. Click the link below to learn more.
You can inspect the file where network interfaces are defined:
- Debian: —
/etc/network/interfaces - Ubuntu —
/etc/netplan/00_installer_config.yaml(file name may vary)
This will show you which interface(s) the VM was shipped with.
Likely what is happening is this:
- The Vulnhub box creator used a different NIC driver when creating the box, probably whatever is available in VirtualBox or VMware.
- Then, the Vulnhub box creator finishes creating the challenge, exports the VM, and shares with the community.
- Whatever files and configurations were shipped with the box will be present when you import the VM into your environment.
- You import the VM into Proxmox and give it a network interface.
- And, because the driver you are using likely does not match the driver the box creator was using, there is a device name mismatch from what was shipped with the box.
Fixing the Issue
Boot Into Single-User Mode
Turn off and back on — or reboot the VM — so that you can edit the GRUB bootloader options.
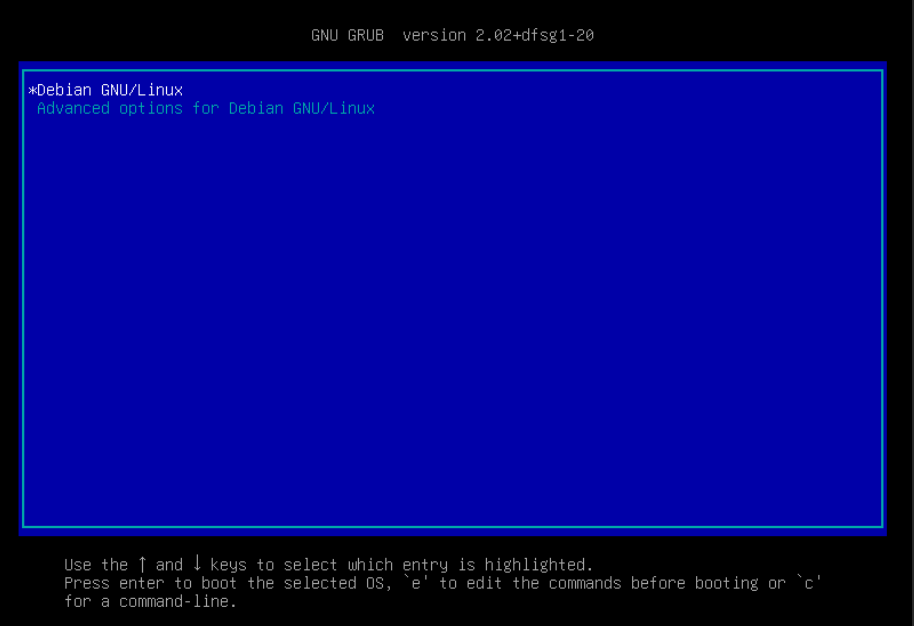
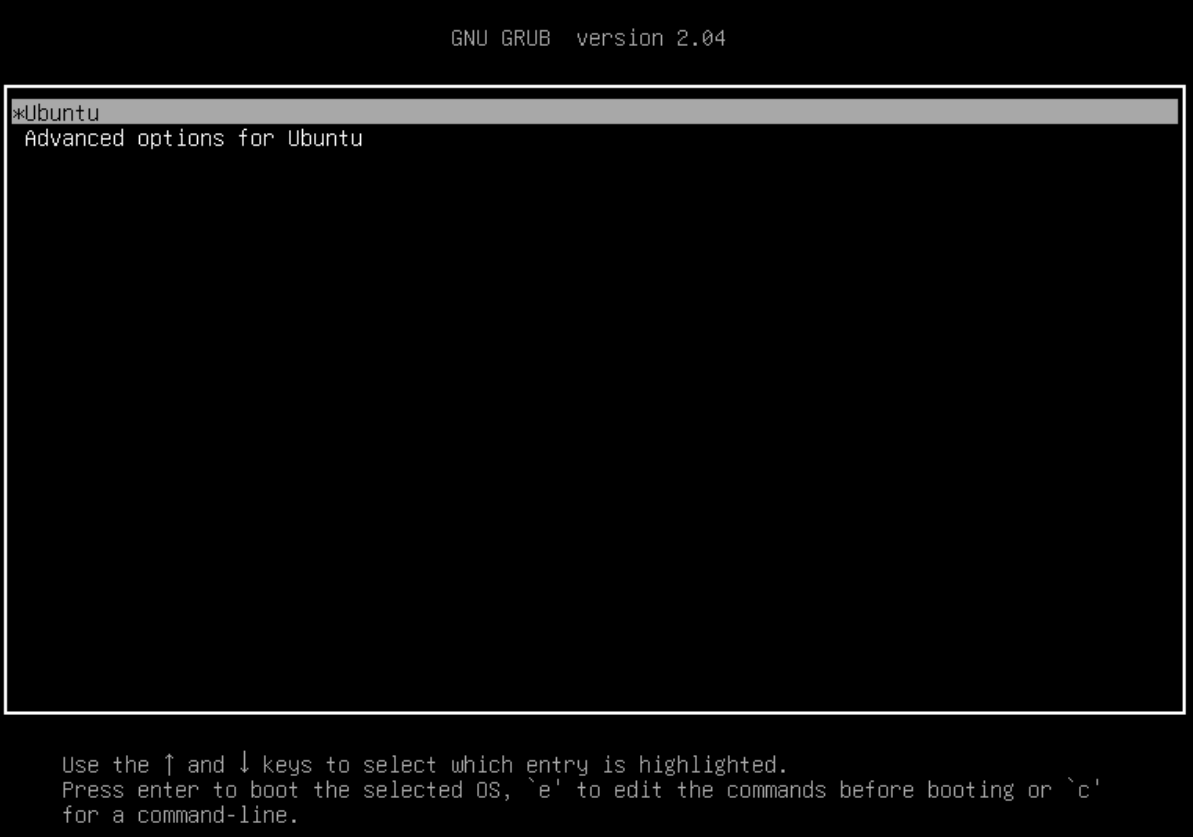
Debian and Ubuntu GRUB Examples
Press the e key at this screen to edit the boot configuration. Then, you'll see the screen to edit GRUB parameters next.
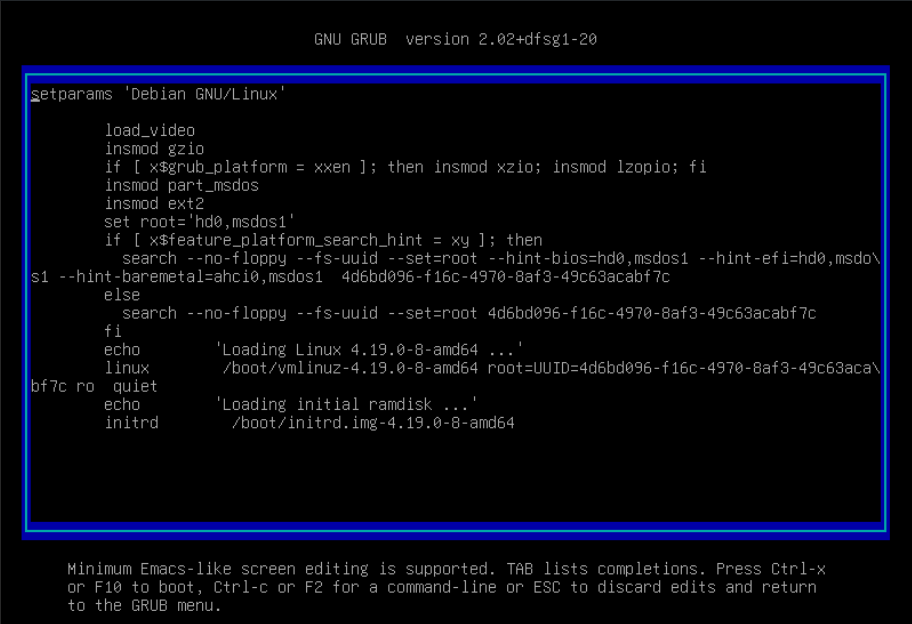
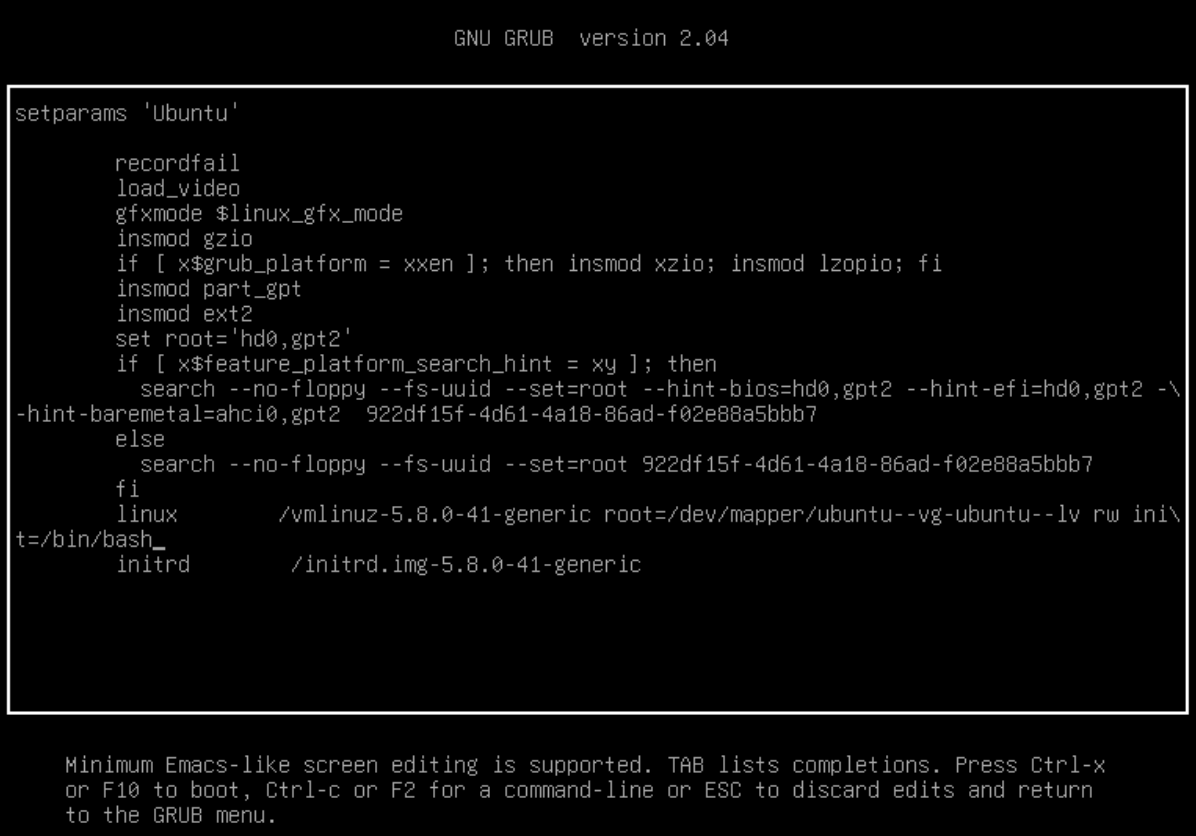
Debian and Ubuntu GRUB Parameters Examples
We want to change a specific line, so that when the system boots, it mounts the file system as read-write and initializes with /bin/bash.
- We'll change
rotorw - Append
init=/bin/bashto the end of thelinuxline


Press CTRL + X or the F10 key to proceed to boot the VM. Next, you'll see that you are running a command prompt.

Update the Network Interface Configuration
Inspect the Current Configuration
Run one of these commands — based on your VM's operating system — to view the network configuration that was shipped from the Vulnhub box creator's VM.
Debian
cat /etc/network/interfaces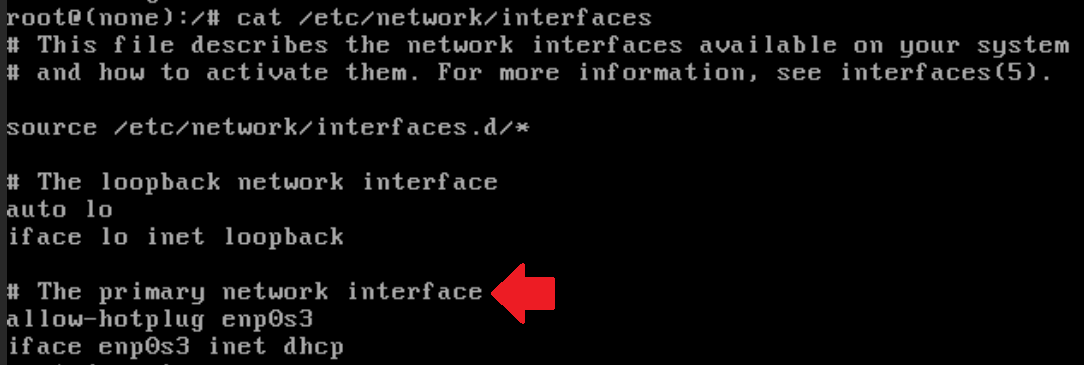
When this VM was created and exported, it was last configured with an interface named enp0s3.
We don't care about the lo interface, as that is the loopback interface and won't be causing any issues for us
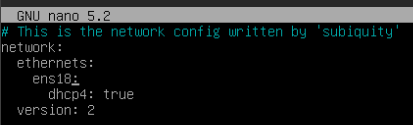
Ubuntu
00_installer_config.yaml, but should be under /etc/netplan. So, keep that in mind.cat /etc/netplan/00_installer_config.yaml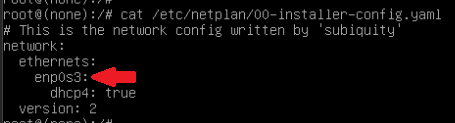
When this VM was created and exported, it was last configured with an interface named enp0s3.
Get Your Interface Name
ip linkYou'll see that on my VM, there is a lo interface and an ens18 interface.
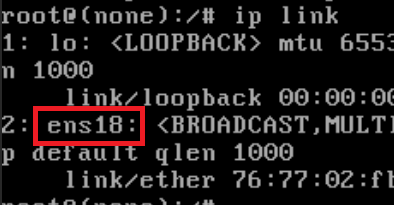
The problem is that enp0s3 does not match ens18 and therefore, the VM cannot access the network via the correct interface.
Edit the Interfaces File
Debian
nano /etc/network/interfacesEdit the configuration file
Replace enp0s3 with your interface name. I will be entering ens18 in my interfaces file.

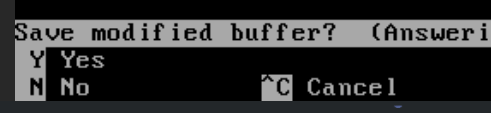
Press CTRL + X, then press the Y key, then press the Enter key to save the changes to the file.

Ubuntu
nano /etc/netplan/00_installer_config.yamlEdit the configuration file
Replace enp0s3 with your interface name. I will be entering ens18 in my interfaces file.
Press CTRL + X, then press the Y key, then press the Enter key to save the changes to the file.

Correct Configuration Files
/etc/ such as iptables.save, wp-config.php, knockd.conf, and more, may be hard-coded with the older interface name.In the case of this exercise, the following is true:
- The old interface name is:
enp0s3 - The new interface name is
ens18
We can do a recursive grep for enp0s3 and use sed to replace the hard-coded interface name with the new one.
OLD_INTERFACE='enp0s3'NEW_INTERFACE='ens18'grep -lr "$OLD_INTERFACE" /etc | xargs -I {} sed -i "s/${OLD_INTERFACE}/${NEW_INTERFACE}/g" {}Replace any hard-coded instances of the old interface name in configuration files
Boot the VM and Check for a New Lease
Run this command at the prompt here to continue booting the VM after you've made your changes.
exec /sbin/init
Log into pfSense or whatever system is acting as your DHCP server — or run another host discovery scan — and check if your VM has requested a new DHCP lease.

