
Previous Step
 0xBEN
0xBENProxmox and Vulnhub VMs
There is no quick and easy way to import Vulnhub VMs into Proxmox.
I will show you how to do it two ways:
- From the shell
- A combination of the GUI and the shell
No matter how you import the VM, in most cases, we are looking for a .vmdk file. The .vmdk file is a format used for a VM’s virtual hard disk
Using Vulnhub VMs Responsibly
Successful import of Vulnhub VMs requires:
- Downloading the VM from Vulnhub
- Extracting the contents
- Locating the .VMDK file
- Creating a VM in Proxmox
- Importing the .VMDK disk to the VM in Proxmox
- And changing the boot order to boot off the imported disk
Before you turn on the VM, double check your settings.
Double check your network settings, double check your boot settings
Don’t take risks and put the Vulnhub VMs on your home network. It is better to be overly cautious than have to fix things later.
Troubleshooting DHCP Issues
Please note that you might get some Ubuntu or Debian boxes where the DHCP client doesn't pull an IP address from pfSense. I've written an article on troubleshooting that issue here:
0xBENExample 1: Import Mr. Robot using the GUI and the Shell
We are going to use Mr. Robot as an example. https://www.vulnhub.com/entry/mr-robot-1,151/
I prefer to use the Download (Mirror) link to get the VM directly from Vulnhub

Stage an Empty VM
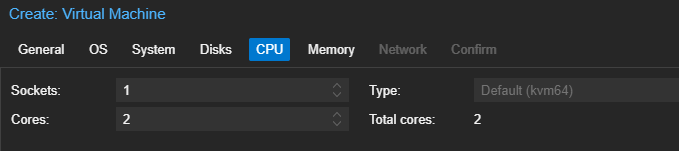
Create a VM
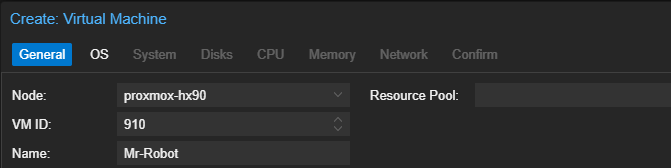

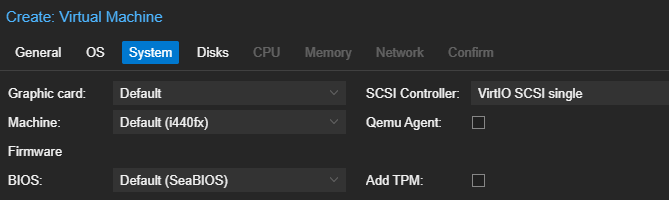
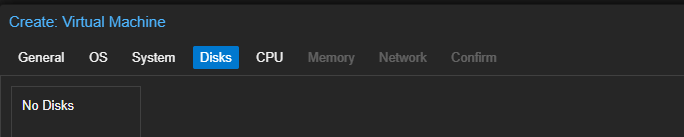


Click Finish.
Open the Proxmox Shell
Copy the Vulnhub download link to your clipboard. Open the shell on your Proxmox node.
901. You will need to know your VM's ID.# This is a comment. Just to add some comments about commands.
# If you see this, you do not need to type this in your shell.
# Enter the /tmp directory
cd /tmp
# Create another directory for working in and enter it
mkdir mr-robot && cd mr-robot
# Download the VM
wget https://download.vulnhub.com/mrrobot/mrRobot.ova
# List the directory contents.
# We should see mrRobot.ova
ls
# An .OVA file is just a tar archive
# Let's extract it
tar -xvf mrRobot.ova
# List the directory contents
# We should see the mrRobot-disk1.vmdk file
# This is the disk we need to import
ls
# Import the disk to the VM
# Replace <vm-id> with your Mr. Robot VM's ID number
# This may take some time to complete depending on the size of the disk
# We use --format qcow2 to allow for snapshots
qm importdisk <vm-id> mrRobot-disk1.vmdk local-lvm --format qcow2
# Clean up
cd /tmp
rm -rf ./mr-robotBack to the GUI
Select your Mr. Robot VM and click Hardware. You should see an unused disk that we imported from the command line above.

Double-click the disk
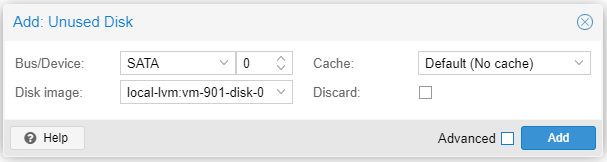
Click Add. The disk is now attached. Click Options > Boot Order


Change the boot order so it looks like this:
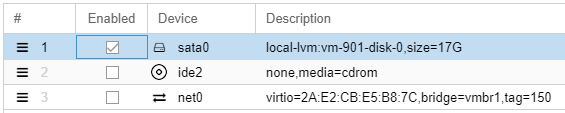
Click OK.
Example 2: Import Metasploitable 2 from the shell
We are going to use Metasploitable2 as an example. https://www.vulnhub.com/entry/metasploitable-2,29/.
I prefer to use the Download (Mirror) link to get the VM directly from Vulnhub

Open the shell on your Proxmox node (right-click the node name and choose shell). The rest of the steps below will be done in code-block format. Try and follow along.
Open the Proxmox Shell
# This is a comment. Just to add some comments about commands.
# If you see this, you do not need to type this in your shell.
# Install the unzip tool
apt install unzip

# Enter the /tmp directory
cd /tmp

# Create a directory for working and enter it
mkdir metasploitable2 && cd metasploitable2

# Copy the Metasploitable download link to your clipboard
# This is all one line: wget <url>
wget https://download.vulnhub.com/metasploitable/metasploitable-linux-2.0.0.zip

# List the directory contents
# You should see "metasploitable-linux-2.0.0.zip"
ls

# Unzip the archive
# This may take a few moments
unzip metasploitable-linux-2.0.0.zip

# Enter the directory we extracted
cd Metasploitable2-Linux

# List the directory contents
# We should see the Metasploitable.vmdk file
ls

# Let's create a VM and put in on the pfSense Isolated VLAN
# Create a VM with the ID 400 (if that's not already taken)
# --name <name of the VM>
# --net0 model=virtio,bridge=vmbr1,firewall=0,tag=999
    # net0 is the first network adapter
    # model=virtio is the driver to use
    # bridge=vmbr1 is the pfSense switch
    # firewall=0 means no Proxmox firewall
    # tag=999 is the VLAN tag
# --memory 1024 means 1024 MiB of RAM
# --ostype l24 means Linux kernel 2.4 (older systems like Metasploitable)
# --storage local-lvm is VM disk storage
qm create 400 --name Metasploitable2 --net0 model=virtio,bridge=vmbr1,firewall=0,tag=999 --memory 1024 --ostype l24 --storage local-lvm

# Let's import the disk to the new VM
# Importing Metasploitable.vmdk to VM 400 on local-lvm as QCOW2 format
# This is just the disk import we have to attach it next
# We use --format qcow2 to allow for snapshots
qm importdisk 400 Metasploitable.vmdk local-lvm --format qcow2

# Attach the disk to the VM
# --sata0 is the first SATA disk
# local-lvm:vm-400-disk-0
   # In the step above we imported the disk to local-lvm
   # The imported disk is stored in local-lvm:vm-400-disk-0
   # We are attaching it to sata0
qm set 400 --sata0 local-lvm:vm-400-disk-0

# Set the disk as the primary boot
   # --boot is setting the boot order settings
   # We attached sata0 in the step above. Now, we want to boot from it.
qm set 400 --boot="order=sata0"

# Clean up
# Go back to the /tmp folder
cd /tmp

# Delete the folder we created
rm -rf ./metasploitable2Continued Practice: OSCP-Like Boxes
Now, that I've shown you two examples of importing Vulnhub boxes into your cyber range, don't stop there. TJ Null and the folks at NetSecFocus have curated a list of OSCP-like boxes.
Among these boxes is a long list of Vulnhub targets. Follow along with the steps shown above and continue your Vulnhub adventures. You can find a list of any write-ups I've done from the list of targets linked above.

Automating Vulnhub Imports
I wrote a PowerShell script a while back to aid in the automation of Vulnhub imports to my Proxmox lab. You can find the explanation on using the script here if you'd like to consider using it moving forward.
0xBENNext Step
0xBEN