
Previous Step
 0xBEN
0xBEN
Note About the GUI
In the VirtualBox GUI, there are no more than 4 tabs to configure network adapters on any VM. However, you can actually add up to 8 network interfaces on any VM.
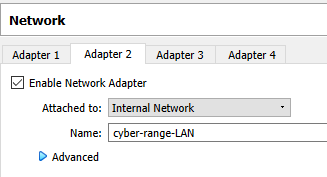
In order to add additional interfaces to pfSense, we will have to use the VirtualBox CLI -- vboxmanage.exe.
Using the VirtualBox CLI
Here, I have PowerShell open in the Windows Terminal app (which I highly recommend).

On my computer, VirtualBox is installed in C:\Program Files\Oracle\VirtualBox. Let's try navigating to that directory and running the vboxmanage.exe command. Here, we can see the general usage options for the vboxmanage.exe CLI. If you scroll down further in the output, it gives you a list of all commands and their options.
cd 'C:\Program Files\Oracle\VirtualBox\'
.\vboxmanage.exe

Usage:

  VBoxManage [<general option>] <command>
Information We Need to Add the Interface
- VM Name
- Next Interface ID
- Network Name
My details are as follows:
- VM Name:
pfSense-CyberRange(case sensitive) - Next Interface ID:
5(interface number) - Network Name:
cyber-range-egress
Why am I Creating this Network?
I am creating this network, because I want a LAN where I can put VMs to have Internet access while not being able to talk to any other devices other than Kali.
Adding the Interface
Shutdown the pfSense VM and run these commands:
# Notice that my commands specify the number 5 in the options
    # --nic5, --nictype5, --intnet5, --cableconnected5
.\VBoxManage.exe modifyvm "pfSense-CyberRange" --nic5 intnet
.\VBoxManage.exe modifyvm "pfSense-CyberRange" --nictype5 virtio
.\VBoxManage.exe modifyvm "pfSense-CyberRange" --intnet5 "cyber-range-egress"
.\VBoxManage.exe modifyvm "pfSense-CyberRange" --cableconnected5 on
Start the pfSense VM and the first thing you’ll notice, is that I still only have 4 interfaces. This is because the new interface is not up yet.

We’re going to repeat some steps that we initially covered in the Configuring pfSense section. I’m not going to include screenshots this time, since they’re available in the aforementioned section.
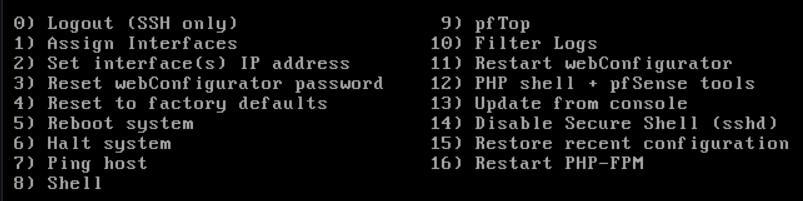
Choose Option 1.
Should VLANs be set up now [y|n]? : n
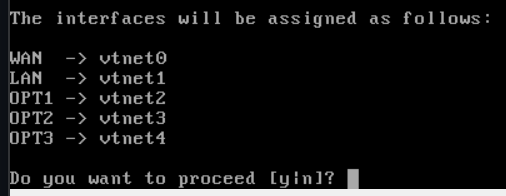
Enter the WAN interface name or ‘a’ for auto-detection: vtnet0
Enter the LAN interface name or ‘a’ for auto-detection: vtnet1
Enter the Optional 1 interface name or ‘a’ for auto-detection: vtnet2
Enter the Optional 2 interface name or ‘a’ for auto-detection: vtnet3
Enter the Optional 3 interface name or ‘a’ for auto-detection: vtnet4
Everything looks good here. Enter y to proceed.
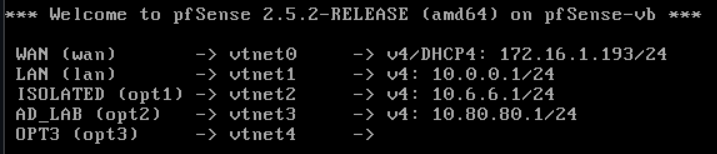
Great! The interface has been added. Now, we need to configure it.
Configuring the New Interface
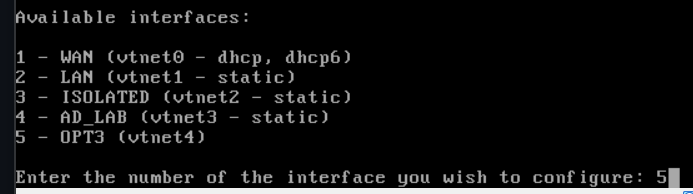
Choose Option 2

Enter 5 (for OPT3)
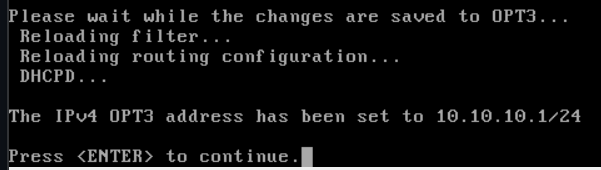
I’m going to specify a 10.10.10.0/24 network for my new interface. Enter the interface address: 10.10.10.1

Enter the subnet mask bits, /24 is equal to 255.255.255.0

Press Enter, this is a LAN.

We are not configuring IPv6, so press ENTER. We do want to enable DHCP, so enter y. Enter the start of the DHCP range and the end of the DHCP range.

We do not want to revert to HTTP for the web configurator.

Wait for setup to finish.
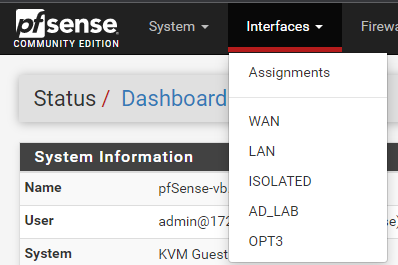
Change the Name on the New Interface
Log into the pfSense web portal. Go to Interfaces > OPT3.
I’m going to set my description to VULN_EGRESS It’s descriptive and helps me remember the reason for this network.

Scroll down and click Save and Apply Changes.
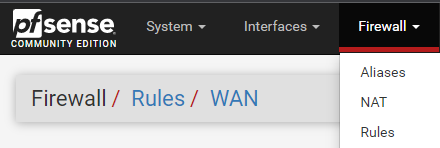
Configuring Firewall Rules for the New Interface
Add Firewall Rules for VULN_EGRESS
Go to Firewall > Rules
Click Add

- Action: Pass
- Interface: VULN_EGRESS
- Address Family: IPv4
- Protocol: Any
- Source: VULN_EGRESS subnets
- Destination: VULN_EGRESS address
- Description: Allow traffic out the gateway
- Click Save
Click Add

- Action: Pass
- Interface: VULN_EGRESS
- Address Family: IPv4
- Protocol: Any
- Source: VULN_EGRESS net
- Destination: Single host or alias = 10.0.0.2 (Kali VM IP)
- Description: Allow packets to Kali VM
- Click Save
Click Add

- Action: Pass
- Interface: VULN_EGRESS
- Address Family: IPv4
- Protocol: Any
- Source: VULN_EGRESS net
- Destination: ✅Invert Match - Single host or alias = RFC1918
- Description: Allow to any non-private IPv4 address
- Click Save

Click Add

- Action: Block
- Interface: VULN_EGRESS
- Address Family: IPv4 + IPv6
- Protocol: Any
- Source: Any
- Destination: Any
- Description: Block packets to everything else
- Click Save and Apply Changes
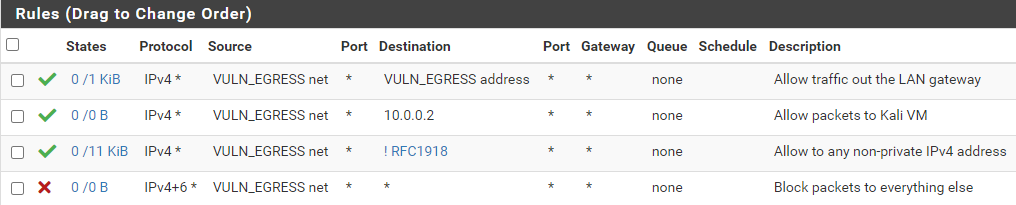
Firewall Rules Desired End-State
Block Firewall Management Ports


CTRL key and select the VULN_EGRESS interface to include it
Test Your New Interface
I am going to test my new interface with a Vulnhub VM. These are the network settings I will assign to the VM.
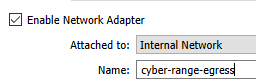
cyber-range-egress internal networkI am using the Kioptrix Level 1 VM from Vulnhub, because I know the login credentials for that VM. That way, I can login and test connectivity.
- Username:
john - Password:
TwoCows2
Let's login and check our IP configuration.
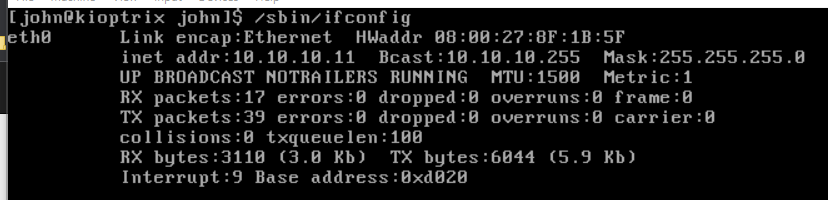
10.10.10.0/24 subnet.Let's try navigating to https://google.com.

You have now set up a new interface for your pfSense VM, configured the network, and configured the firewall settings.
Deleting an Interface
If for some reason you want to delete the interface, you really only need to reverse your steps.
- Shutdown the pfSense VM
- Run these commands:
- Power on your pfSense VM and the interface should now be deleted.
# Notice that my commands specify the number 5 in the options
    # --nic5, --nictype5, --intnet5, --cableconnected5
.\VBoxManage.exe modifyvm "pfSense-CyberRange" --nic5 none
.\VBoxManage.exe modifyvm "pfSense-CyberRange" --intnet5 none