
Previous Step
 0xBEN
0xBENCommand Line Tools
There will come times when certain operations in the GUI fail or a guest becomes non-responsive. You might want to shut down a guest, but it is not responding to your triggers. In cases like these, you should use the command line tools for Proxmox.
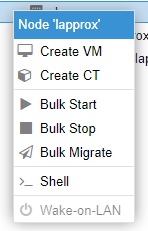
To enter the command line, you can either SSH or log in via the web console and enter a shell. Right-click on the node name and choose shell.
VM Management
qm is the command line tool to manage VMs.
Show all available commands
qm helpList all the VMs on the node
qm listShow the status of a VM
qm status [vm ID number]Start a VM
qm start [vm ID number]Force a VM to stop
qm shutdown [vm ID number] --forceStop 1 --timeout 1Create a VM from the command line
qm create [options here]Completely destroy and remove a VM
qm destroy [vm ID number] --destroy-unreferenced-disks --purgeMigrate a VM
May require the CLI if migration fails from the GUI. Moves a VM from one node to another (some prerequisites are necessary, like the same network bridge must exist on the target node)
qm migrate [vm ID number] [target-node] [options]Many, many more commands
Container Management
pct is the command line tool to manage containers.
Show all available commands
pct helpList all the containers on the node
pct listshow the status of a container
pct status [ct ID number]Start a container
pct start [ct ID number]Force a container to stop
pct shutdown [ct ID number] --forceStop 1 --timeout 1Enter a new shell on the target container
You can open a shell on a container from the Proxmox shell
pct enterCreate a container from the command line
pct create [options here]Completely destroy and remove a container
pct destroy [ct ID number] --destroy-unreferenced-disks --purgeMigrate a container
May require the CLI if migration fails from the GUI. Moves a container from one node to another (some prerequisites are necessary, like the same network bridge must exist on the target node)
pct migrate [ct ID number] [target-node] [options]Container Template Management
pveam is the command line tool to manage container templates and appliances.
Storage Management
Show all available commands
pvesm helpShow status of all storage volumes
pvesm statusProxmox System Upgrades
pveupgradeShow System Version
pveversionChanging a Proxmox Node's IP Address
You may be in one of the following groups:
- Your Proxmox node got a new IP address and now you cannot get to the web interface
- You want to change your Proxmox node’s IP address to something else
- Proxmox is statically configured with an IP address and will not get one from DHCP if that is what you are thinking.
If you are in group 1 or group 2, you can do this over SSH if the IP address is on the same subnet. If it’s on a new subnet, you will need to physically log into the server.
Update the Hosts File
nano /etc/hostsChange the IP address on this line:
172.16.1.16 lapprox.home.labDo not change the IP address here:
127.0.0.1 localhost.localdomain localhostPress CTRL + X, enter Y, and press Enter to save your changes
Update the Interfaces File
nano /etc/network/interfacesYou should see something like this:
auto vmbr0_mgmt
iface vmbr0_mgmt inet static
        address 172.16.1.16/24
        gateway 172.16.1.1
        ovs_type OVSIntPort
        ovs_bridge vmbr0
# Proxmox Management
Change the address and gateway lines.
Press CTRL + X, enter Y, and press Enter to save your changes
Reload the Networking Service
ifreload -aDouble Check DNS
nano /etc/resolv.confMake sure the DNS server is correct here.
Correcting a Cluster After a Node's IP Has Changed
This action needs to be performed on all nodes in the cluster!
nano /etc/corosync/corosync.confYou should see something like this:
nodelist {
  node {
    name: lapprox
    nodeid: 2
    quorum_votes: 1
    ring0_addr: 172.16.0.16
  }
  node {
    name: proxmox
    nodeid: 1
    quorum_votes: 1
    ring0_addr: 172.16.0.6
  }
}
Change the IP address on the ring0_addr line. Then, increment the config_version number +1. So here, 2 will become 3.
totem {  cluster_name: HomeLab
  config_version: 2
  interface {
    linknumber: 0
  }
  ip_version: ipv4-6
  link_mode: passive
  secauth: on
  version: 2
}
Press CTRL + X, enter Y, and press Enter to save your changes. Then, restart the Corosync service.
systemctl restart corosync.serviceProxmox Support Options
If you do not have an enterprise subscription, you can still access the Proxmox forums. Members of the community and moderators will offer help, but your requests will not be prioritized. In most cases, Google and forums will be a huge source of help -- enough to get you through most sticky situations.
Proxmox Official Forums: https://forum.proxmox.com/
Next Step
0xBEN