

Previous Step
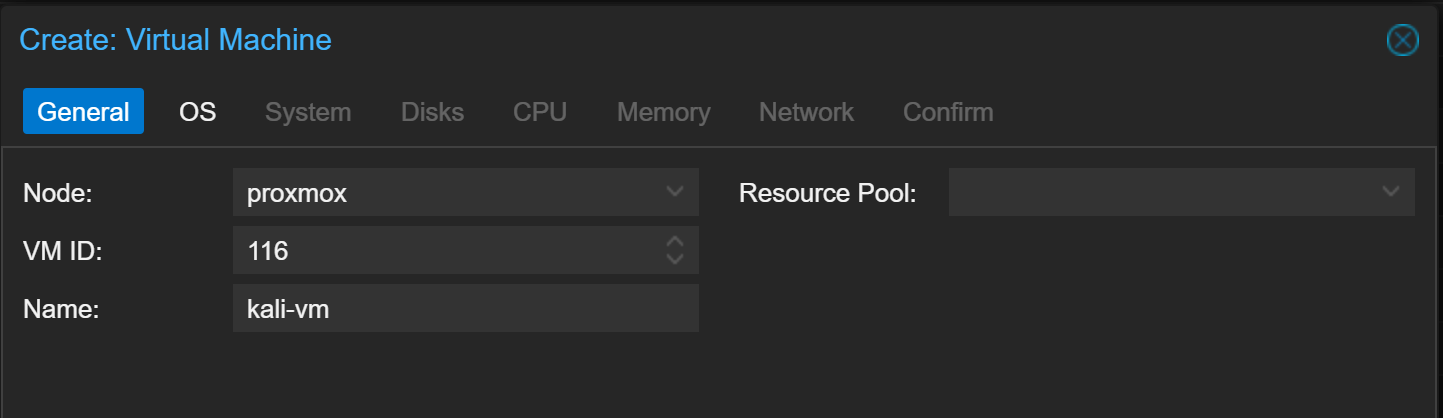
Create the VM
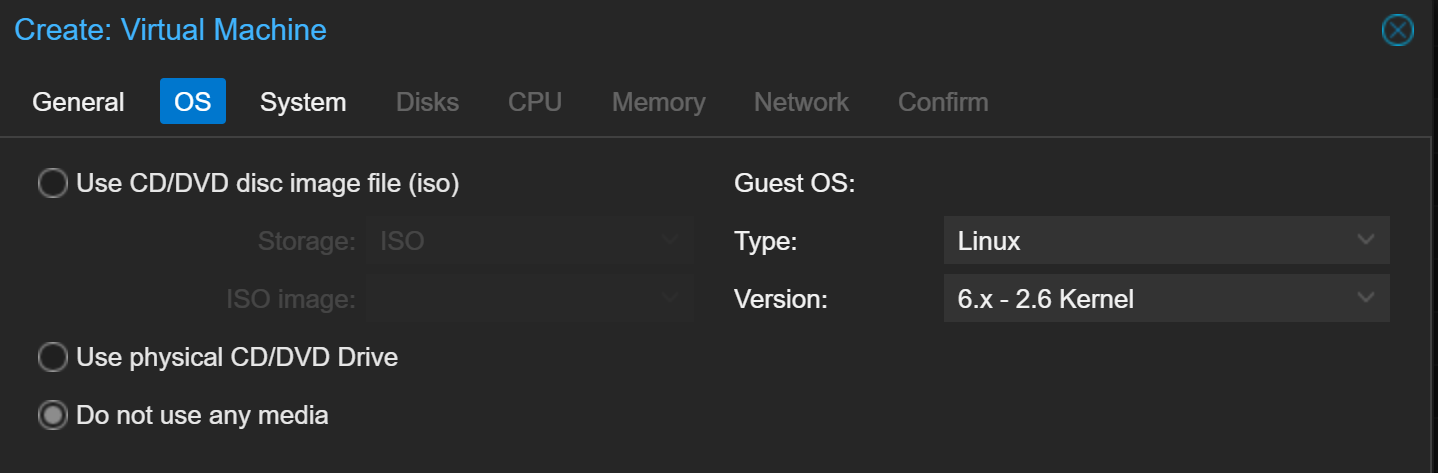
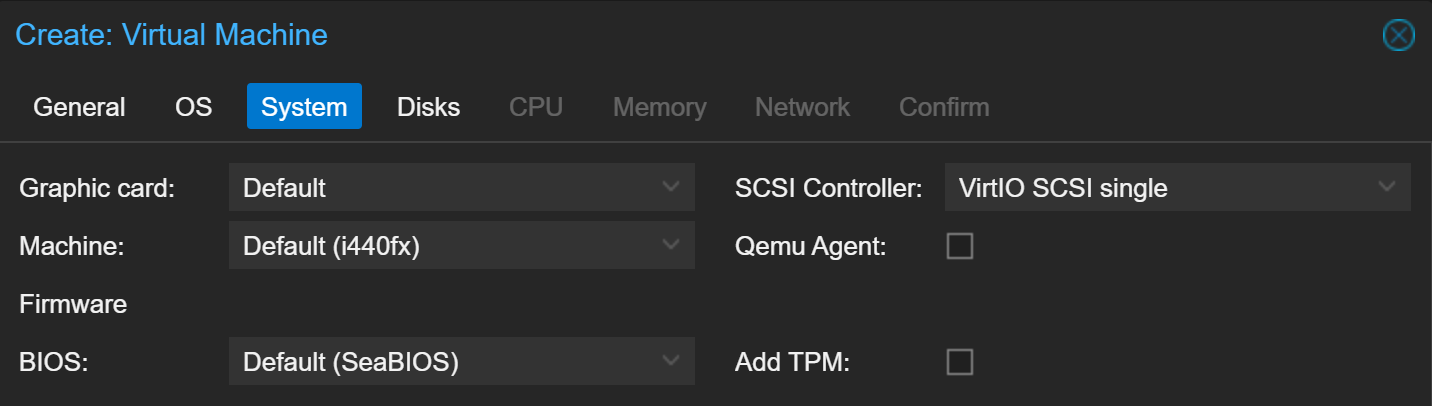
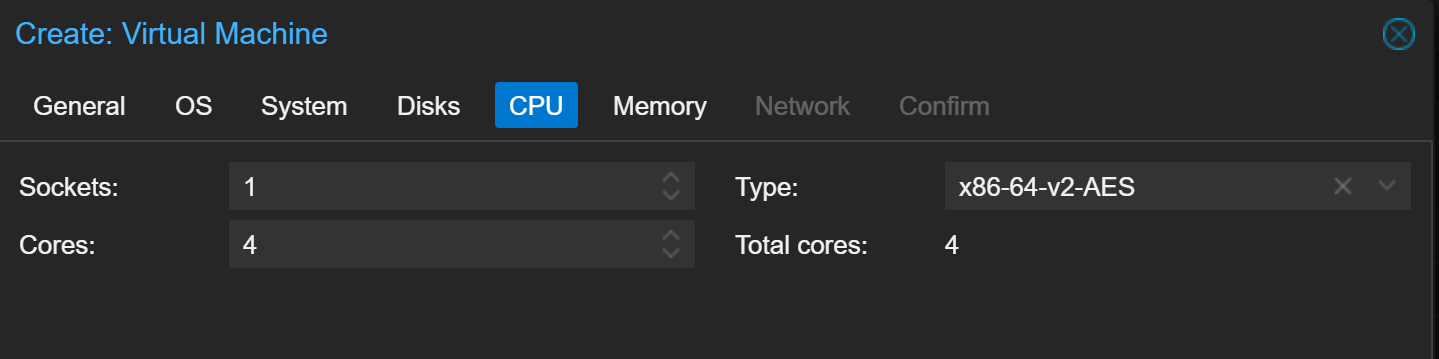
Option 1: Create in the Web UI
Scaffold the VM

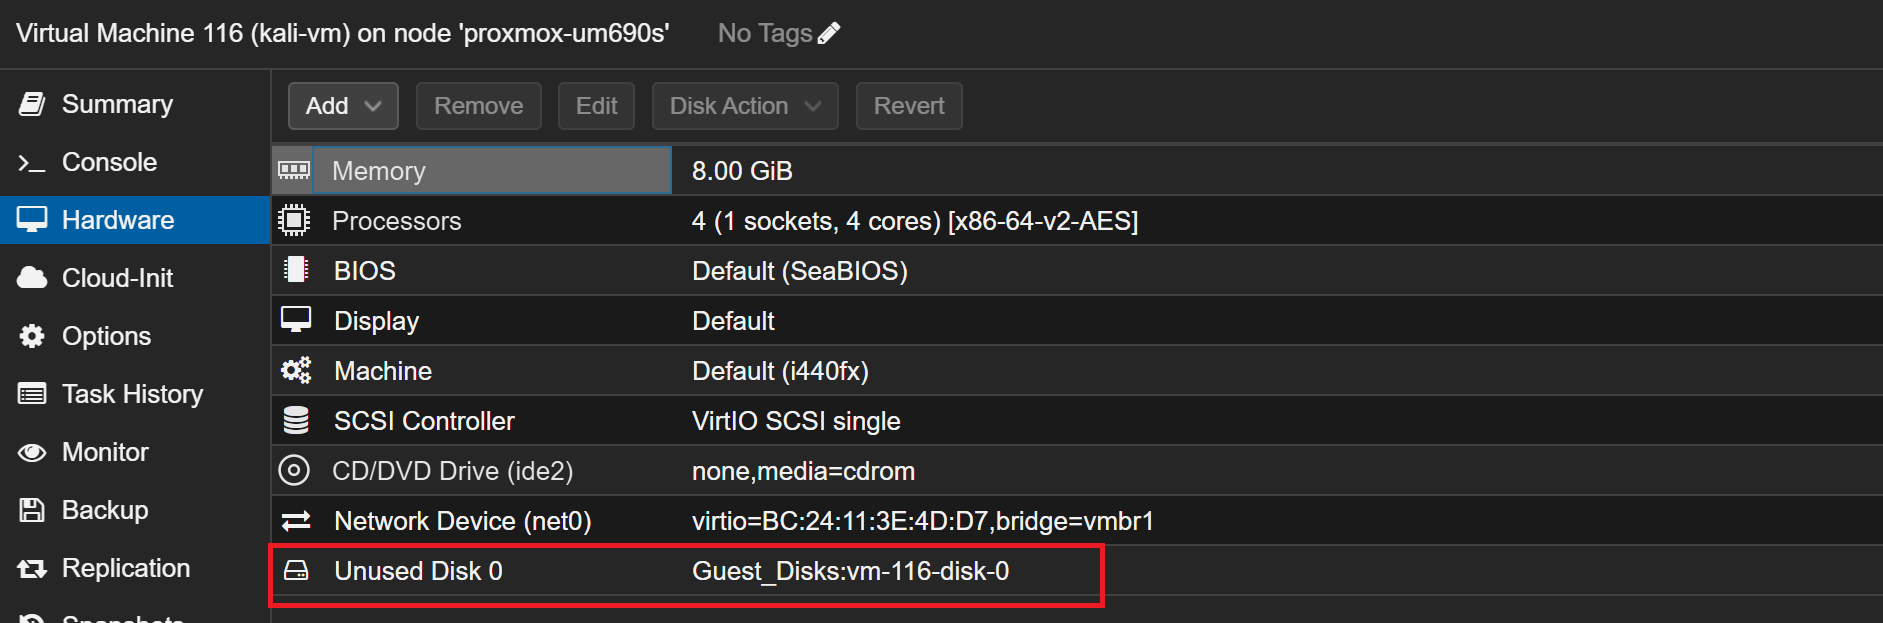
Attach the Disk to the VM
Download the Disk from OffSec
cd /tmpwget "https://cdimage.kali.org/kali-2024.4/kali-linux-2024.4-qemu-amd64.7z"Use the URL you copied above
apt clean && apt update && apt install unarInstall the unar package to decompress the .7z archive
unar kali-linux-2024.4-qemu-amd64.7z
Import the Disk to the VM
116, retrieve your Kali VM's ID before following alongpvesm status --content imagesGet your guest disk storage target
Guest_Disks and local-zfs. Default Proxmox VE installations use local-lvm and in all likelihood is the storage target for you in this case.local-zfs is the partition I used when I first installed Proxmox VE. I added a ZFS pool later called Guest_Disks by installing an additiona SSD.
Guest_Disks since it's the larger storage poolqm importdisk 116 kali-linux-2024.4-qemu-amd64.qcow2 Guest_Disks --format qcow2- Import
unar kali-linux-2024.4-qemu-amd64.qcow2to VM116 - Save it in
Guest_Disks(probablylocal-lvmfor you) - Set it as
qcow2format

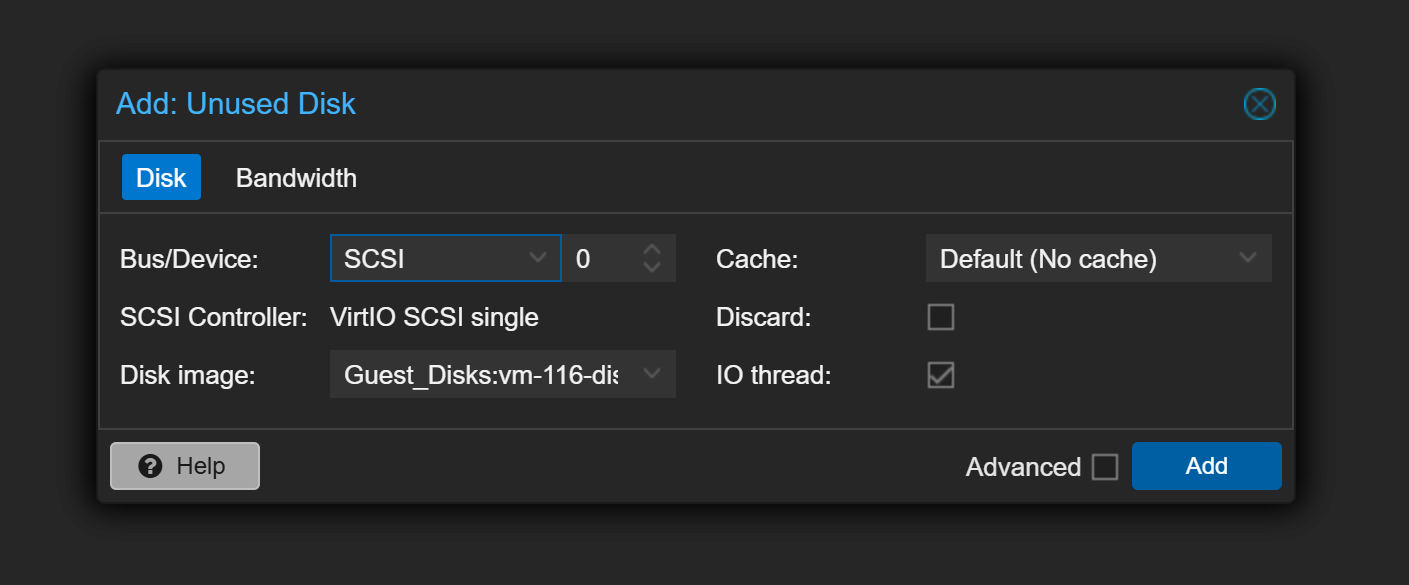
Attach the Disk to the VM
Set the Boot Order

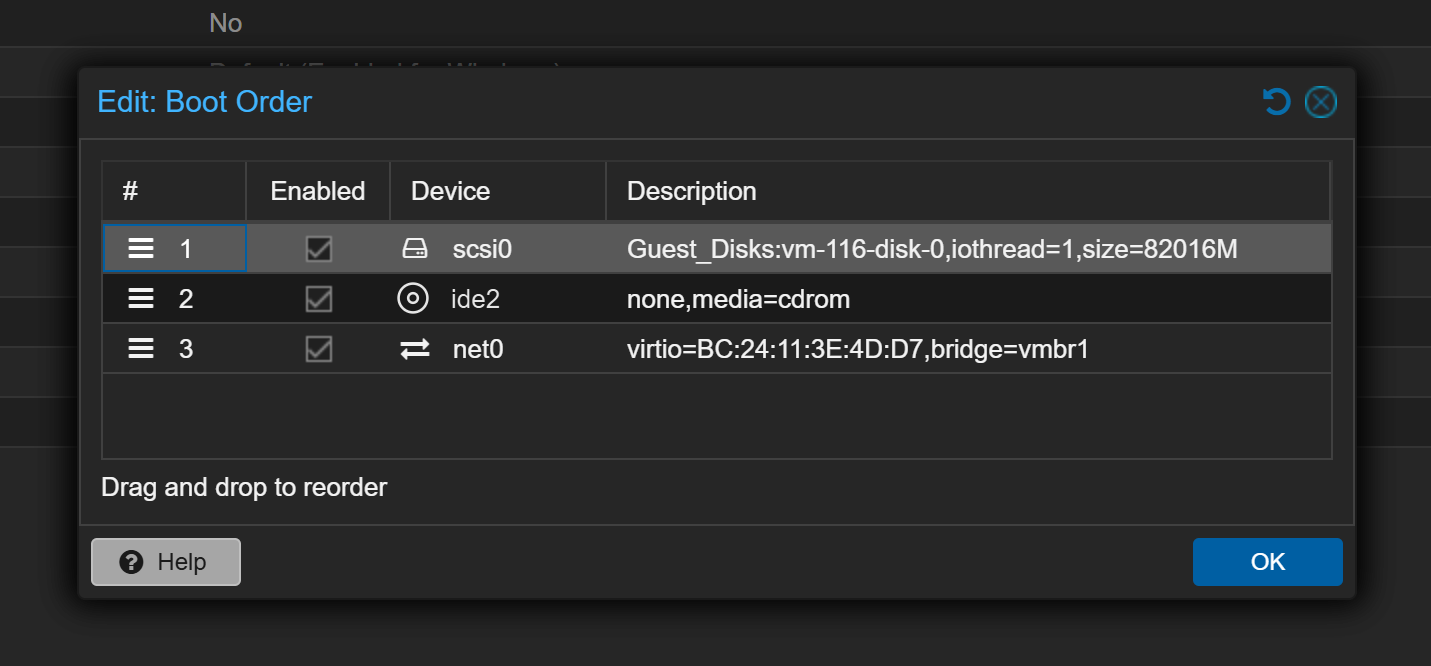
scsi0 to the top and check the "Enabled" boxStart the VM

Option 2: Create the VM Using the CLI
Also, with respect to the script, pay careful attention to the following variable values and set them as pertains to your PVE configurations.
-
storage_target-
network_bridge# Any line starting with a "#" is a comment.
# You do not need to type this in your shell.
#############
# VARIABLES #
#############
kali_url="https://cdimage.kali.org/kali-2024.4/kali-linux-2024.4-qemu-amd64.7z"
working_dir="/tmp/kali-download"
filename=$(
echo "$kali_url" |
rev | awk -v FS='/' '{print $1}' |
rev
)
vm_id=136
vm_name="kali-vm"
vm_description="Kali VM imported from OffSec"
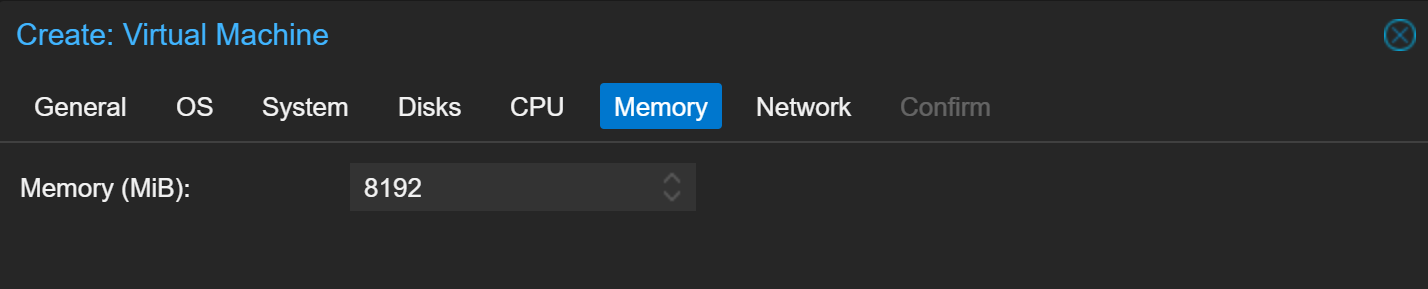
min_memory=4096
max_memory=8192
cpu_cores=4
os_type="l26"
# Uses local-lvm as this is the default on most PVE installations
# When in doubt, run `pvesm status --content images` and check which one you want to use
storage_target="local-lvm"
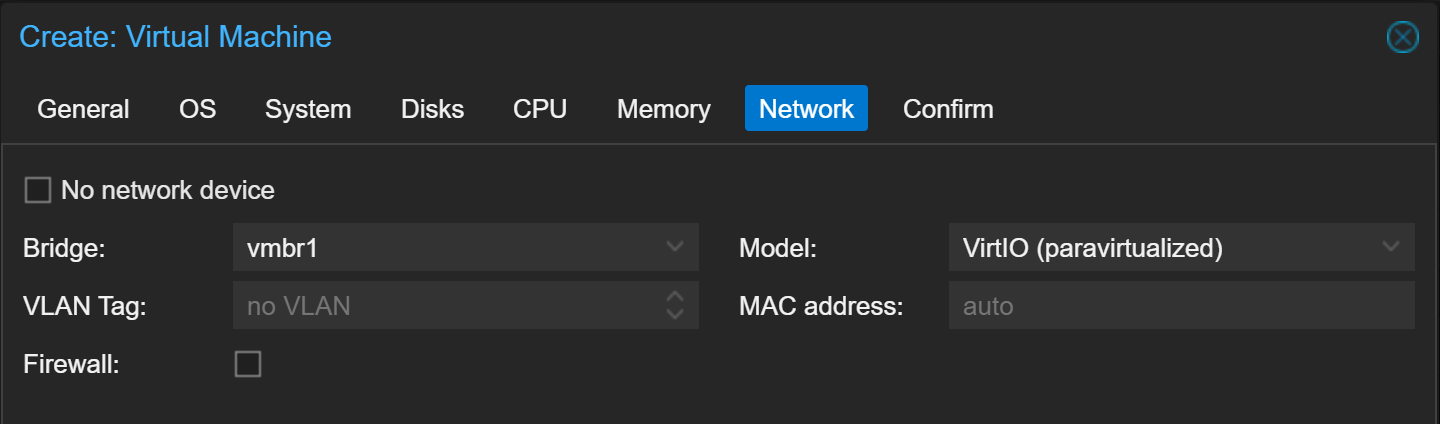
network_bridge="vmbr1"
vlan_id=666 # Leave blank if on default VLAN
################
# SANITY CHECK #
################
vm_id_used=$(
find /etc/pve/nodes/ -type f -name '*.conf' |
grep qemu-server |
cut -d '/' -f 7 |
cut -d '.' -f 1 |
grep "$vm_id"
)
if [ -n "$vm_id_used" ] ; then
echo -e "\n${vm_id} already taken. Please specify an unused id.\n"
exit 1
fi
################
# DEPENDENCIES #
################
echo -e "\nUpdating apt packages and installaing 'unar' ...\n"
apt clean && apt update
apt install -y unar
#################
# CREATE THE VM #
#################
# Create the download directory
if ! [ -d "$working_dir" ]; then
echo -e "\n${working_dir} does not exist. Creating ...\n"
mkdir "$working_dir"
fi
cd "$working_dir"
echo -e "\nDownload Kali VM from ${kali_url} ... \n"
wget "$kali_url"
echo -e "\nDownload completed. Extracting VM disk ... \n"
unar "$filename"
# Find the .qcow2 disk to import to the VM
qcow2file=$(find $PWD -name '*.qcow2')
# Create the Kali VM
if [ -z "$vlan_id" ] ; then
net_config="model=virtio,firewall=0,bridge=${network_bridge}"
else
net_config="model=virtio,firewall=0,bridge=${network_bridge},tag=${vlan_id}"
fi
echo -e "\nCreating the VM with specifications designated in variables ... \n"
qm create "$vm_id" --memory "$max_memory" --balloon "$min_memory" \
--cores "$cpu_cores" --name "$vm_name" --description "$vm_description" \
--net0 "$net_config" --ostype "$os_type" \
--autostart 1 --startup order=10,up=30,down=30
# Import the disk file to the VM. Wait for command to finish!
echo -e "\nImporting the .qcow2 disk ... \n"
qm importdisk "$vm_id" "$qcow2file" "$storage_target" --format qcow2
# Attach the disk to the VM
echo -e "\nAttaching the disk to the VM ... \n"
qm set "$vm_id" --scsi0 "${storage_target}:vm-${vm_id}-disk-0"
# Set the disk as the primary boot
echo -e "\nSetting the hard disk as the primary boot method ... \n"
qm set "$vm_id" --boot=order=scsi0
# Start the VM
echo -e "\nAll done. Starting VM with ID: ${vm_id} and cleaning up ... \n"
qm start "$vm_id"
# Clean up
cd "$HOME"
rm -rf "$working_dir"Kali DHCP Reservation
Now that the Kali VM has been created, it has a MAC address that we can use to assign a DHCP reservation in pfSense to ensure that it always gets the IP address of 10.0.0.2. Having a DHCP reservation makes it easier to craft firewall rules and also matches the alias we crated when first setting up pfSense.

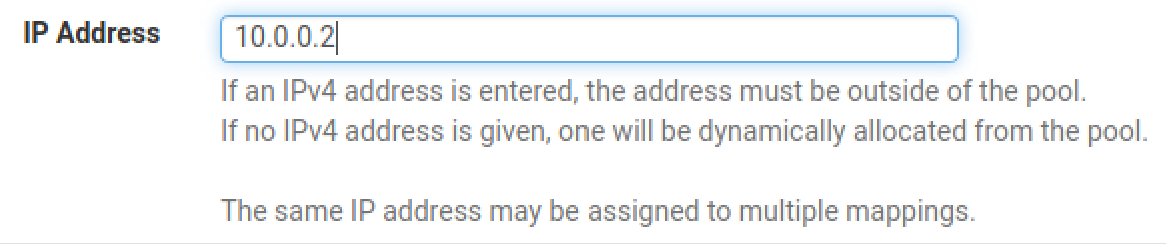
We can use the NoVNC console for running commands and troubleshooting in the Kali VM and grab the new DHCP reservation. To acquire the address set in the DCHP reservation run the command as shown below:
sudo ip link set eth0 down && sudo ip link set eth0 up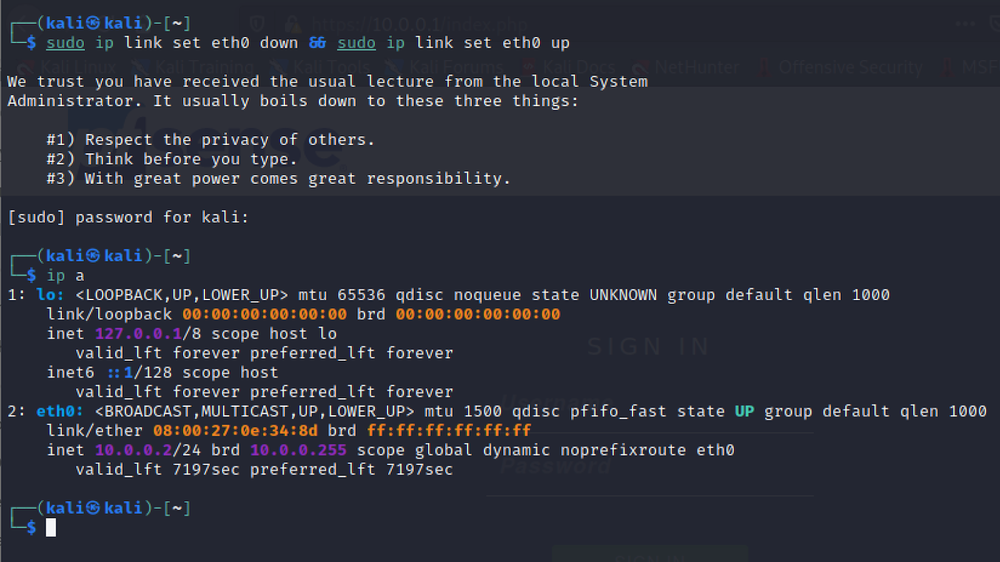
Kali's Booted — Now What?
You'll quickly find that the default NoVNC console for viewing your VM's desktop is fine in a pinch, but is not the greatest user experience.
NoVNC is to install a Remote Desktop server application on your VM and connect to it with a client application.Here is a list of the things I typically do once I provision a new Kali guest.


Of the items in the link above, I view these of the most importance:
- Change the default user account
- Install a remote desktop service
Install Remote Desktop Solutions
SPICE Protocol
Enable the SPICE Display Driver on Kali
Running SPICE on Windows VMs requires some additional drivers, consult the documentation linked above.


Hardware
Display
Install the SPICE Client
Linux Clients
- Use your operating system's package manager to install
virt-viewer - For example:
sudo apt install -y virt-viewer virt-viewerwill be the default file handler for the.vvfiles served by Proxmox
Windows Clients
- Navigate to: https://virt-manager.org/download
- Current release: https://releases.pagure.org/virt-viewer/virt-viewer-x64-11.0-1.0.msi (64-bit)
- This will install
virt-vieweron Windows virt-viewerwill be the default file handler for the.vvfiles served by Proxmox


.vv file, which virt-viewer will open

Configure Display Settings...
NoMachine (NX Protocol)
Make sure you add the proper host and/or network firewall rules and routes to allow the traffic to flow from your computer to your Kali VM. See: https://benheater.com/proxmox-lab-pfsense-firewall/#optional-configuring-static-routes
Install NoMachine Service
I like to use the NoMachine server on my Linux (and Windows) guests, as it will run on a huge variety of operating systems. It works very well with clipboard support, drive mapping, dynamic screen resizing, and much more.


nomachnine_deb_url="https://download.nomachine.com/download/8.8/Linux/nomachine_8.8.1_1_amd64.deb"

cd /tmp
# The version you're downloading may be different
wget $nomachnine_deb_url
# Again, ensure you're specifying the correct file name
dpkg -i ./nomachine_8.8.1_1_amd64.deb
systemctl enable --now nxserver
The NoMachine daemon should now be listening on tcp/4000
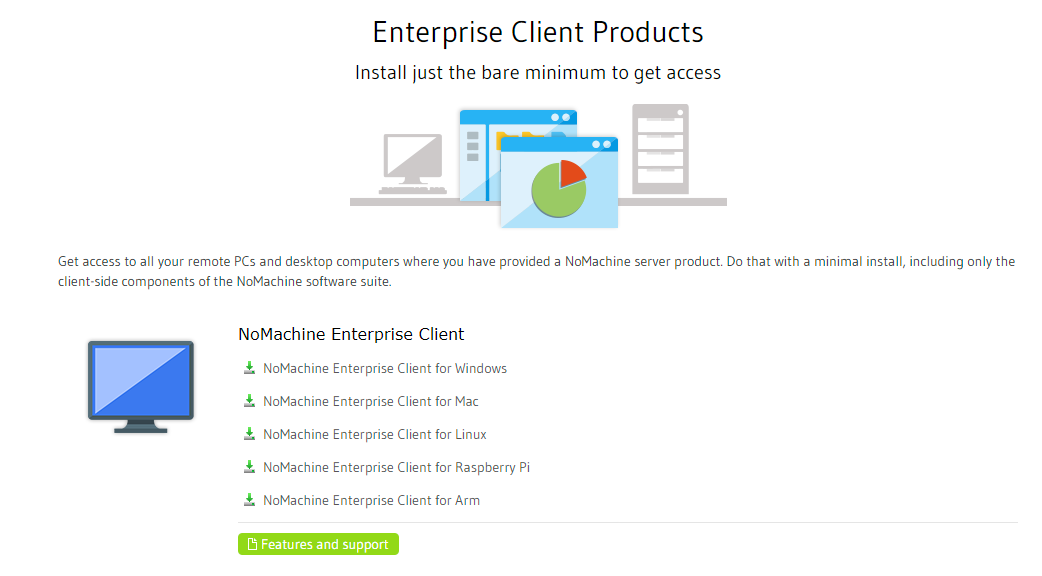
Install the NoMachine Enterprise Client
I'll be using the NoMachine Enterprise Client for Windows installer. Download the correct package for your operating system and complete the installation.


Add button
Add button in the top-right


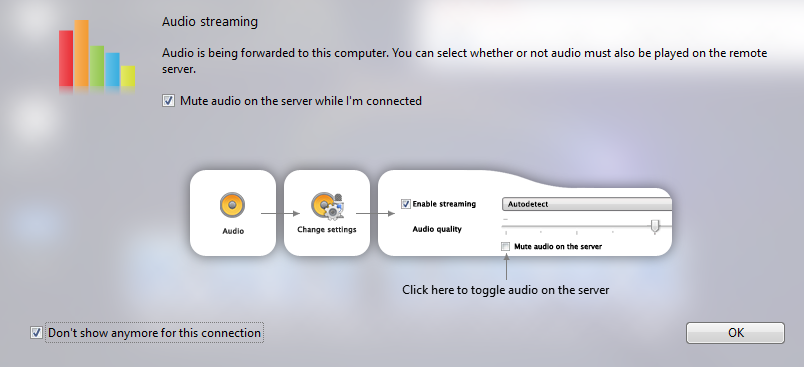
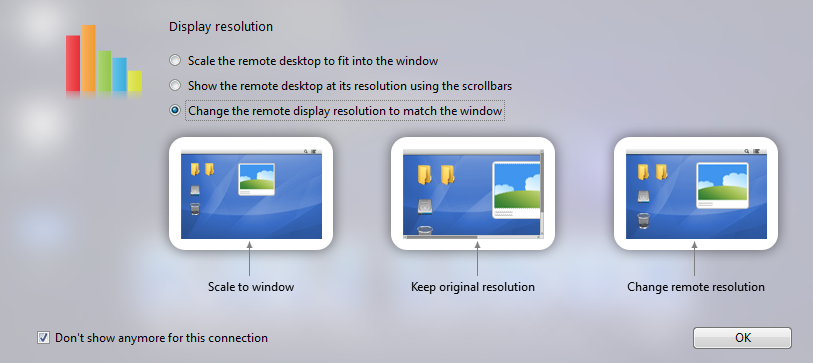

Making Some Tweaks to NoMachine
I keep a list of some of the configuration changes to my NoMachine environment here. You don't have to follow these recommendations, but they may improve your quality of life with NoMachine

Next Step
 0xBEN
0xBEN