
Previous Step

Before We Start
In order to make this a high-availability setup, you'd ideally:
- Have a distinct PostgreSQL server
- Have a distinct Redis server
- Have a distinct Infisical server
Having all three components as separate hosts allows for replication across cluster nodes in the event that a service or node goes down.
Prerequisites
Linux Container

0 in order to adhere to the production hardening recommendations here: https://infisical.com/docs/self-hosting/guides/production-hardening#linux-binary-deployment

PostgreSQL
Add APT Repository
mkdir -p /usr/share/postgresql-common/pgdgCreate a directory to store the repository public key signature
curl -o /usr/share/postgresql-common/pgdg/apt.postgresql.org.asc --fail https://www.postgresql.org/media/keys/ACCC4CF8.ascSave the public key
echo "deb [signed-by=/usr/share/postgresql-common/pgdg/apt.postgresql.org.asc] http://apt.postgresql.org/pub/repos/apt $(lsb_release -cs)-pgdg main" | tee /etc/apt/sources.list.d/pgdg.listAdd the APT source using the public key file to verify
Install PostgreSQL
apt update && apt install -y postgresql-18 postgresql-contribConfigure Database
DB_PASS=$(cat /dev/urandom | tr -dc 'a-zA-Z0-9' | head -c 32) && echo "$DB_PASS"Generate a random password for the DB user and save it somewhere secure
su postgrespsqlCREATE USER infisical_user WITH PASSWORD 'ENTER_YOUR_PASSWORD_HERE';Add the user account that will manage the application database
CREATE DATABASE infisical OWNER infisical_user;Create the application database to be managed by the user
quitexitReturn to "root" shell
Redis Server
Install Redis
apt install -y redis-serversystemctl stop redis-serverREDIS_PASS=$(cat /dev/urandom | tr -dc 'a-zA-Z0-9' | head -c 32) && echo "$REDIS_PASS"Generate a random password for Redis authentication and save somewhere secure
grep -n '^# requirepass' /etc/redis/redis.confNote the line number where the password is defined
nano -l /etc/redis/redis.confStart nano with line numbering and replace the password on the target line
systemctl enable --now redis-serverStart Redis server
Infisical Server
Add APT Repository
Following the documentation here
curl -1sLf 'https://artifacts-infisical-core.infisical.com/setup.deb.sh' | bashAdds the apt repository and any dependencies
First, let me say that the issue below can be totally avoided by using a VM instead of LXC.
When installing the
infisical-core omnibus package, it makes hundreds of fsync() syscalls while dpkg untars the installation files to the file system. This will cause a massive bottleneck with ZFS. To work around this, I'll install with eatmydata.apt install -y eatmydataalias apt='/bin/eatmydata /bin/apt'echo "alias apt='/bin/eatmydata /bin/apt'" >> /etc/bash.bashrcapt install -y infisical-coreConsult
man eatmydata and you'll note that this overrides fsync() and arbitrarily returns a 0 exit code when this function is called.Security Hardening
echo "* hard core 0" | tee -a /etc/security/limits.confulimit -c 0mkdir /etc/infisicaltouch /etc/infisical/infisical.rbchmod 640 /etc/infisical/infisical.rbCreate Configuration Files
postgres:// and redis connection details with the correct username and password.cat << EOF > /etc/infisical/infisical.rb
infisical_core['DB_CONNECTION_URI'] = "postgres://infisical_user:${DB_PASS}@localhost:5432/infisical"
infisical_core['REDIS_URL'] = "redis://:${REDIS_PASS}@localhost:6379"
infisical_core['ENCRYPTION_KEY'] = '$(openssl rand -hex 16)'
infisical_core['AUTH_SECRET'] = '$(openssl rand -base64 32)'
infisical_core['LISTEN_ADDR'] = '127.0.0.1'
infisical_core['PORT'] = 8080
EOFinfisical-ctl reconfigureinfisical-ctl tail to debug any issues during configuration.Reverse Proxy for TLS
Dynamic DNS Workflow
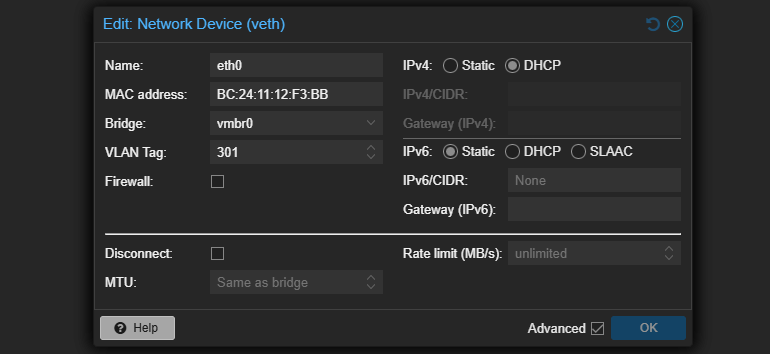
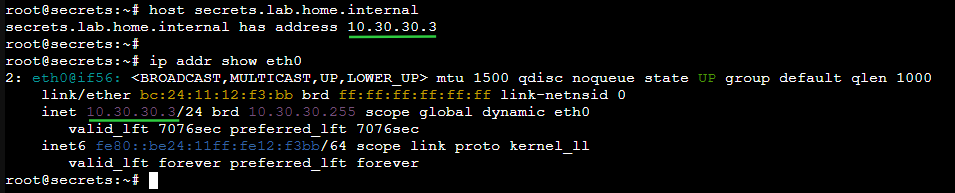
As has been demonstrated in the previous step of the lab during testing, this host is going to be assisted by DHCP and Dynamic DNS.
- Hostname — secrets
- VLAN: 301 (10.30.30.0/24), DHCP
- DNS domain — lab.home.internal
- DNS server — 10.30.30.1
I'll be creating a DHCP reservation in pfSense for this host, so that it's reliably at the same IP address.

secrets.lab.home.internal.tcp/443 to the Intermediate CA and ensure the Intermediate CA can reach tcp/80 of any ACME clients.ACME clients request an ACME certificate from the CA server at
tcp/443 and the CA server verifies a nonce at tcp/80 on the client.Request ACME Certificate
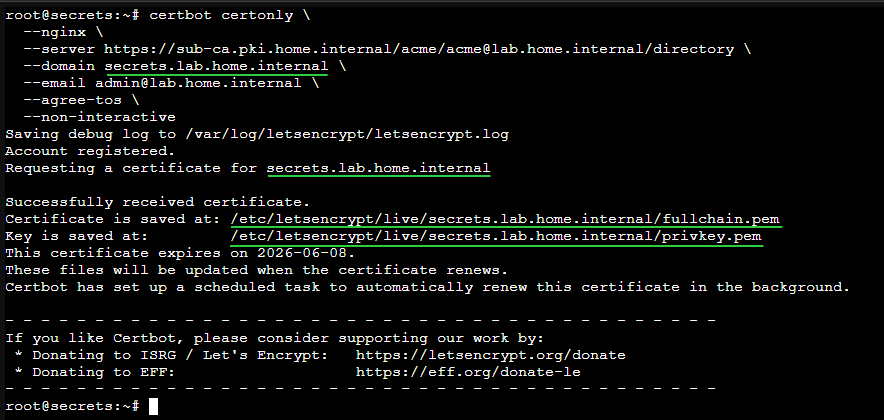
apt install -y nginx certbot python3-certbot-nginxcurl -k https://sub-ca.pki.home.internal/roots.pem -o /usr/local/share/ca-certificates/home-lab-root.crtSave the Root CA locally
update-ca-certificatesAdd to certificate store
certbot certonly \
  --nginx \
  --server https://sub-ca.pki.home.internal/acme/acme@lab.home.internal/directory \
  --domain secrets.lab.home.internal \
  --email admin@lab.home.internal \
  --agree-tos \
  --non-interactive
Using the FQDN, "test123.lab.home.internal" as the domain
Install and Configure Nginx
nano /etc/nginx/sites-available/infisical.confserver_name directive according to your environment.map $http_upgrade $connection_upgrade {
default upgrade;
'' close;
}
server {
listen 80;
listen [::]:80;
server_name secrets.lab.home.internal;
return 301 https://$host$request_uri;
}
server {
http2 on;
listen 443 ssl;
listen [::]:443 ssl;
server_name secrets.lab.home.internal;
# Use certbot certificates
ssl_certificate /etc/letsencrypt/live/secrets.lab.home.internal/fullchain.pem;
ssl_certificate_key /etc/letsencrypt/live/secrets.lab.home.internal/privkey.pem;
ssl_protocols TLSv1.2 TLSv1.3;
ssl_prefer_server_ciphers on;
ssl_ciphers 'ECDHE-ECDSA-AES128-GCM-SHA256:ECDHE-RSA-AES128-GCM-SHA256:ECDHE-ECDSA-AES256-GCM-SHA384:ECDHE-RSA-AES256-GCM-SHA384';
ssl_session_cache shared:SSL:10m;
ssl_session_timeout 1d;
add_header Strict-Transport-Security "max-age=31536000; includeSubDomains" always;
add_header X-Frame-Options "SAMEORIGIN" always;
add_header X-XSS-Protection "1; mode=block" always;
add_header X-Content-Type-Options "nosniff" always;
add_header Content-Security-Policy "default-src 'self'; script-src 'self' 'unsafe-inline'; style-src 'self' 'unsafe-inline'; img-src 'self' data:; connect-src 'self' wss:;" always;
access_log /var/log/nginx/infisical_access.log;
error_log /var/log/nginx/infisical_error.log;
location / {
proxy_pass http://127.0.0.1:8080;
proxy_set_header Host $host;
proxy_set_header X-Real-IP $remote_addr;
proxy_set_header X-Forwarded-For $proxy_add_x_forwarded_for;
proxy_set_header X-Forwarded-Proto $scheme;
proxy_http_version 1.1;
proxy_set_header Upgrade $http_upgrade;
proxy_set_header Connection $connection_upgrade;
proxy_connect_timeout 60s;
proxy_send_timeout 60s;
proxy_read_timeout 60s;
proxy_buffers 16 16k;
proxy_buffer_size 32k;
}
}/etc/nginx/sites-available/ as the symbolic link source.ln -s /etc/nginx/sites-available/infisical.conf /etc/nginx/sites-enabled/infisical.confnginx -t && systemctl restart nginxInitial Setup
First Login
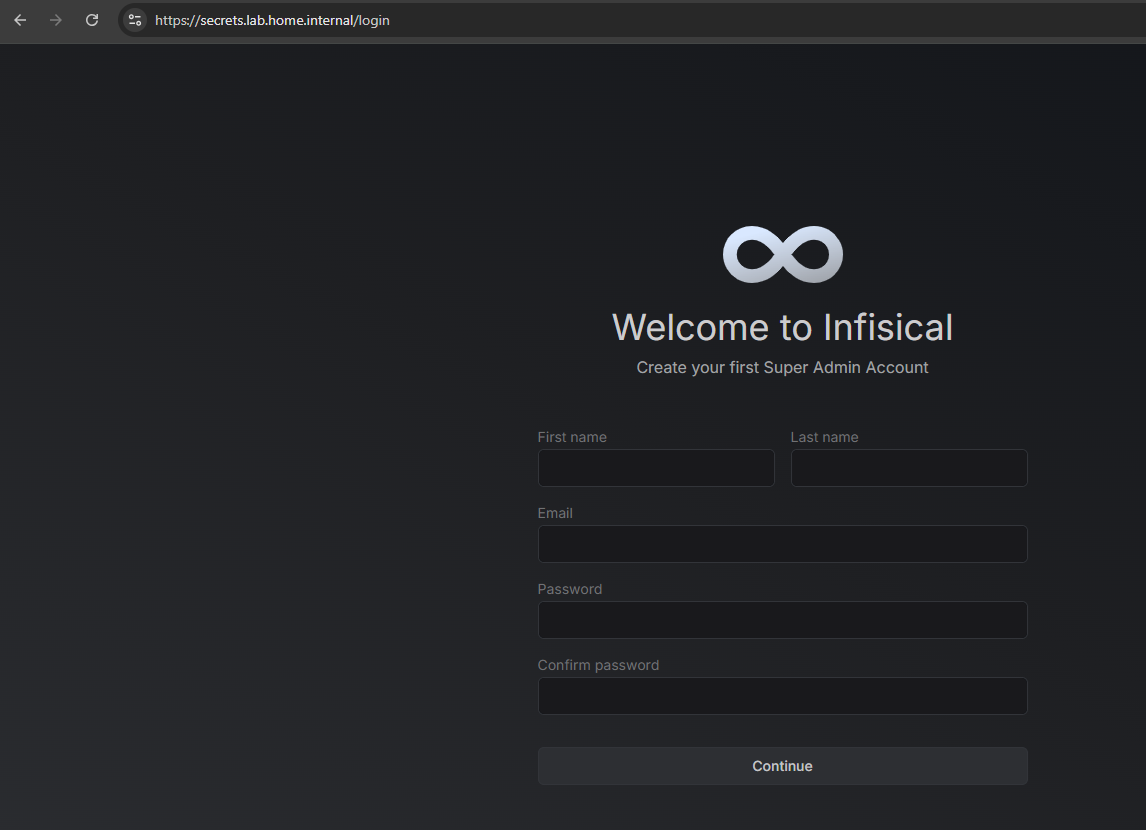


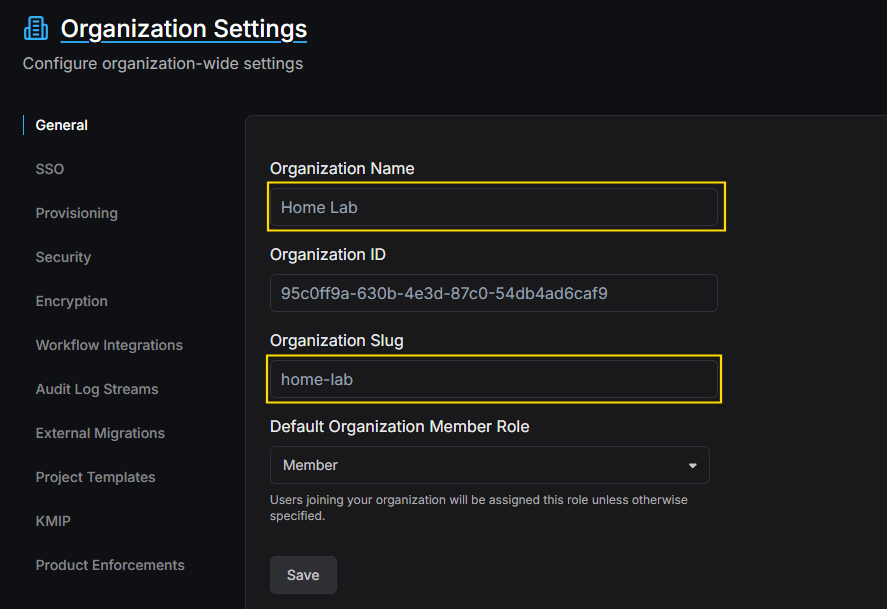
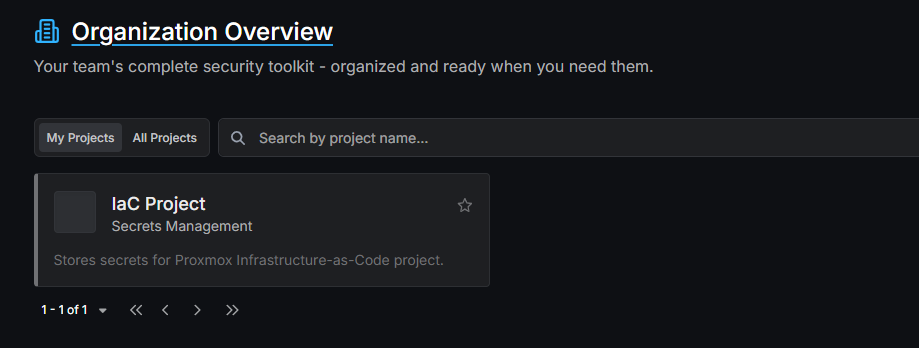
Organization Setup
Recommended reading to understand how data is compartmentalized
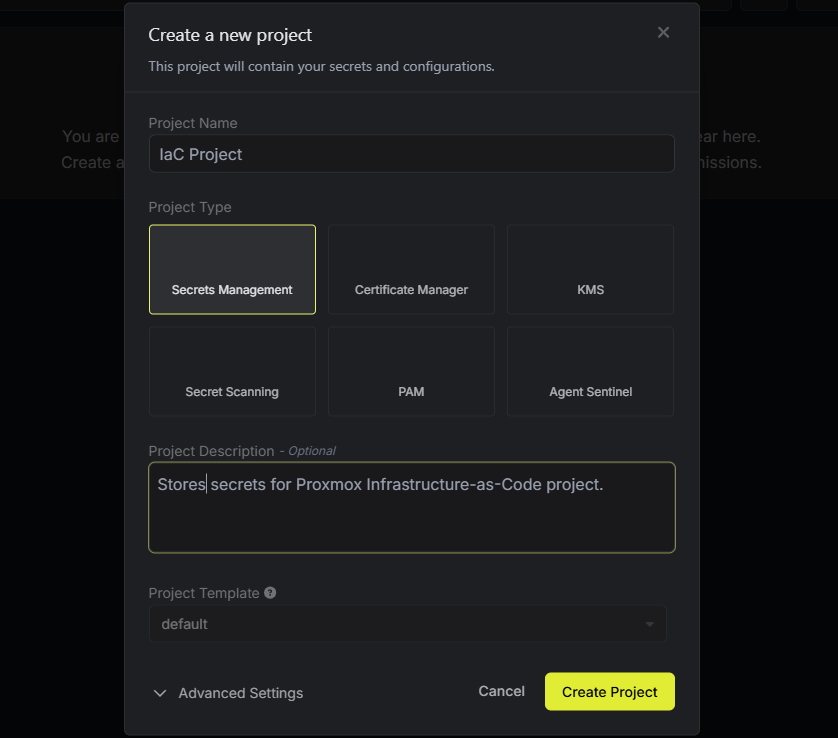
Create a Project

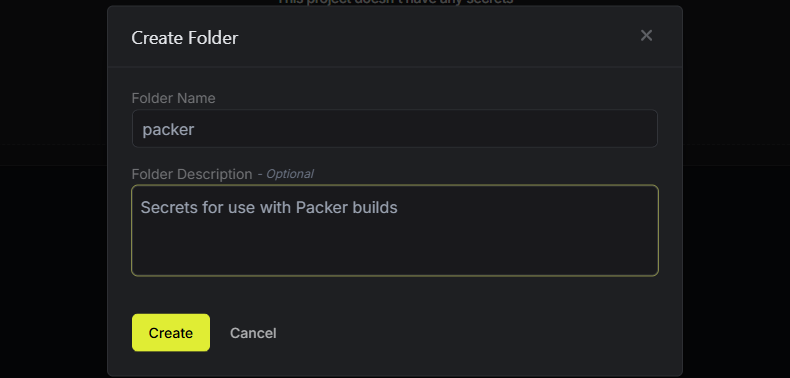
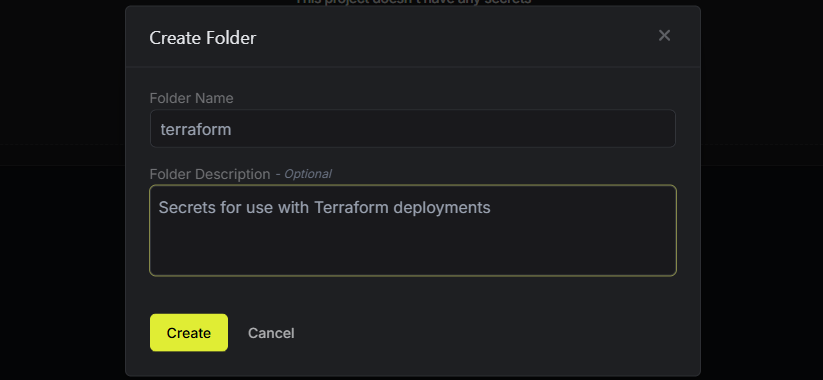
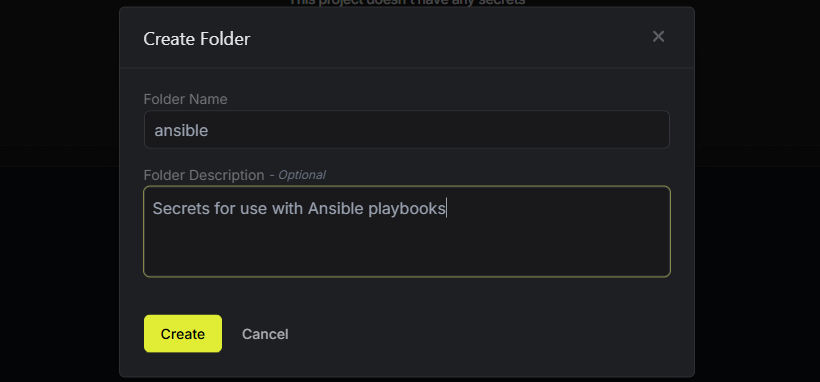
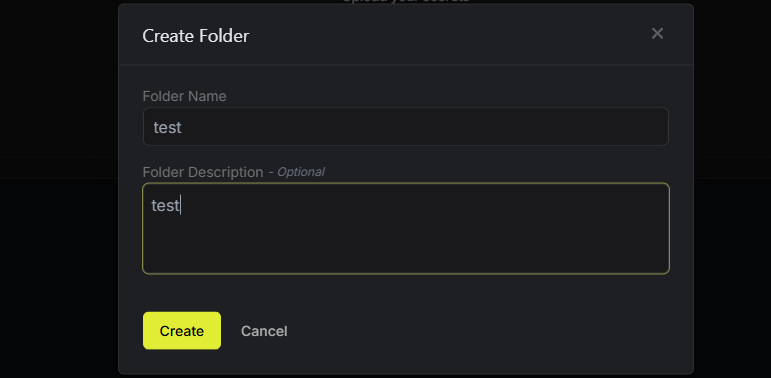
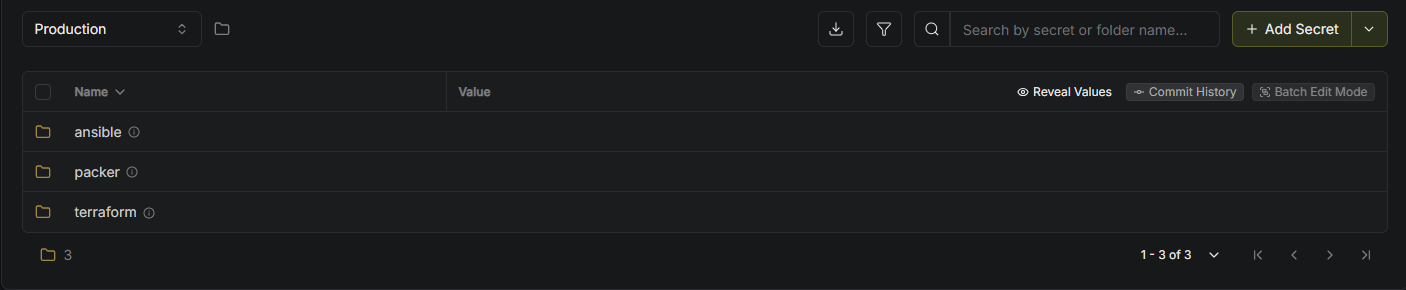
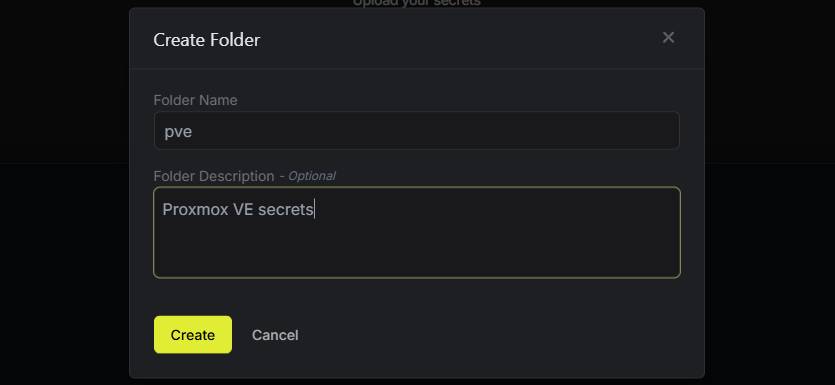
Create Directory Structure


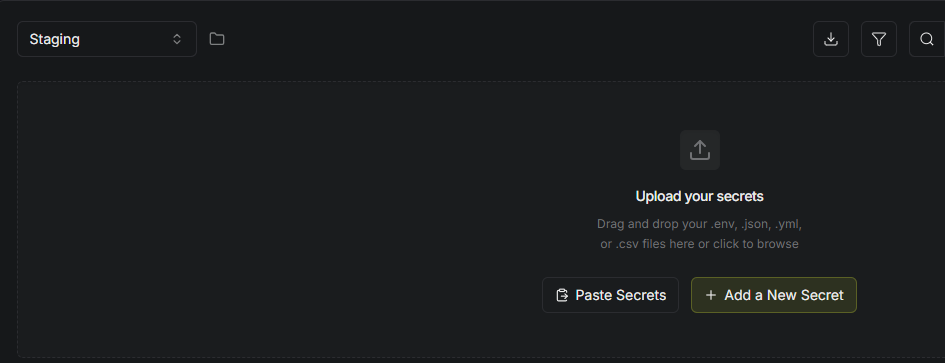
Testing Secrets Access
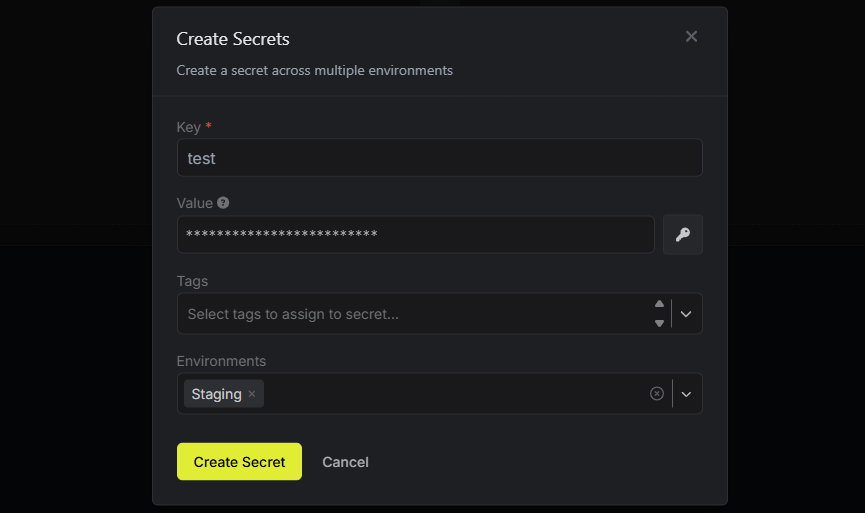
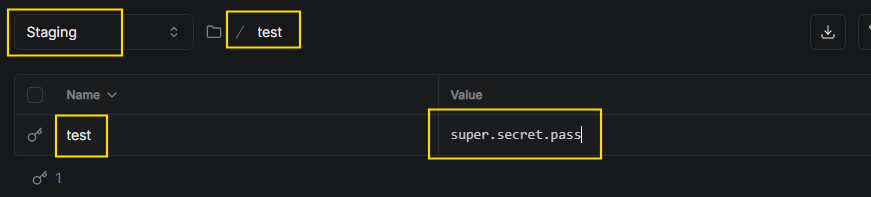
Create a Secret in Staging
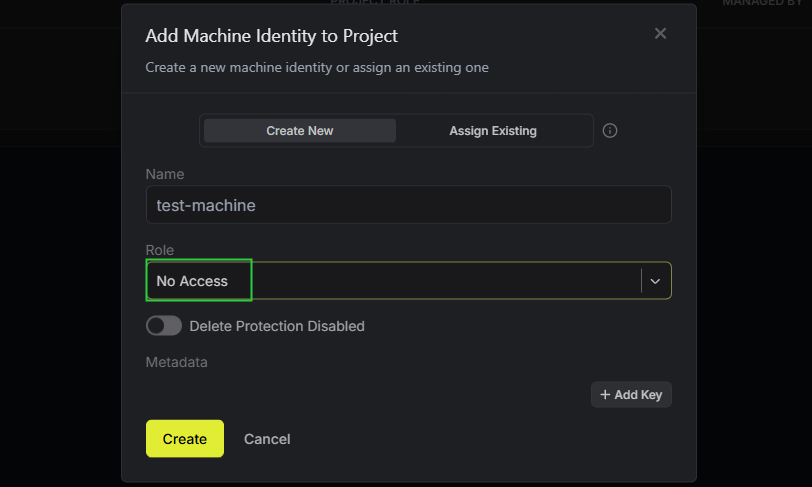
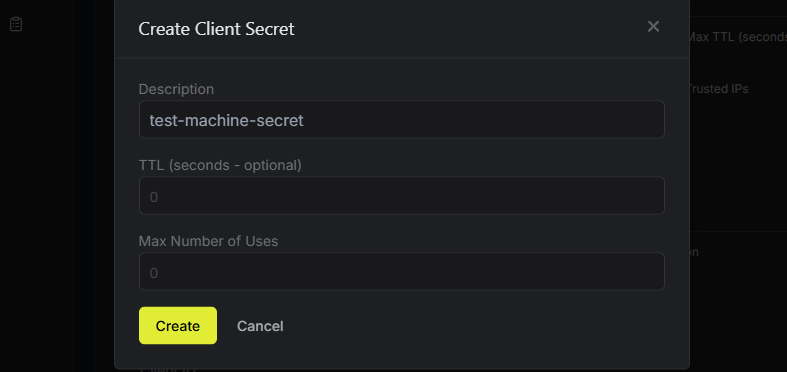
Create a Test Machine Account
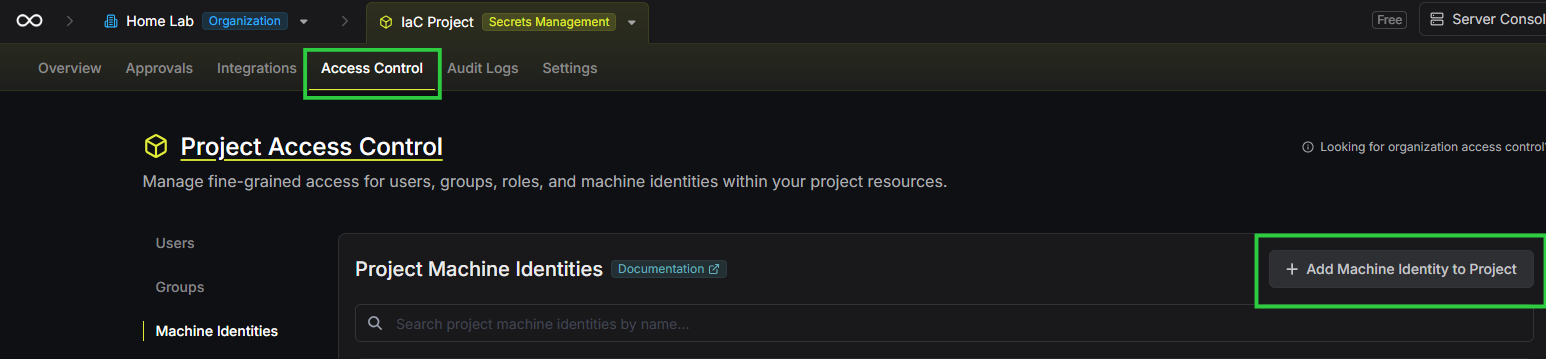
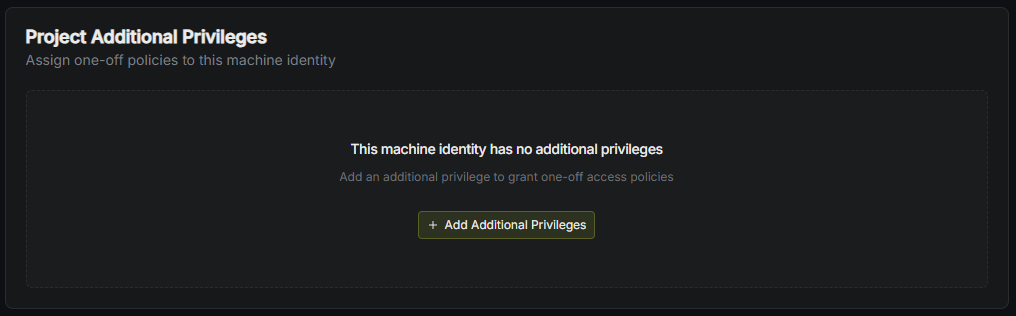
Add Privileges
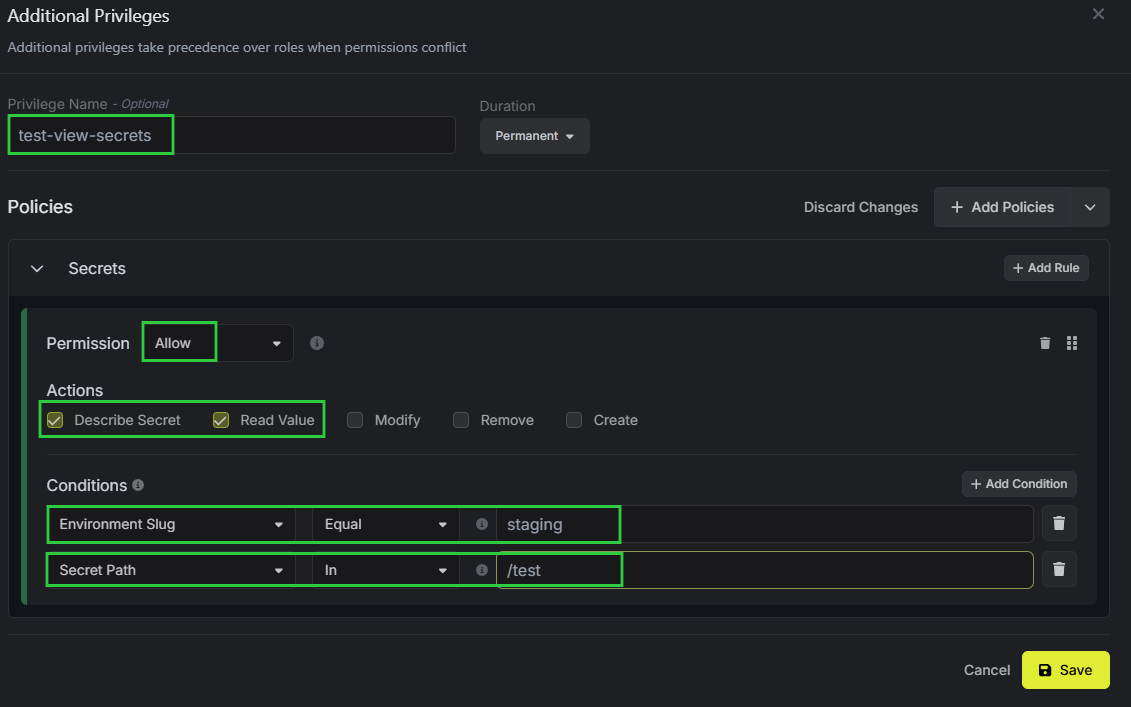
- Set a Privilege Name:
test-view-secrets(only lowercase letters, numbers, hyphens) - Click
+ Add Policies- Choose Secrets
- Click Add Policies
- Choose Secrets
- Click
+ Add Condition- Environment Slug equals
staging - Secret Path in
/test
- Environment Slug equals
- Click Save
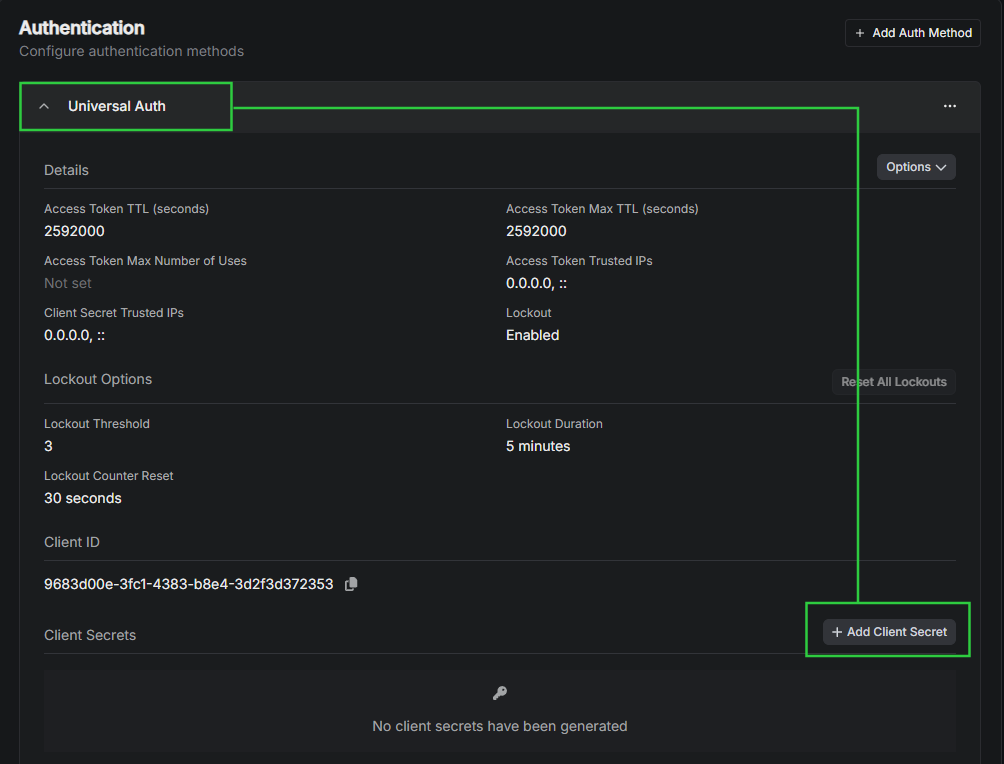
Add Universal Auth Secret
Testing Authentication and Secret Retrieval


Generate a Bearer Token
read -s -e -p "Enter client ID (input hidden): " CLIENT_IDEnter the UUID4 as shown in the "Universal Auth" panel
read -s -e -p "Enter client secret (input hidden): " CLIENT_SECRETEnter the secret that was generated just above
curl -s -k --location --request POST 'https://secrets.lab.home.internal/api/v1/auth/universal-auth/login' \
  --header 'Content-Type: application/x-www-form-urlencoded' \
  --data-urlencode "clientId=${CLIENT_ID}" \
  --data-urlencode "clientSecret=${CLIENT_SECRET}"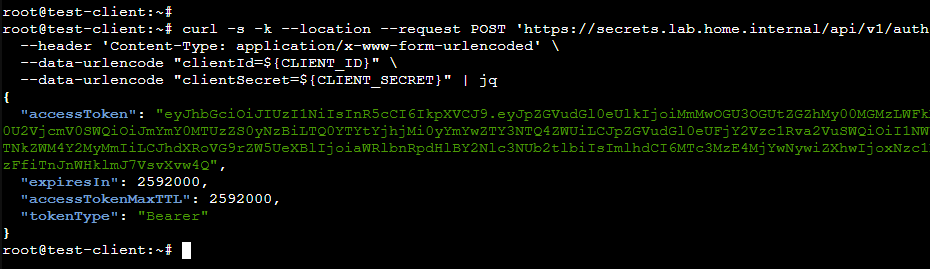
read -s -e -p "Enter Bearer token (input hidden): " TOKENEnter the access token from the JSON
Use Bearer Token to Fetch Secret

read -e -p "Enter project ID: " PROJECT_IDcurl -s -k -G --request GET \
--url 'https://secrets.lab.home.internal/api/v3/secrets/raw/test' \
--data-urlencode "workspaceId=${PROJECT_ID}" \
--data-urlencode 'environment=staging' \
--data-urlencode 'secretPath=/test/' \
--header "Authorization: Bearer ${TOKEN}"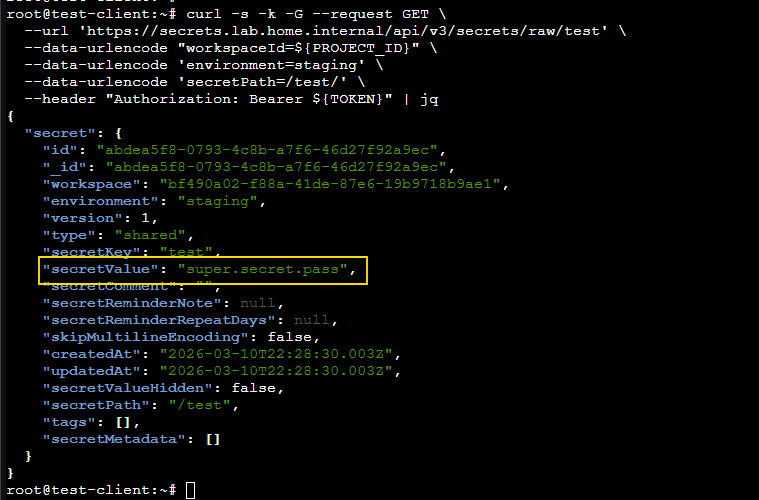
Adding Service Accounts for Tools
Generate Pools, Groups, Users, and Tokens in Proxmox VE
Now that we've created a project under the Infisical organization, we'll want to create service accounts, so that Packer, Terraform, and Ansible can authenticate to the Proxmox VE API. Then, we'll store those API tokens in Infisical.
nano generate-service-accounts.sh#!/bin/bash
REALM="pve"
ISO_STORAGE_POOL="local" # change according to your environment
DISK_STORAGE_POOL="local-lvm" # change according to your environment
# 1. CREATE RESOURCE POOLS
echo "Creating resource pools..."
pveum pool add packer-templates --comment "Packer-built VM templates"
pveum pool add terraform-managed --comment "Terraform-managed VMs"
# 2. CREATE GROUPS
echo "Creating automation groups..."
pveum group add Packer --comment "Packer service accounts"
pveum group add Terraform --comment "Terraform service accounts"
pveum group add Ansible --comment "Ansible service accounts"
# 3. CREATE USERS
echo "Creating service users..."
pveum user add svc_packer@$REALM --comment "Packer service account"
pveum user add svc_terraform@$REALM --comment "Terraform service account"
pveum user add svc_ansible@$REALM --comment "Ansible service account"
# 4. ASSIGN USERS TO GROUPS
echo "Assigning users to groups..."
pveum user modify svc_packer@$REALM --groups Packer
pveum user modify svc_terraform@$REALM --groups Terraform
pveum user modify svc_ansible@$REALM --groups Ansible
# 5. ASSIGN GRANULAR PERMISSIONS VIA ACLs
echo "Assigning pool and system permissions..."
# ---- PACKER PERMISSIONS ----
# Full CRUD on its own pool
pveum aclmod /pool/packer-templates --group Packer --role PVEVMAdmin
pveum aclmod /pool/packer-templates --group Packer --role PVEPoolAdmin
# Packer needs to read the node state and find available VM IDs, but cannot modify anything outside its pool
pveum aclmod /nodes --group Packer --role PVEAuditor
# Read-only on global storage configurations
pveum aclmod /storage --group Packer --role PVEAuditor
# Full permissions on required storage pools
pveum aclmod /storage/$ISO_STORAGE_POOL --group Packer --role PVEDatastoreAdmin
pveum aclmod /storage/$DISK_STORAGE_POOL --group Packer --role PVEDatastoreAdmin
# Ability to attach the network interface
pveum aclmod /sdn/zones/localnetwork --group Packer --role PVESDNUser
# ---- TERRAFORM PERMISSIONS ----
# Full CRUD on its own pool
pveum aclmod /pool/terraform-managed --group Terraform --role PVEVMAdmin
pveum aclmod /pool/terraform-managed --group Terraform --role PVEPoolAdmin
# Read-only access to Packer pool (Required to clone templates)
pveum aclmod /pool/packer-templates --group Terraform --role PVEPoolUser
pveum aclmod /pool/packer-templates --group Terraform --role PVETemplateUser
# Terraform needs to read the node state and find available VM IDs, but cannot modify anything outside its pool
pveum aclmod /nodes --group Terraform --role PVEAuditor
# Read-only on global storage configurations
pveum aclmod /storage --group Terraform --role PVEAuditor
# Full permissions on required storage pools
pveum aclmod /storage/$ISO_STORAGE_POOL --group Terraform --role PVEDatastoreAdmin
pveum aclmod /storage/$DISK_STORAGE_POOL --group Terraform --role PVEDatastoreAdmin
# Ability to attach the network interface
pveum aclmod /sdn/zones/localnetwork --group Terraform --role PVESDNUser
# ---- ANSIBLE PERMISSIONS ----
# Read-only on Terraform pool (For inventory and state checking)
pveum aclmod /pool/terraform-managed --group Ansible --role PVEAuditor
# Read-only on nodes and VMs for managing VMs outside the pool as well
pveum aclmod /nodes --group Ansible --role PVEAuditor
# Give Ansible read-only to query other VMs to manage as well
pveum aclmod /vms --group Ansible --role PVEAuditor
# 6. GENERATE API TOKENS
echo "Generating API tokens..."
pveum user token add svc_packer@$REALM packer-token --privsep 0
pveum user token add svc_terraform@$REALM terraform-token --privsep 0
pveum user token add svc_ansible@$REALM ansible-token --privsep 0A Few Clarifications:
- Pools
/pool/packer-templates—svc_packerhas full permissions on this pool- Later, we'll create the Packer templates, so that they are written here
- This makes it so that
svc_packermay only write VMs to this pool
svc_terraformhas read-only permissions to this pool- Terraform needs to be able to see VMs inside this pool and be able to clone off of them
/pool/terraform-managedsvc_terraformhas full permissions on this pool- Later, Terraform managed VMs will be written to this pool
- This makes it so that Terraform may only manage VMs in this pool
svc_ansiblehas read-only permissions to this pool- Ansible needs to be able to list VMs in this pool and query their IP addresses using dynamic inventory
--privsep 0is used because we don't want an API token with unique privileges- We want the API token to inherit the permissions of the user
- The permissions of the user are controlled at the group level
bash generate-service-accounts.sh
Save in Infisical Project
Generate a SSH Key Pair
You can run the below command on any Linux box. Save the resulting automation_key and automation_key.pub files for reference later.
ssh-keygen -t ed25519 -a 100 -C "" -N "" -f automation_keyPacker

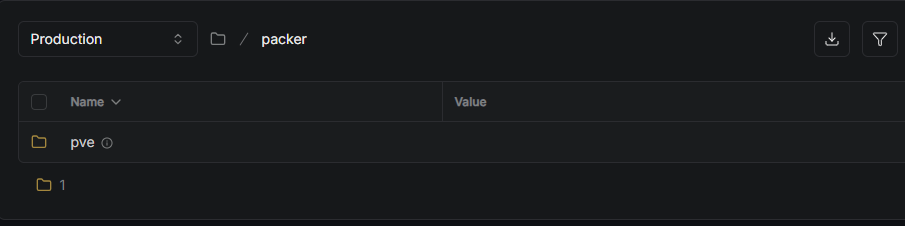

/packer/pve and this will inject all of the secrets shown below as environment variables.Secrets for Packer:

See documentation on any environment variables that will be read by the proxmox provider
- Secret 1
- Key:
PROXMOX_USERNAME— injected as environment variable, read by plugin - Value:
svc_packer@pve!packer-token- When
packerruns with the Proxmox provider, it will automatically discover the variable
- When
- Key:
- Secret 2
- Key:
PROXMOX_TOKEN— injected as environment variable, read by plugin - Value:
3xxxxxxx-xxxx-xxxx-xxxx-xxxxxxxxxxxx9- When
packerruns with the Proxmox provider, it will automatically discover the variable
- When
- Key:
- Secret 5
- Key:
PKR_VAR_ssh_username - Value:
packer - Comment: Username Packer uses when logging into VM for provisioning
- Key:
- Secret 4
- Key:
PKR_VAR_ssh_password - Value: Password Packer uses when logging into VM for provisioning
- Key:
- Secret 5
- Key:
PKR_VAR_windows_admin_password— for use with WinRM - Value:
ENTER_YOUR_SECURE_PASSWORD— generate a secure password - Comment: Use this password for WinRM and RDP login to provision Windows VMs
- Key:
Terraform
- Production folder in Infisical
- terraform parent directory
- pve subdirectory
- terraform parent directory
- Secret 1
- Key:
PROXMOX_VE_API_TOKEN - Value:
svc_terraform@pve!terraform-token=3xxxxxxx-xxxx-xxxx-xxxx-xxxxxxxxxxxe
- Key:
- Secret 2
cat ./automation_key.pub— Run command and copy output
- Key:
TF_VAR_ssh_public_key - Value:
ssh-ed25519 AAAAC3...[SNIP]...KVDWli—automation_key.puboutput from before - Comment: Terraform adds this SSH key for the user defined in TF_VAR_ssh_username
- Secret 3
cat ./automation_key— Run command and copy output- Key:
TERRAFORM_SSH_PRIVATE_KEY - Value:
--—BEGIN OPENSSH PRIVATE KEY-----— paste all of the output into this field - Comment: SSH private key to verify successful provisioning of VMs
- Enable Multiline Encoding: ✅
- Secret 4
- Key:
TF_VAR_ssh_username - Value:
ansible - Comment: Terraform adds this SSH user, and will login with private key matching TF_VAR_ssh_public_key
- Key:
Ansible
TERRAFORM_SSH_PRIVATE_KEY and TF_VAR_ssh_username secrets from /terrafrom/pve so that we only need to update these secrets in one place.- Production folder in Infisical
- ansible parent directory
- pve subdirectory
- Secret 1
- Key:
PROXMOX_URL - Value:
https://proxmox.lab.home.internal:8006
- Key:
- Secret 2
- Key:
PROXMOX_USER - Value:
svc_ansible@pve
- Key:
- Secret 3
- Key:
PROXMOX_TOKEN_ID - Value:
ansible-token
- Key:
- Secret 4
- Key:
PROXMOX_TOKEN_SECRET - Value:
9xxxxxxx-xxxx-xxxx-xxxx-xxxxxxxxxxxf
- Key:
- Secret 1
- pve subdirectory
- ansible parent directory
- Secret 5
- Key:
WINRM_USER - Value:
Administrator
- Key:
- Secret 6
- Key:
WINRM_PASSWORD - Value: Copy the same password used above in the Packer secrets
- Key:
- Secret 7
- Key:
ANSIBLE_HOST_KEY_CHECKING - Value:
False - Comment: Disable Ansible SSH host key checking, as we don't have PKI-signed host keys
- Key:
