Previous Step

How PKI Works in the Lab
Click here to view this diagram in a new tab
Diagram Summary
Root CA: Offline
- The Root CA generates a public certificate and private key pair
- The public
root_ca.crtfile will be distributed to all TLS clients in the lab, so that certificates can be verified
- The public
- Generates the Intermediate CA public certificate and private key pair
- Transfer the Intermediate CA certificate and key to the sub-ca server
- Then, power off or completely isolate the Root CA from all network connectivity
Intermediate CA
- Using the
sub_ca.keyprivate key, has been delegated as a trusted intermediary to sign TLS certificates - Runs an ACME registration service that clients can use to request TLS certificates
- As long as the ACME clients have
root_ca.crtinstalled, the ACME server certified bysub_ca.crtwill be trusted
- As long as the ACME clients have
Infisical Server
- Requests an ACME certificate from Intermediate CA for
infisical.lab.home.internal - This certificate will be served for the web application and OIDC trust
- We must ensure we have a DNS record for
infisical.lab.home.internalpointing to the correct IP address
GitLab
GitLab CE Server
- Requests an AMCE certificate from Intermediate CA for
gitlab.lab.home.internal - This certificate will be served for the web UI
- We must ensure we have a DNS record for
gitlab.lab.home.internalpointing to the correct IP address - GitLab CE will also establish an OIDC trust with Infisical to sign JWT for GitLab Runner to authenticate to Infisical
GitLab Runner Server
- Will be registered with GitLab CE for CI/CD operations to perform automated tasks
- GitLab CE will inject JWT into GitLab Runner's environment when a job is triggered
- Will be used to authenticate infisical-cli client and retrieve ephemeral credentials
- Ephemeral credentials will be used to authenticate to Infisical and retrieve the Proxmox VE REST API token for packer
- Runner will invoke packer build based on commit to any Packer template files and update templates in Proxmox accordingly
Staging the Linux Containers
Root CA LXC


Install Smallstep
pct enter <CT_ID>You can use the "pct enter" command in Proxmox VE to launch a shell inside the container
curl -fsSL https://packages.smallstep.com/keys/apt/repo-signing-key.gpg -o /etc/apt/keyrings/smallstep.asccat << EOF > /etc/apt/sources.list.d/smallstep.sources
Types: deb
URIs: https://packages.smallstep.com/stable/debian
Suites: debs
Components: main
Signed-By: /etc/apt/keyrings/smallstep.asc
EOFapt update && apt install -y step-ca step-cliuseradd -c 'smallstep service account' \
-U -r -m -d '/var/lib/step' \
-s /usr/sbin/nologin \
stepClone and Create Intermediate CA LXC
At this point, we've only installed packages and have not generated any certificates or private keys,
Intermediate CA LXC Settings
Since this is a clone, I'll only be touching on anything that needs to be changed for this host.
Network Settings
- VLAN: 325
DNS Settings
- DNS server: 10.33.33.1
Configure Root CA
Initialize PKI
pct enter <CT_ID>You can use the "pct enter" command in Proxmox VE to launch a shell inside the container
sudo -u step step ca init- Type: Standalone
- Name: Enter FQDN:
root-ca.pki.home.lab.internal(dynamic DNS) - DNS name: Enter host IP address
- IP and port: 127.0.0.1:443
- First provisioner name:
root-ca@lab.home.internal - Password: auto-generate, then store in password vault
sudo -u step step certificate create --profile root-ca \
--not-after 175200h --no-password --insecure \
--key '/var/lib/step/.step/secrets/root_ca_key' \
'Home Lab Root CA' /var/lib/step/.step/certs/root_ca.crt
Use existing "root_ca_key" to sign a "root_ca.crt" with longer expiry
step ca init to decrypt root_ca_key. Answer y to all questions.sudo -u step nano /var/lib/step/.step/config/ca.json "authority": {
"provisioners": [
{
"type": "JWK",
"name": "root-ca@lab.home.internal"
}
]
}Before...
] below "authority": {
"provisioners": [
{
"type": "JWK",
"name": "root-ca@lab.home.internal"
}
],
"claims": {
"maxTLSCertDuration": "87600h",
"defaultTLSCertDuration": "43800h"
}
}...After, adds "claims" block to increase the duration of certificates issued by CA
sudo -u step step ca provisioner update "root-ca@lab.home.internal" --x509-max-dur=87600hUpdate the provisioner with the new duration
Configure Intermediate CA
Regenerate SSH Host Keys
Since we cloned this LXC from the Root CA image, we want to ensure the SSH host keys are unique.
pct enter <CT_ID>You can use the "pct enter" command in Proxmox VE to launch a shell inside the container
rm -f /etc/ssh/ssh_host_*Rotate host SSH keys, so they're unique after cloning
ssh-keygen -Asystemctl restart sshInitialize PKI
sudo -u step step ca init- Type: Standalone
- Name: Home Lab Sub CA
- DNS name: sub-ca.pki.home.internal (dynamic DNS)
- IP and port:
:443 - First provisioner name:
sub-ca@lab.home.internal - Password: auto-generate, then store in password vault
Certificate Signing Request (CSR)
sudo -u step bash -c 'tr -dc "A-Za-z0-9" < /dev/urandom 2>/dev/null | head -c 32 > /var/lib/step/.step/secrets/password.txt && chmod 600 /var/lib/step/.step/secrets/password.txt'Create a password to sign the key file and store in the default secrets path
sudo -u step step certificate create "Home Lab Intermediate CA" /tmp/intermediate.csr /var/lib/step/.step/secrets/intermediate.key \
  --csr --kty EC --crv P-256 --password-file /var/lib/step/.step/secrets/password.txt
Generate a CSR with the password file to encrypt the key
/tmp/intermediate.csr to your Root CA LXC to process the CSR. It's up to you how you decide to transfer the file.Process CSR
sudo -u step step certificate sign /tmp/intermediate.csr /var/lib/step/.step/certs/root_ca.crt /var/lib/step/.step/secrets/root_ca_key \
  --profile intermediate-ca --not-after 43800h > /tmp/intermediate.crt
When prompted, enter the password saved earlier during step ca init to decrypt root_ca_key.
/var/lib/step/.step/certs/root_ca.crt and /tmp/intermediate.crt to your Sub CA LXC. It's up to you how you decide to transfer the file.Once transferred remove any files from
/tmp/ on the Root CA.Finalize Intermediate CA
Configurations
rm /tmp/intermediate.csrmv /tmp/root_ca.crt /var/lib/step/.step/certs/root_ca.crtMoving "root_ca.crt" transferred from Root CA LXC to Sub CA LXC certificate store
mv /tmp/intermediate.crt /var/lib/step/.step/certs/intermediate_ca.crtMoving "/tmp/intermediate.crt" transferred from Root CA LXC to Sub CA LXC to certificate store
chmod 600 /var/lib/step/.step/certs/*.crt && chown step:step /var/lib/step/.step/certs/*.crtintermeidate.key. Now, the Root CA has created an intermediate_ca.crt using our CSR, we can make intermediate.key our default key file by renaming it.The password in
/var/lib/step/.step/secrets/password.txt will decrypt the intermediate_ca_key file.mv /var/lib/step/.step/secrets/intermediate.key /var/lib/step/.step/secrets/intermediate_ca_keysudo -u step nano /var/lib/step/.step/config/ca.json "authority": {
"provisioners": [
{
"type": "JWK",
"name": "sub-ca@lab.home.internal"
}
]
}Before...
] "authority": {
"provisioners": [
{
"type": "JWK",
"name": "root-ca@lab.home.internal"
}
],
"claims": {
"maxTLSCertDuration": "8760h",
"defaultTLSCertDuration": "2160h"
}
}...After, adds "claims" block to increase the duration of certificates issued by CA
sudo -u step step ca provisioner update "sub-ca@lab.home.internal" --x509-max-dur=8760hUpdate the provisioner with the new duration
Systemd Unit
setcap CAP_NET_BIND_SERVICE=+eip $(which step-ca)Allow the step-ca binary to bind to a privileged port
nano /etc/systemd/system/step-ca.service[Unit]
Description=Smallstep CA Service
After=network.target
[Service]
Type=simple
User=step
Group=step
Environment=STEPPATH=/var/lib/step/.step
ExecStart=/usr/bin/step-ca ${STEPPATH}/config/ca.json --password-file ${STEPPATH}/secrets/password.txt
Restart=on-failure
RestartSec=5
PrivateTmp=true
ProtectSystem=full
[Install]
WantedBy=multi-user.targetNote the "--password-file" flag used to decrypt the "intermediate_ca_key" file
systemctl daemon-reloadsystemctl enable --now step-caEnable the service at startup and also, start it now
systemctl status step-caEnsure the service has started correctly
sudo -u step step certificate inspect /var/lib/step/.step/certs/intermediate_ca.crt --short
intermediate_ca.crt file back to the Sub CA and restart the step-ca service.sudo -u step step ca health --ca-url https://sub-ca.pki.home.internal:443 --root /var/lib/step/.step/certs/root_ca.crt

Mid-Way Recap
- Initialized
root-caprofile on Root CA LXCroot_ca.crt— transferred to Sub CA LXCroot_ca_key- Updated the maximum certificate lifetime and updated provisioner
- Initialized CA on Intermediate CA LXC
- Created password to encrypt
intermediate_ca_key - Generated a CSR with password
- Transferred to Root CA LXC to generate
intermediate_ca.crt - Transferred
intermediate_ca.crtandroot_ca.crtback to Sub CA - Renamed a few files to ensure they align with configuration file
- Updated the maximum certificate lifetime and updated provisioner
- Created a Systemd unit file and ensured successful startup
- Created password to encrypt
Create ACME Provisioner
The Automatic Certificate Management Environment (ACME) protocol involves a client-server interaction between:
- ACME provisioner —
step-cain this case - ACME client —
certbotis very commonly used
Using a client application such as certbot facilitates automated issuance, renewal, and revocation of certificates for a multitude of applications requiring CA-signed certificates.
root_ca.crt file to all hosts in our lab that will be making TLS connections where our certificates issued by step-casudo -u step step ca provisioner add 'acme@lab.home.internal' \
--type=ACME \
--x509-max-dur=8760hAdd the ACME provisioner on the "Sub CA"
systemctl restart step-caTest ACME Provisioning
Overview of ACME Workflow
- Client such as
certbotwill ask ACME provisioner onstep-cafor a certificate - ACME provisioner will give ACME client a random string that it will use to prove its authenticity
- ACME client will host this string using HTTP, DNS, or some other verification method
- ACME server will read the string and determine if they match, and if they do, issue the TLS certificate to the ACME client
- ACME client will continue to renew the certificate as needed at regular intervals
Note on Firewall Rules
In the context of my home lab, I'll need to ensure connectivity between VLANs on a few ports:
- ACME clients — require
tcp/443to the ACME server - ACME server — depends on which challenge type you use to validate clients
- If you use the DNS challenge, ACME server will require
udp/53to any nameserver(s) acting as the authority for your internal domain - If you use the HTTP challenge, ACME server will require
tcp/80to ACME client, as they will be required to host a/.well-known/acme-challengefile containing an established nonce - Other challenge types are also available
- If you use the DNS challenge, ACME server will require


Test Web Server
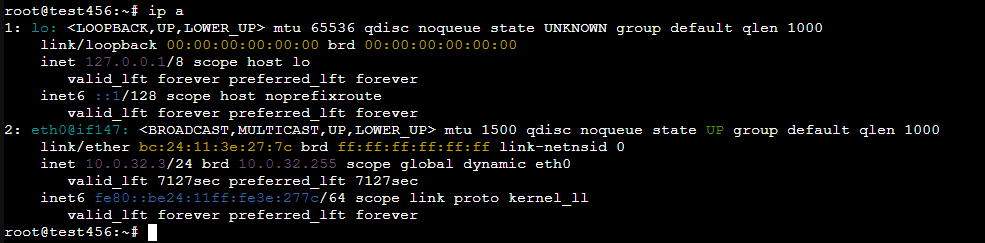
I'm just going to be setting up a very simple Debian 13 Linux Container for testing. Key details on the configuration are:
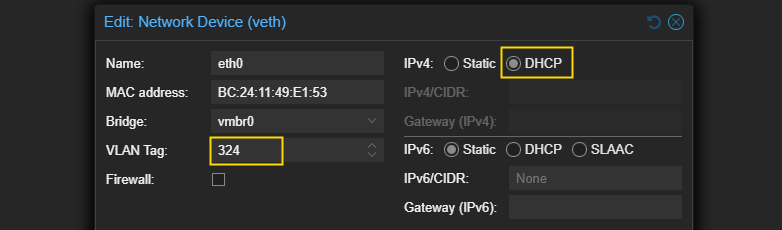
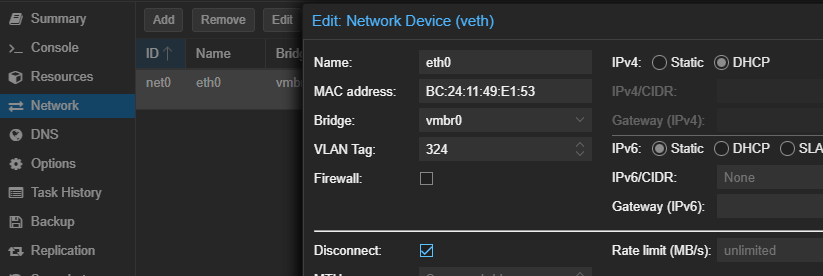
- VLAN 302 —
10.0.32.x/24 - Hostname —
test123 - DHCP domain —
lab.home.internal - DNS server —
10.0.32.1
test123. With Dynamic DNS enabled in the environment, when host comes online, it will be offered a DHCP lease in the 10.0.32.x/24 subnet. pfSense will then update the BIND server with test123.lab.home.internal and the corresponding IP address.
Import Root CA
We need to install the Root CA public certificate, so that the ACME client trusts the provisioner when initiating the TLS handshake.
curl -k https://sub-ca.pki.home.internal/roots.pem -o /usr/local/share/ca-certificates/home-lab-root.crtSave the Root CA locally
update-ca-certificatesMerge into the system certificate store

Upgrade and Install Dependencies
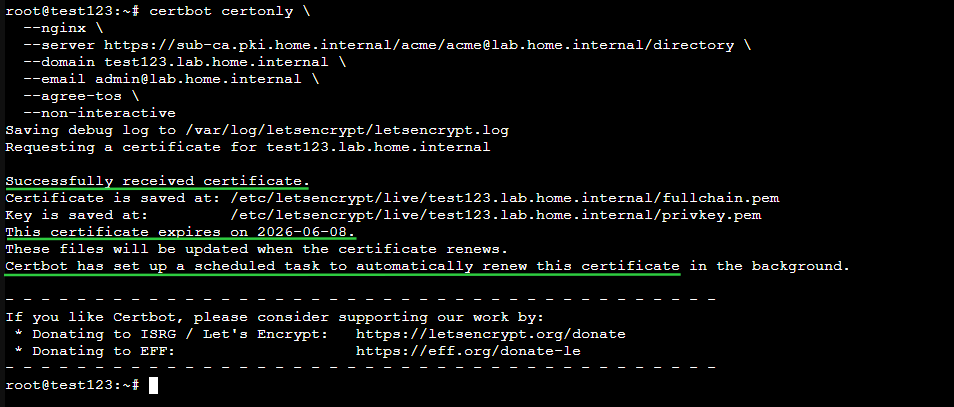
apt clean && apt update && apt upgrade -yapt install -y sudo curl certbot python3-certbot-nginx nginxCertbot ACME Client
certbot certonly \
--nginx \
--server https://sub-ca.pki.home.internal/acme/acme@lab.home.internal/directory \
--domain test123.lab.home.internal \
--email admin@lab.home.internal \
--agree-tos \
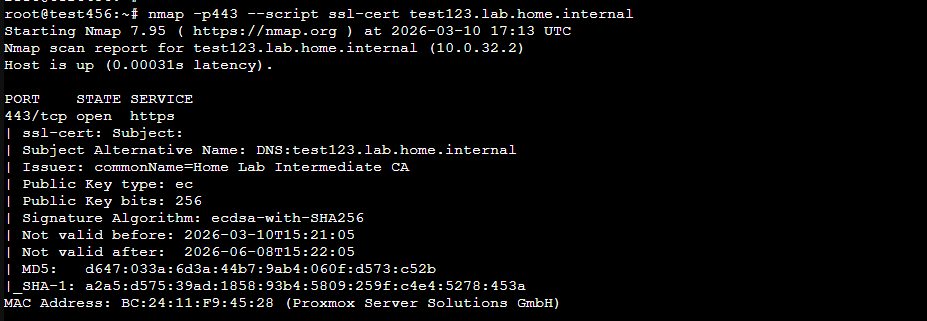
--non-interactiveUsing the FQDN, "test123.lab.home.internal" as the domain
Simple HTTPS Site
unlink /etc/nginx/sites-enabled/defaultmkdir -p /var/www/test123Create the web root for this test server
echo '<h1>Hello, World!</h1>' > /var/www/test123/index.htmlCreate a simple HTML file
chown -R www-data:www-data /var/www/test123/*Set correct permissions
cat << 'EOF' > /etc/nginx/sites-available/test.conf
server {
    listen 80;
    server_name test123.lab.home.internal;
    return 301 https://$host$uri;
}

server {
    listen 443 ssl http2;
    server_name test123.lab.home.internal;
    ssl_certificate /etc/letsencrypt/live/test123.lab.home.internal/fullchain.pem;
    ssl_certificate_key /etc/letsencrypt/live/test123.lab.home.internal/privkey.pem;
    root /var/www/test123;
    index index.html;

    location / {
        try_files $uri $uri/ =404;
    }
}
EOF
Create a Nginx config for the test server
ln -s /etc/nginx/sites-available/test.conf /etc/nginx/sites-enabled/test.confLink the test config to enable it
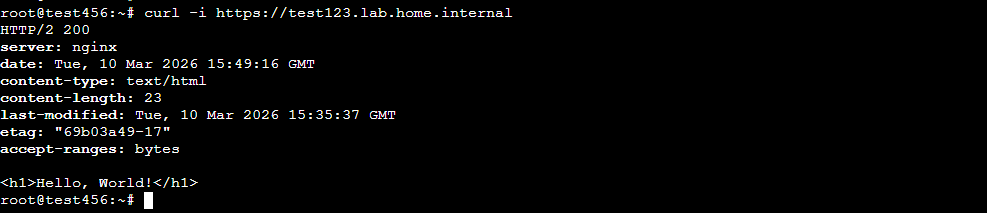
systemctl restart nginxTest Client
curl trusts the TLS connection with the server.curl -k https://sub-ca.pki.home.internal/roots.pem -o /usr/local/share/ca-certificates/home-lab-root.crtSave the Root CA locally
update-ca-certificatesMerge into the system certificate store
curl -i http://test123.lab.home.internal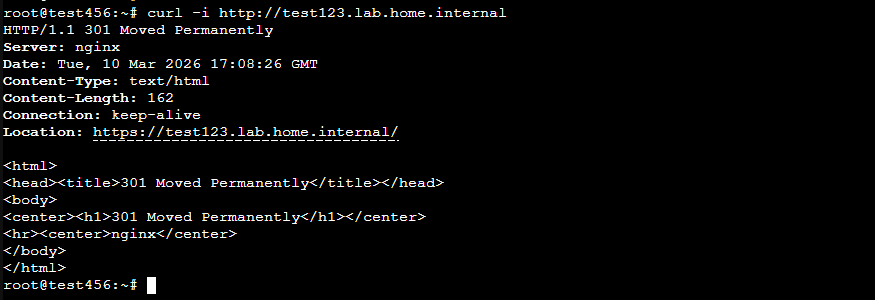
curl -i https://test123.lab.home.internal