Previous Step
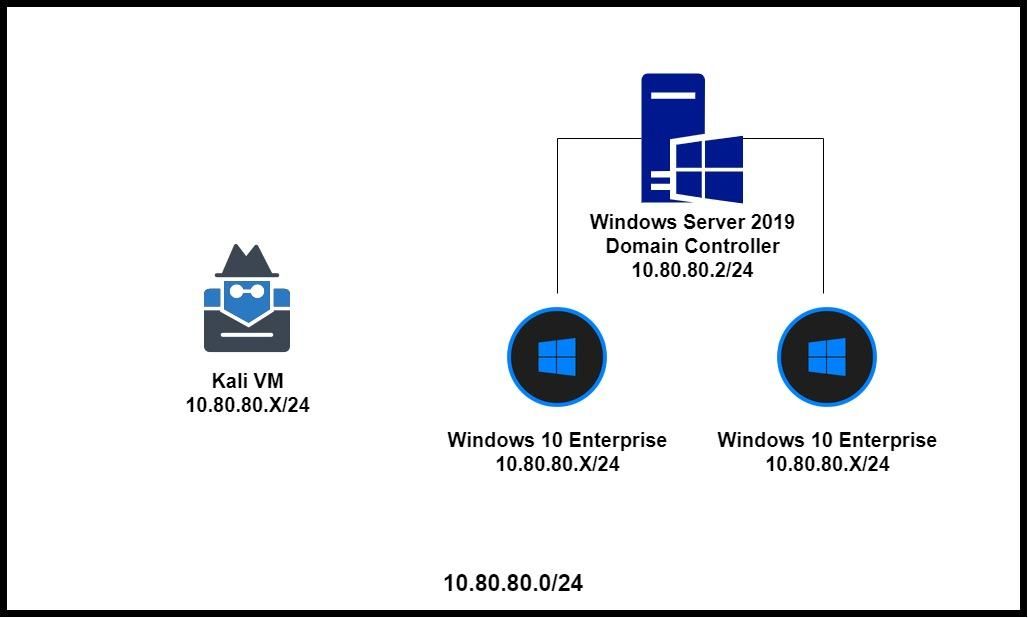
Active Directory Lab Overview
Note: if you don't want your AD lab to have Internet access, modify the firewall rules. I will not be showing you how to do this, as I've already shown you how to craft this kind of firewall rule when first configuring pfSense.
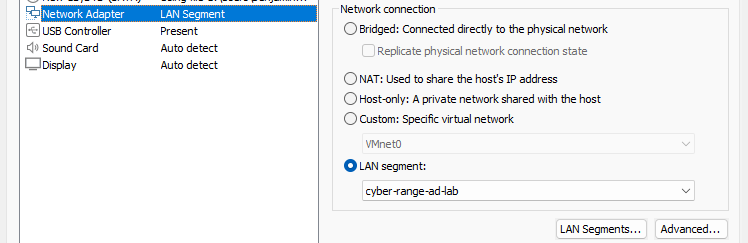
Putting Kali on the Active Directory Network
- Stop the VM
- Go to VMware Workstation settings for Kali VM
- Change the network adapter to be on the
cyber-range-ad-labLAN segment - Start Kali again
To put Kali back on the default LAN, just follow the steps from above, but set it to the cyber-range-LAN LAN segment.
Getting the Windows ISO Files
We will be getting the ISO files from the Microsoft Evaluation Center. Most of the ISOs you encounter here will have a lifespan of 90 -- 180 days of usage. Some say that you can extend beyond the lifespan and the VMs will still function just fine
Windows Server 2025
- Click Download the ISO
- Fill out your information (uncheck the box for additional communications)
- Find your language
- Under ISO – download
- Click the 64-bit edition link
Windows 11 Enterprise
- Click Download the ISO - Window 11 Enterprise
- Fill out your information (uncheck the box for additional communications)
- Find your language
- Under ISO – Enterprise download
- Click the 64-bit edition link
Windows 7
When this page was initially written, these download links — on download.microsoft.com — for Windows 7 were functional. At last check — June 23, 2023 — these links are all dead.
I am leaving the links here in case anyone reading this would like to try and look for them on the Internet Archive.
Windows 7 Ultimate (x64) ISO(dead link)Windows 7 Ultimate (x32) ISO(dead link)Windows 7 Professional (x64) ISO(dead link)Windows 7 Professional (x32) ISO(dead link)


Staging the VMs
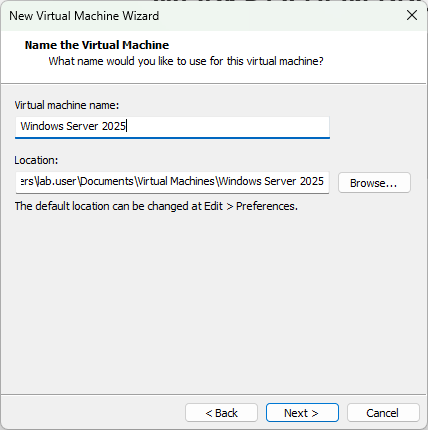
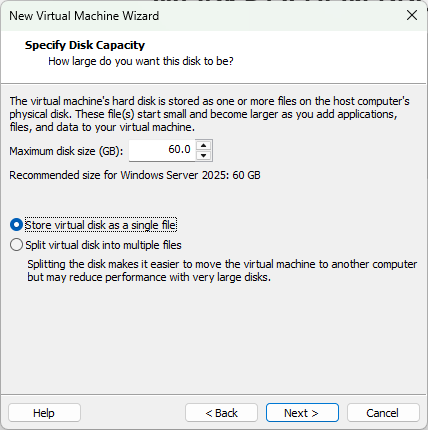
Windows Server 2025
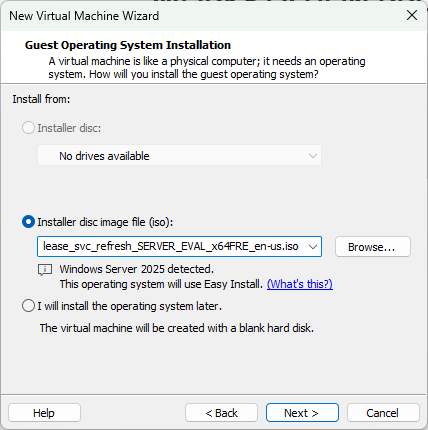
.iso file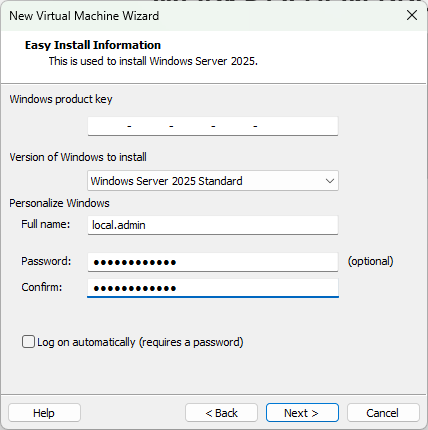
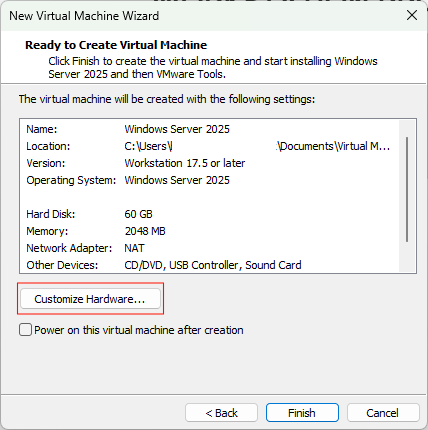
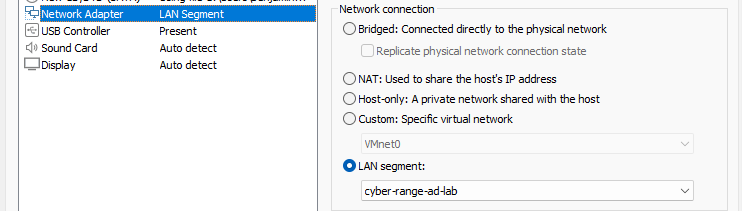
cyber-range-ad-lab LAN segment > Close > Finish
Windows 11 Enterprise Template
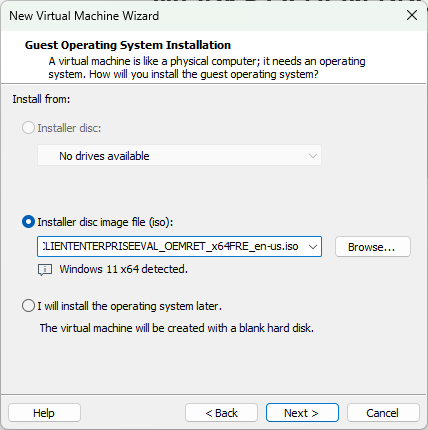
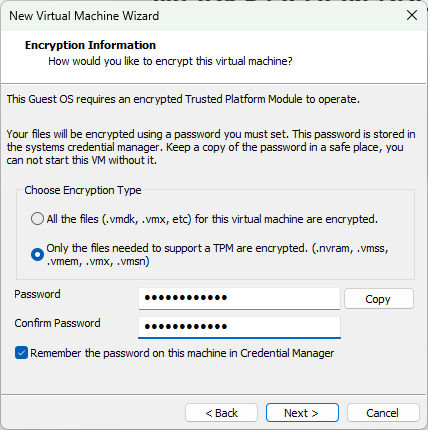
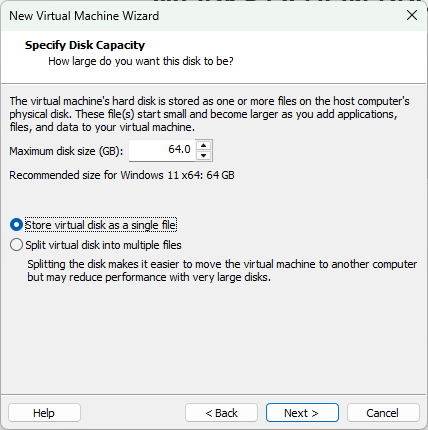
.iso file > Next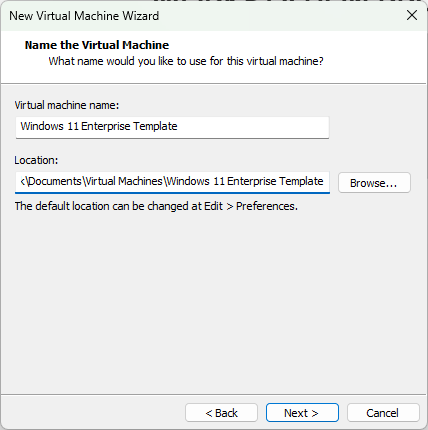
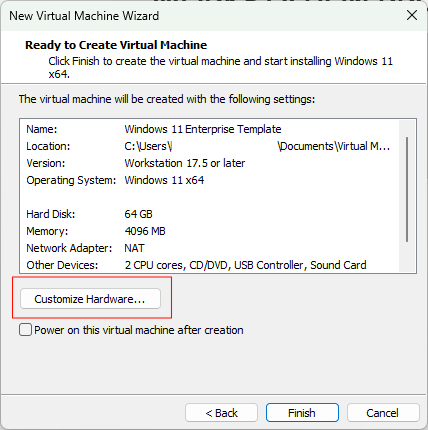
cyber-range-ad-lab LAN segment > FinishInstall the Operating Systems
Windows Server 2025
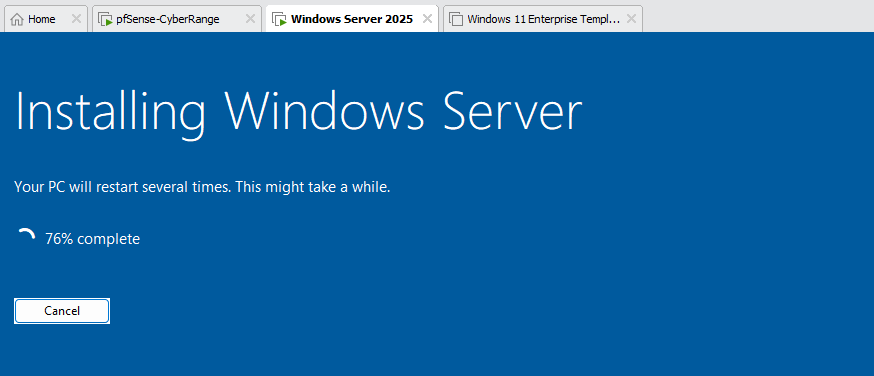
Power on the VM...
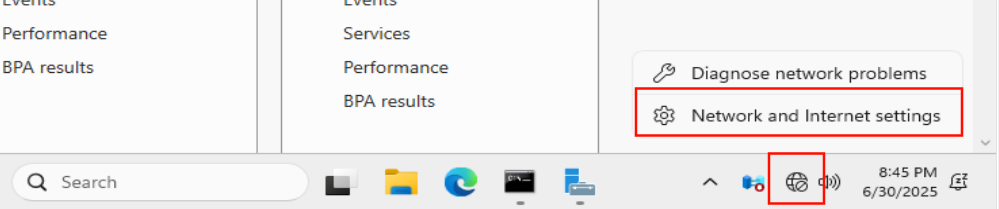
Configure the Network Interface


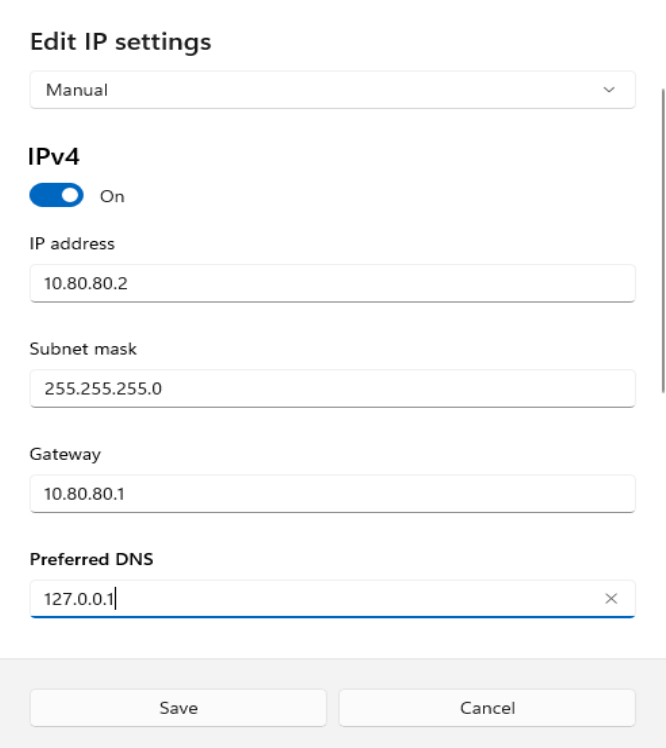
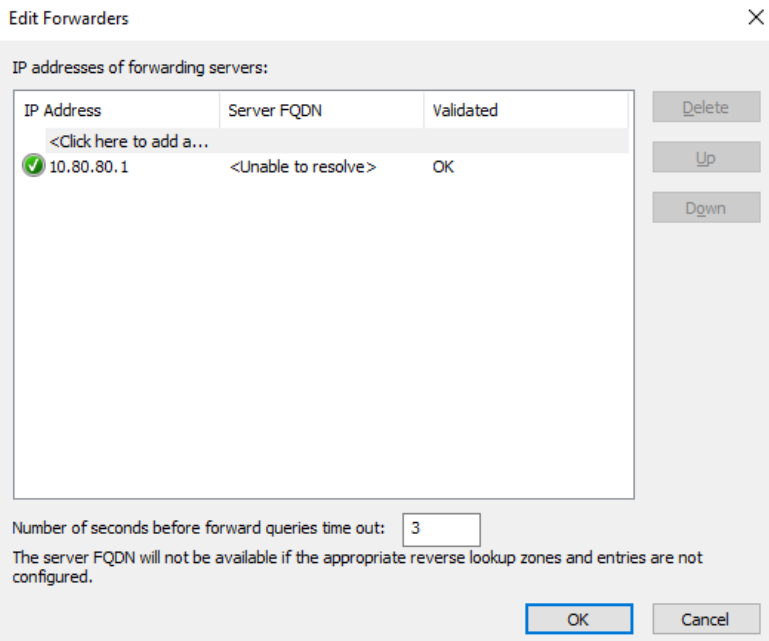
127.0.0.1, because in a moment, when we configure the DNS service, we are going to set a conditional forwarder. The DNS service on this server will be responsible for the
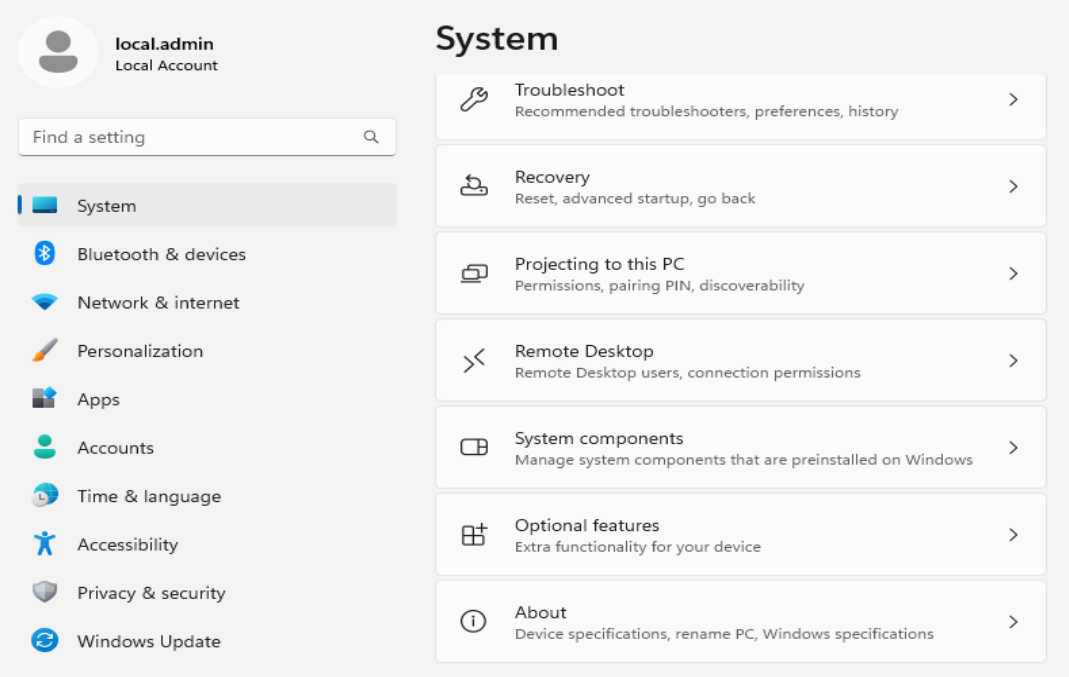
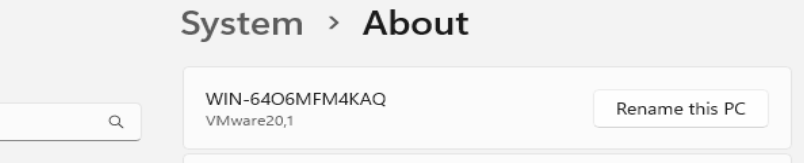
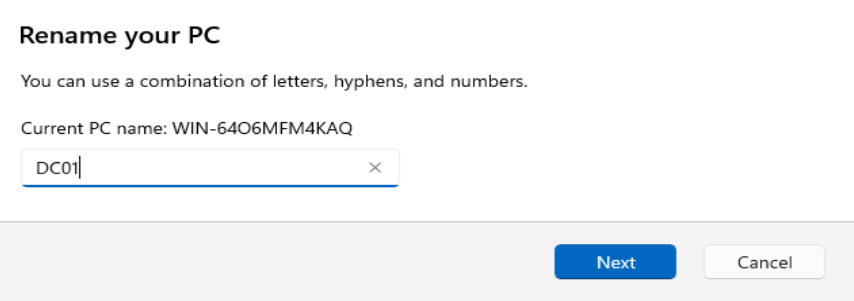
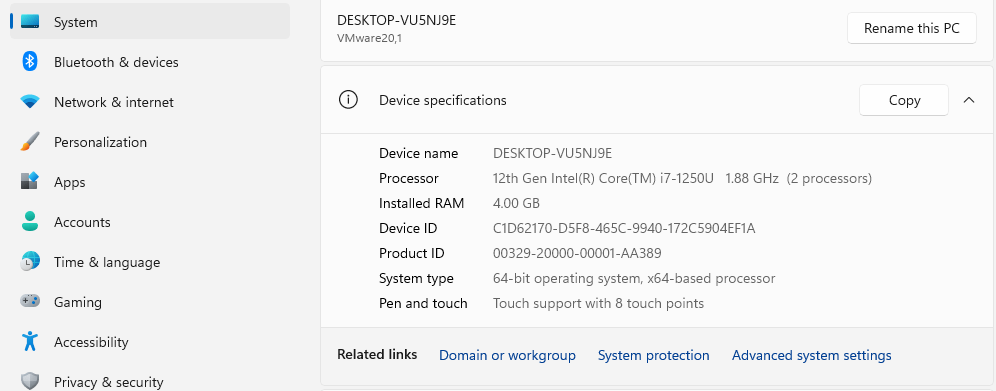
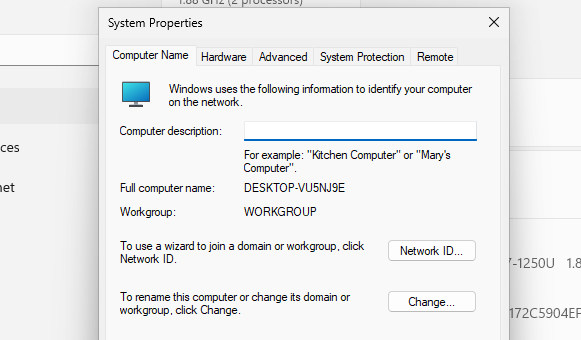
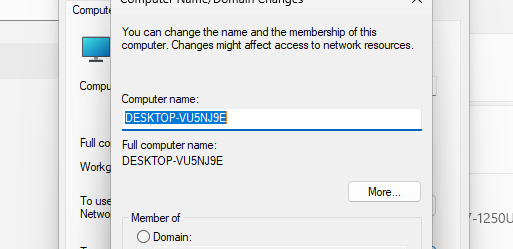
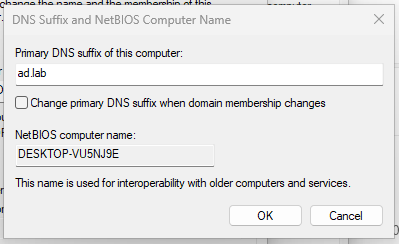
ad.lab domain. Any other domain or host will be forwarded to the DNS resolver on pfSense at 10.80.80.1.Rename the Server
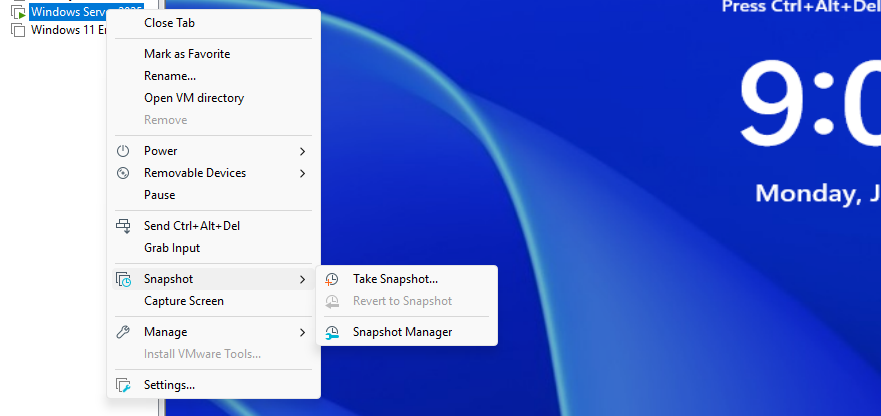
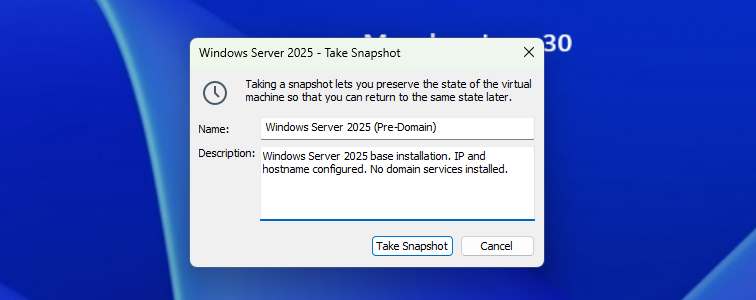
Take a Snapshot of the VM
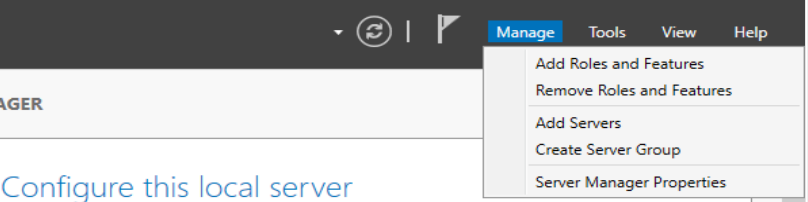
Install and Configure Domain Services
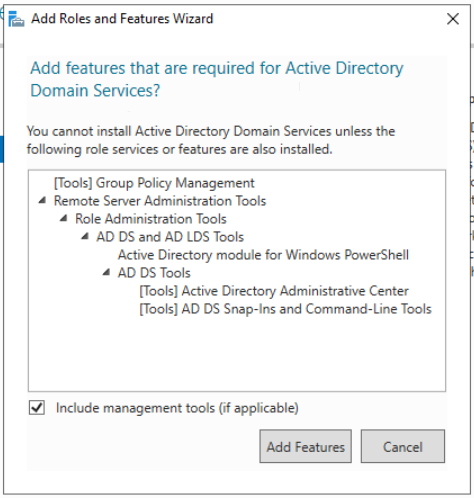
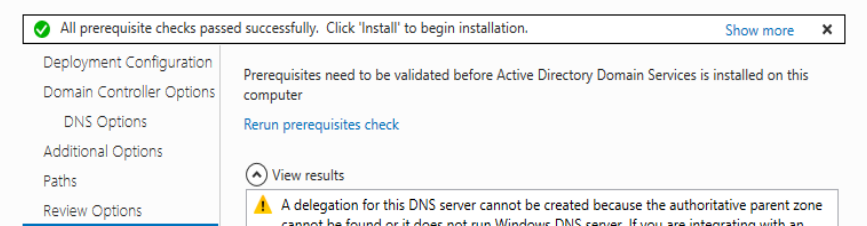
Install Active Directory Domain Services
Click Next > Next > Next until you reach the Server Roles tab...
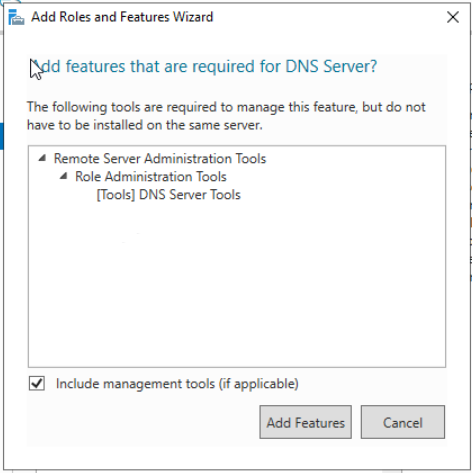
Click Next > Next > Next > Next ...
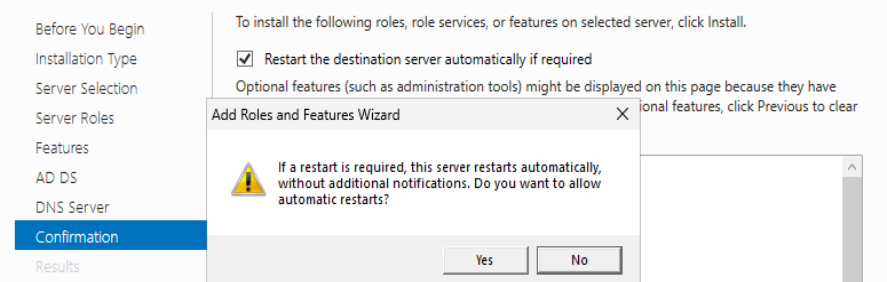
Configure Domain Services
If you checked the box to automatically reboot during installation, you should now be sitting at the Server Manager dashboard.


ad.lab.lab top-level domain (TLD), as this is not likely to have any collisions with real domains at more common TLDs such as .com, .org, .net, etc. Using the .local domain is not recommended, as this can interfere with multicast traffic.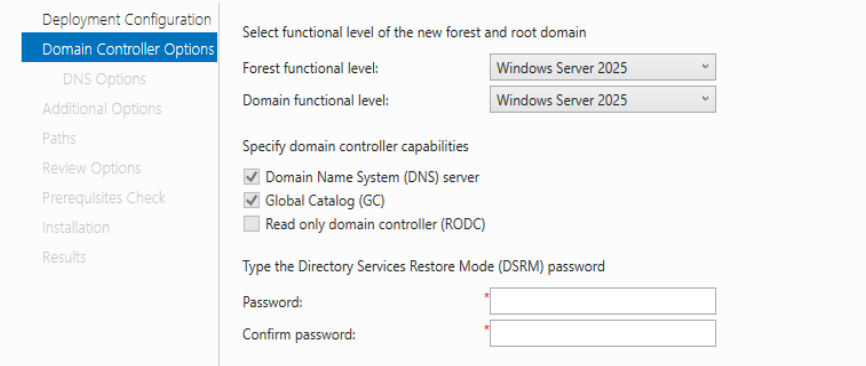


Click Next > Next > Next ...
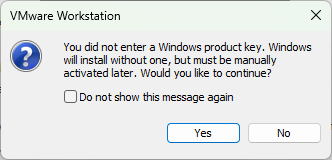
If you see the screenshot below, this is most likely because the VMware Easy Installer does not set a password for the local "Administrator" account...

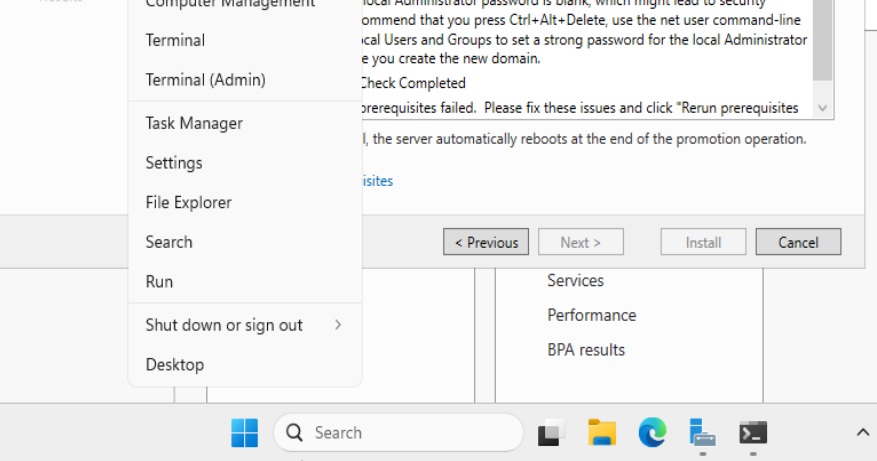
net user Administrator 'P@$$word123!'

Configure Active Directory Certificate Services
Click Next > Next > Next until you reach the Server Roles tab...
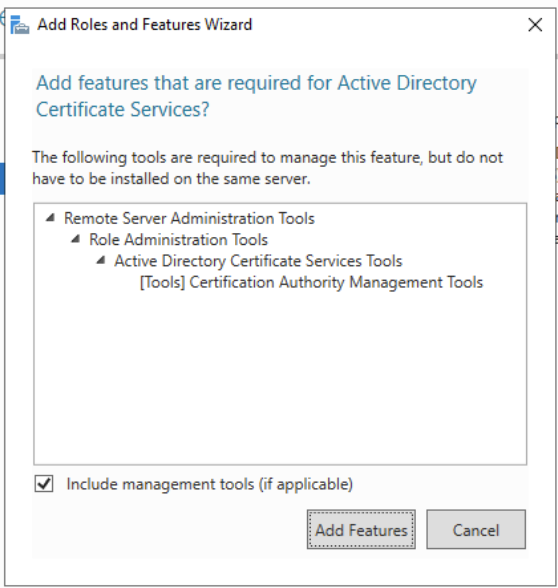
Click Next > Next > Next...

Click Next > Install. When the installation is complete, it's time to configure the service.


We're just going to accept all of the default options in the next steps. Click Next > Next > Next > Next > Next > Next > Next > Configure.
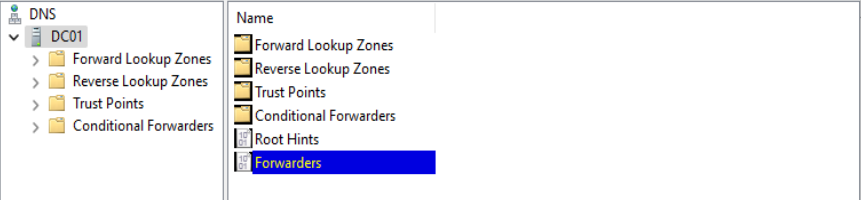
Configure DNS Service
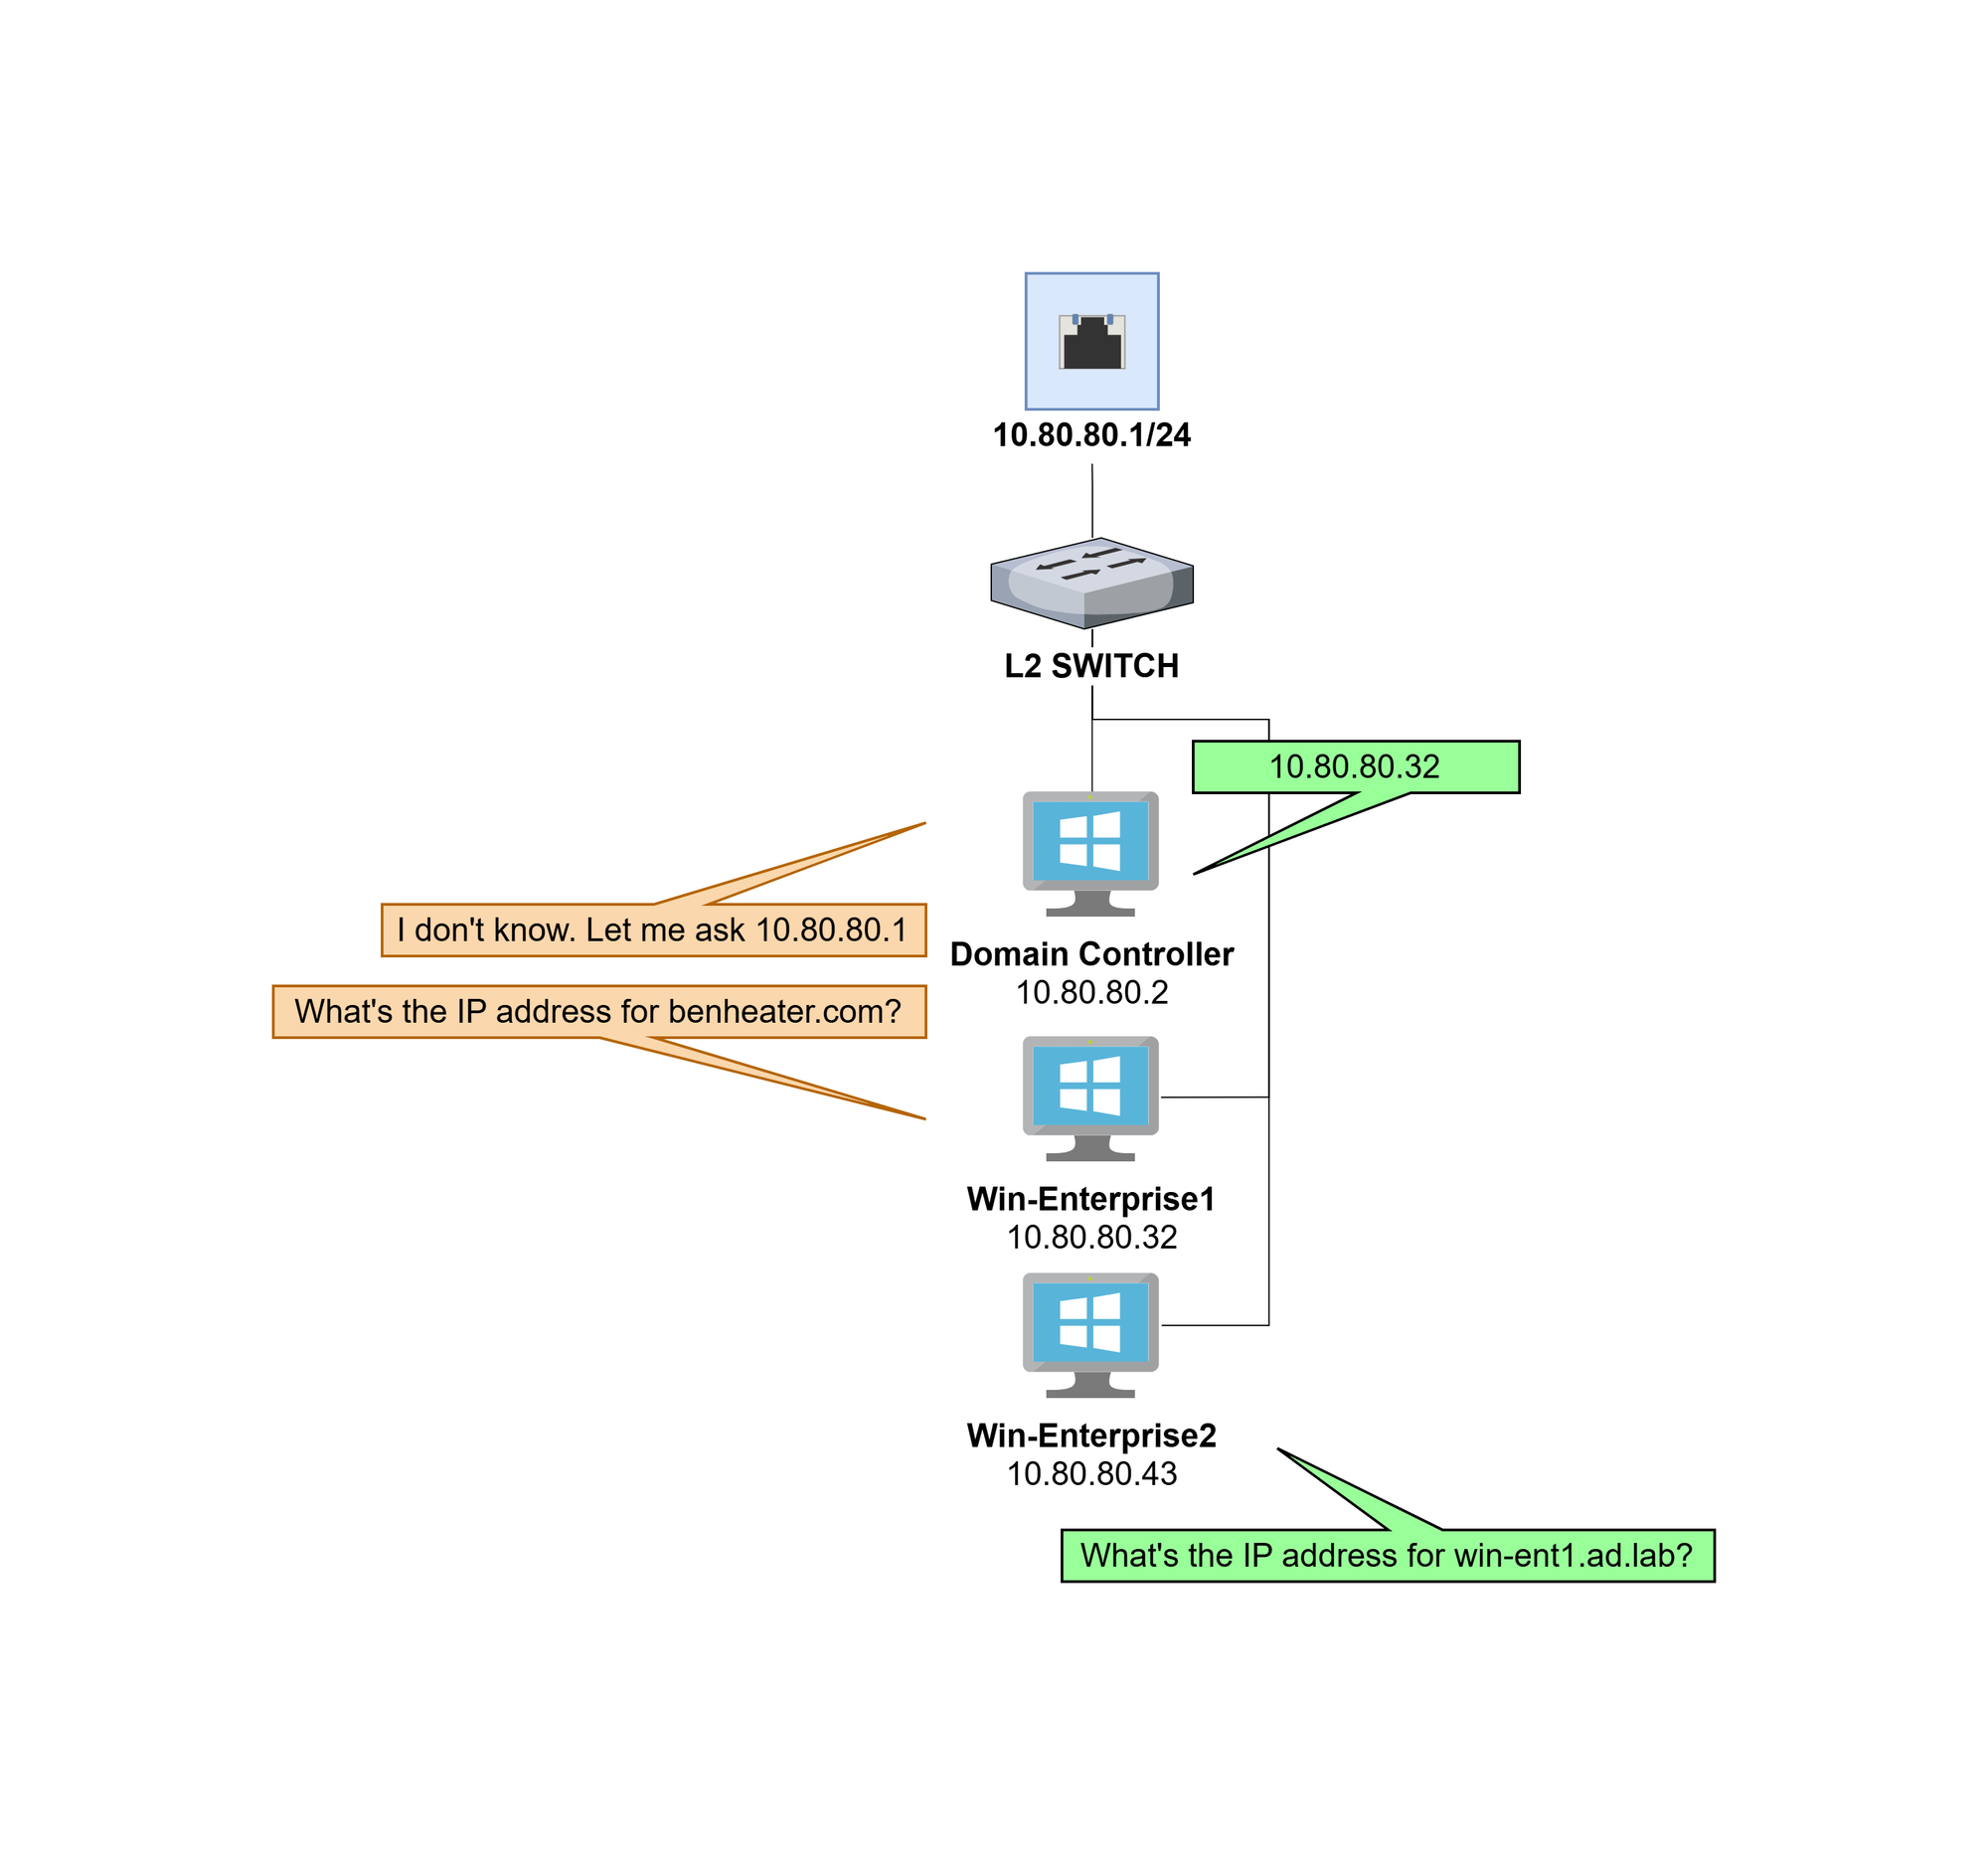
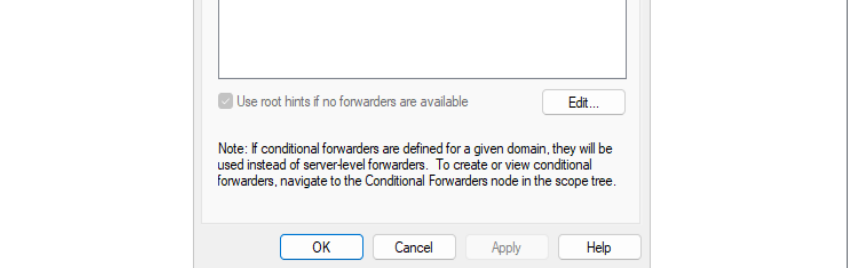
The DNS server running on the domain controller will act as a resolver for the ad.lab domain (or whichever local domain you chose). We need a forwarder for any DNS query for which the DNS server does not know the answer.
We can use the pfSense default gateway as a downstream DNS server that the domain controller can pass queries to for any unknown hostnames.

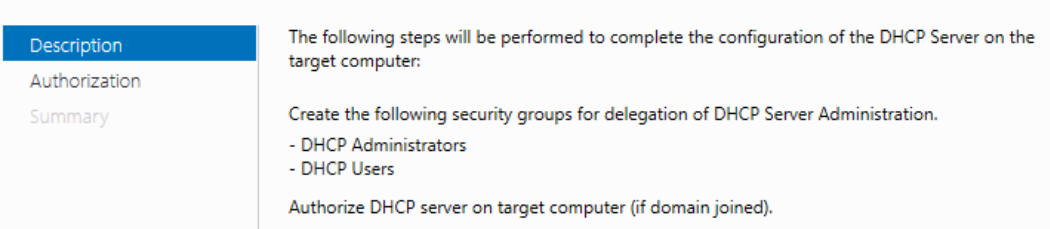
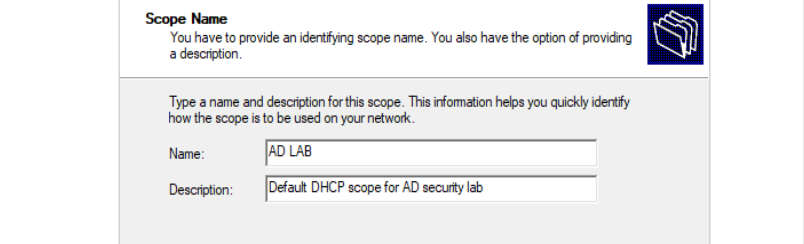
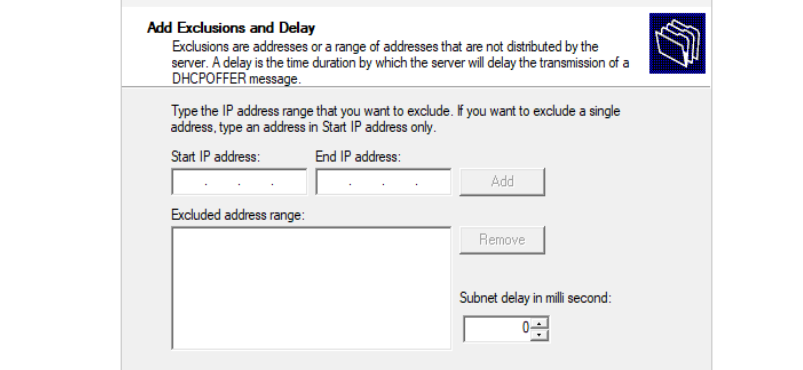
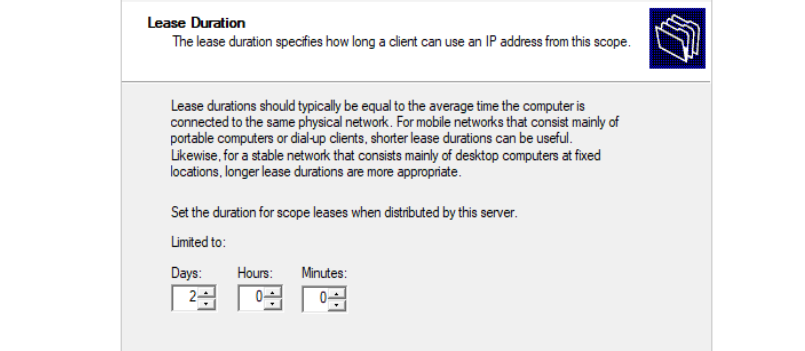
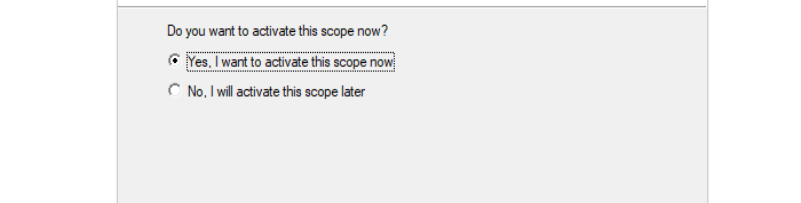
Configure DHCP Server

Click Next > Next > Next until you reach the Server Roles tab...
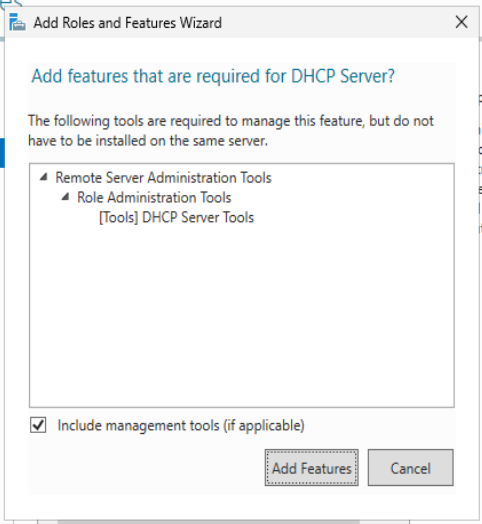
Click Next > Next > Next > Install...


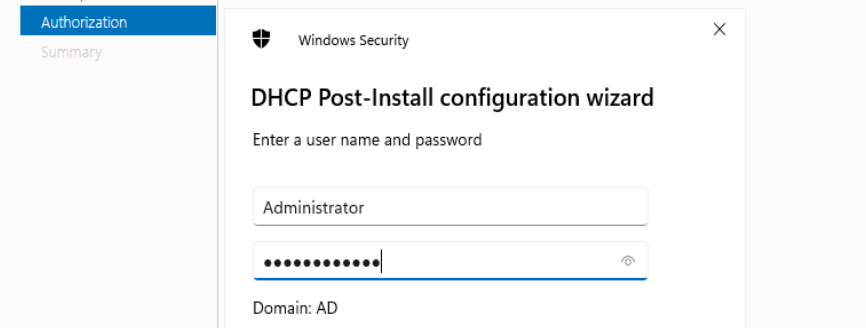

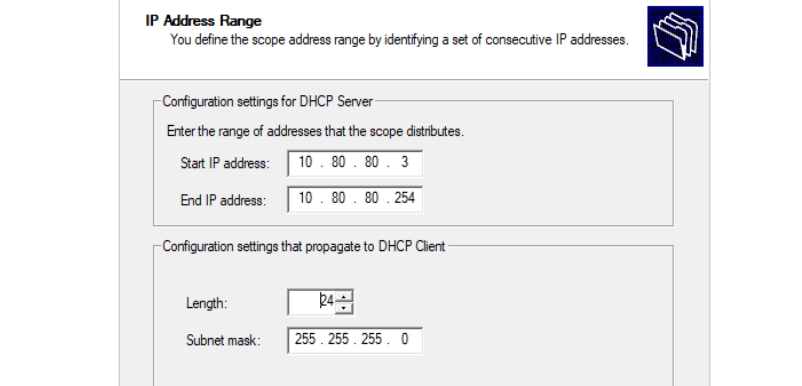
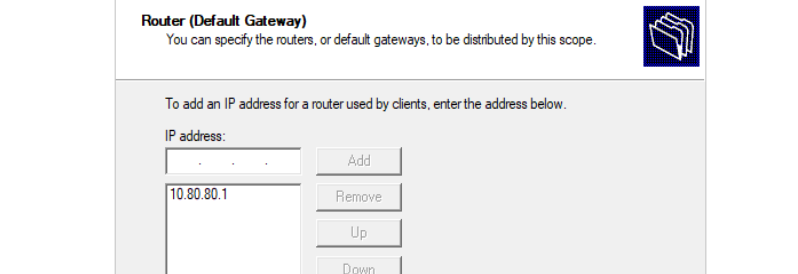
10.80.80.1 > Add > Next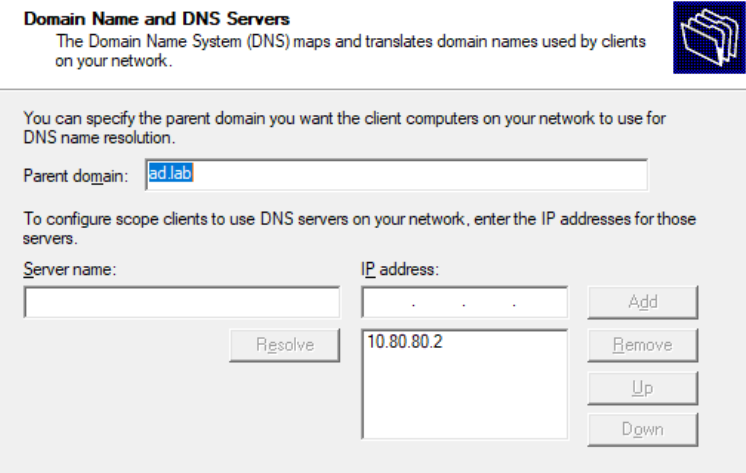
Create User Accounts
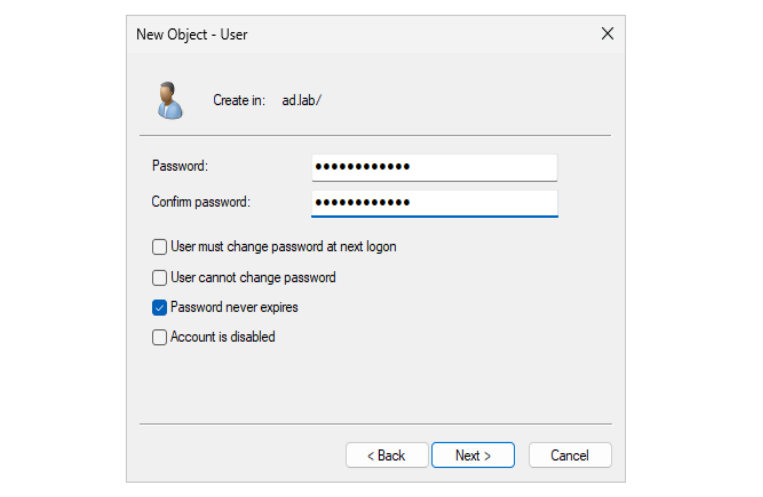
Domain Administrator
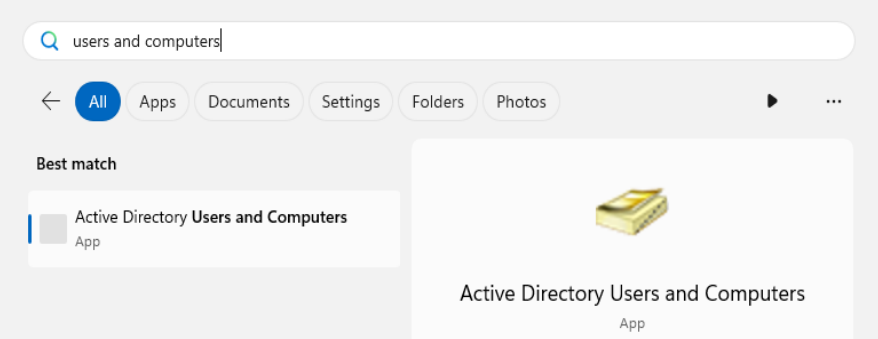
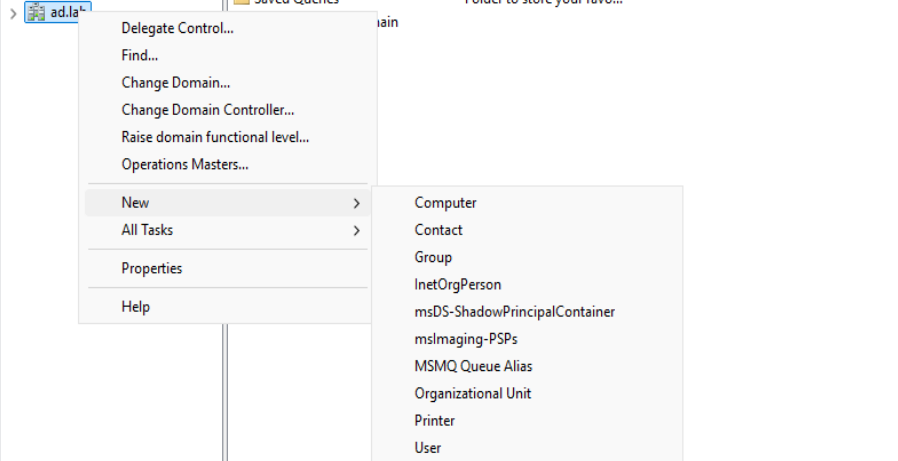
ad.lab > New > User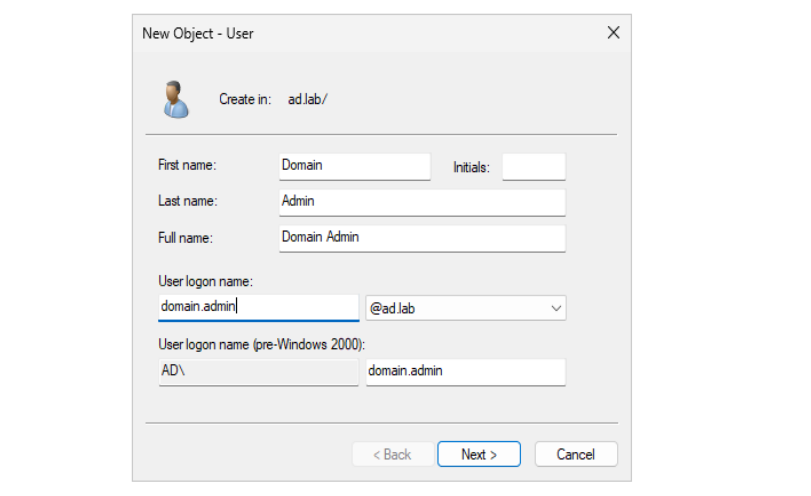
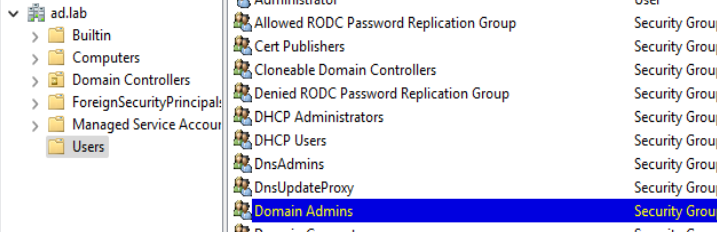
ad.lab > Users > double-click Domain Admins > click "Add"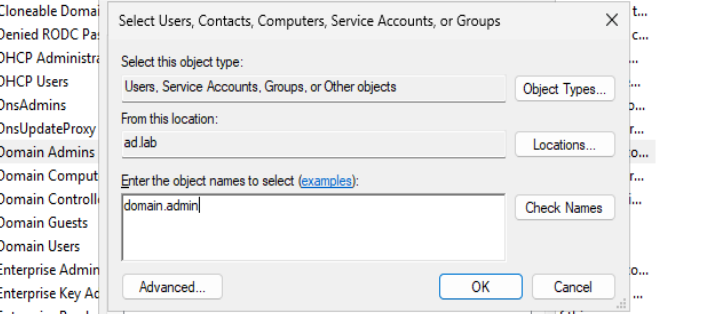
domain.admin > Click "OK"Domain Users
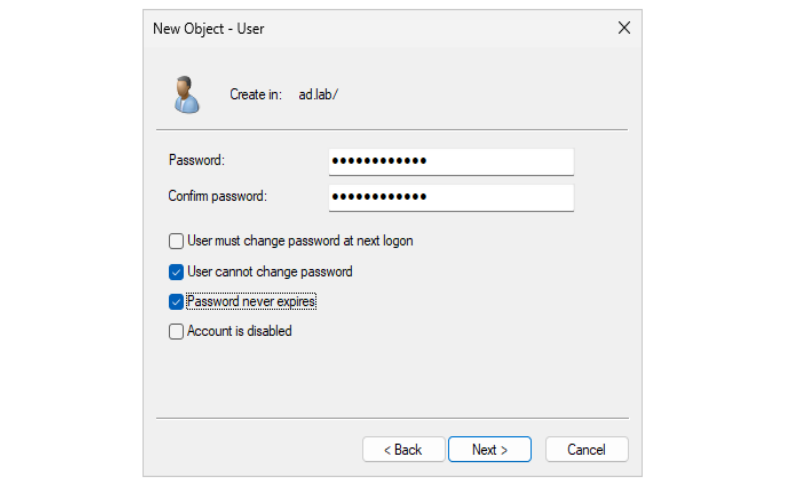
John Doe
ad.lab > New > User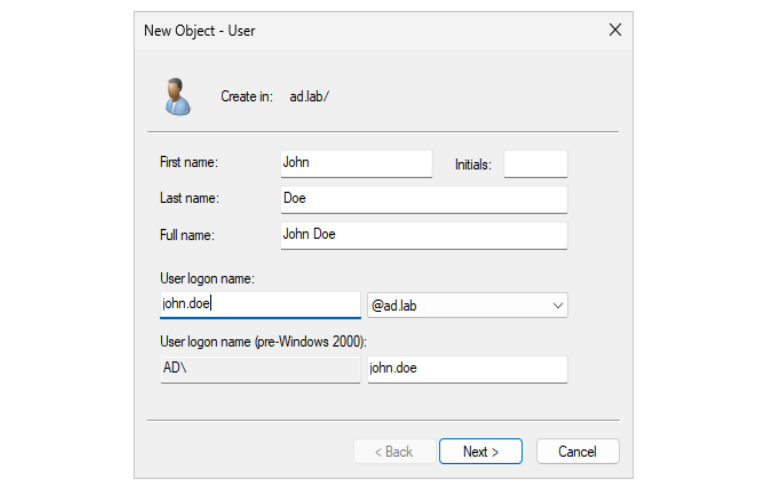
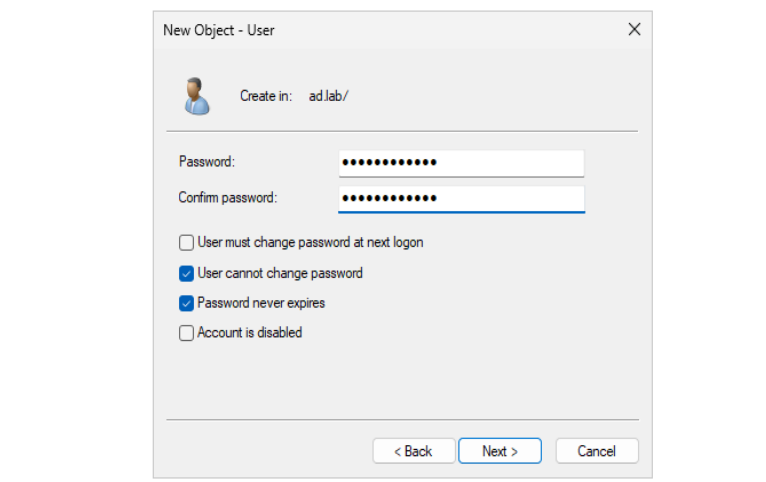
Jane Doe
ad.lab > New > User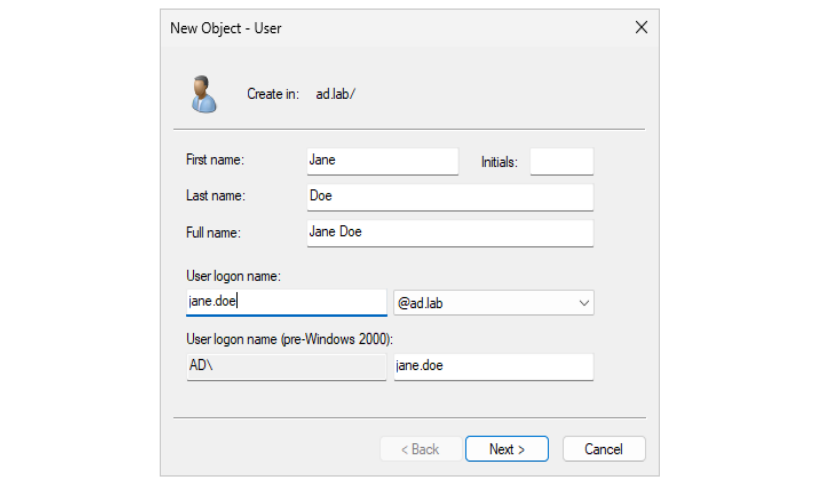
Windows 11 Enterprise Template
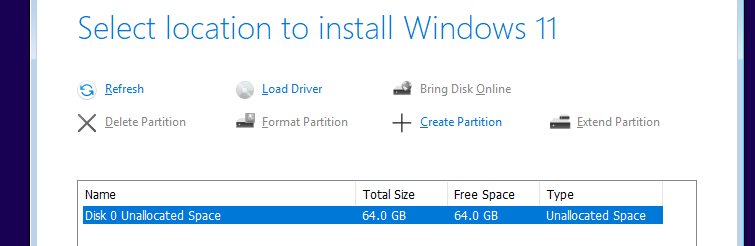
Install Windows 11 Enterprise
Power on the VM ...

.iso file, use CTRL + ALT to free your mouse


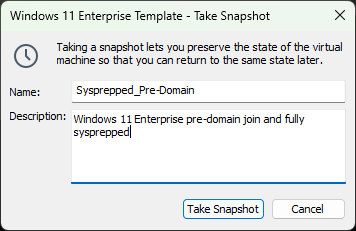
Sysprep the Template
sysprep to create a template VM, so that when we clone the VM, the Windows systems will always have a unique SID when joining to the domain.The installation process should now be complete and you should be able to log in using the username and password you set during the installation.

C:\Windows\System32\Sysprep\sysprep.exe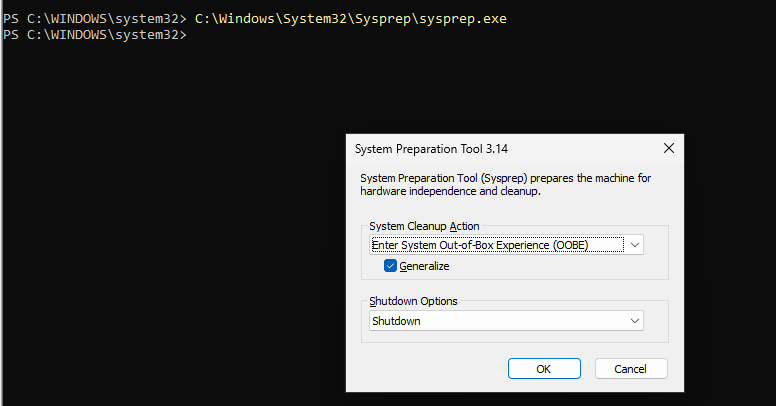
sysprep process complete until the VM shuts down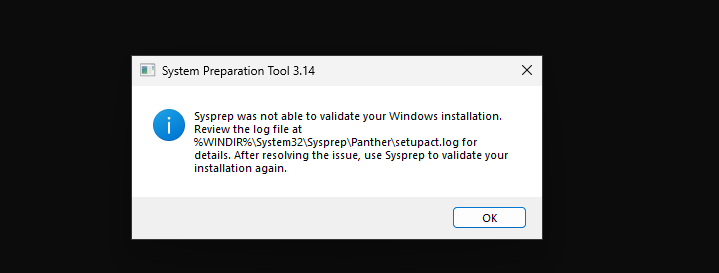
sysprep, use notepad to view the file setupact.log and find what's causing the issue.notepad C:\Windows\System32\Sysprep\Panther\setupact.logWe can see the "ERROR" logs at this particular point of the file. sysprep was unable to remove a package during the process and terminated. Let's see if we can manually remove it and try again.
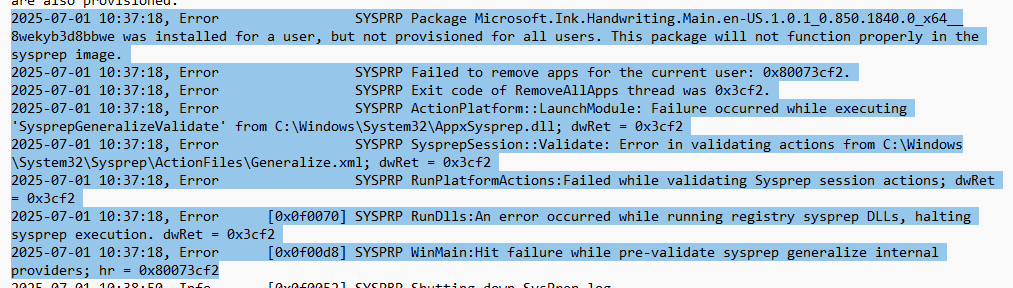
Get-AppxPackage -AllUsers -Name 'Microsoft.Ink.Handwriting.Main*' | % {Remove-AppxPackage -Package $_.Name -AllUsers}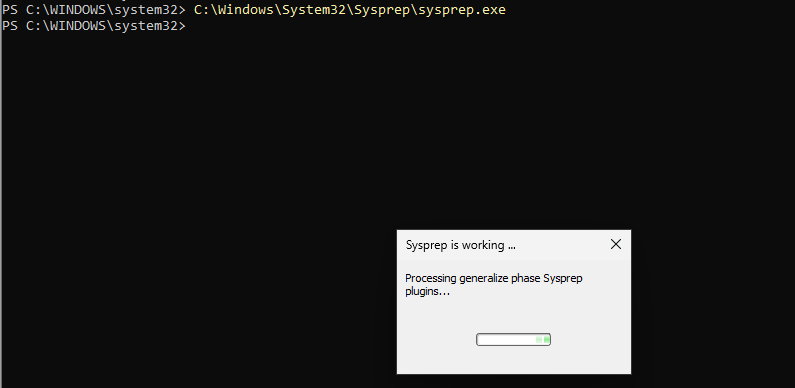
sysprep has no problems generalizing the image and the VM shuts down when complete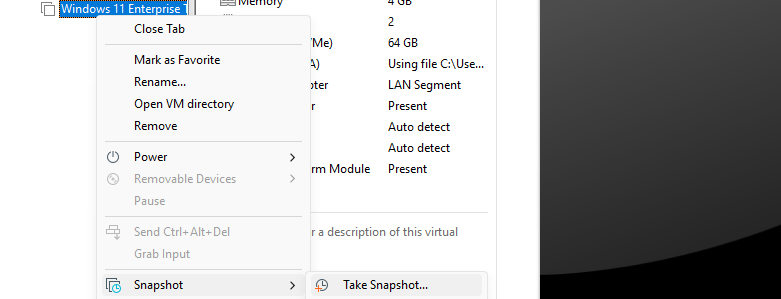
Joining Windows 11 PCs to the Domain
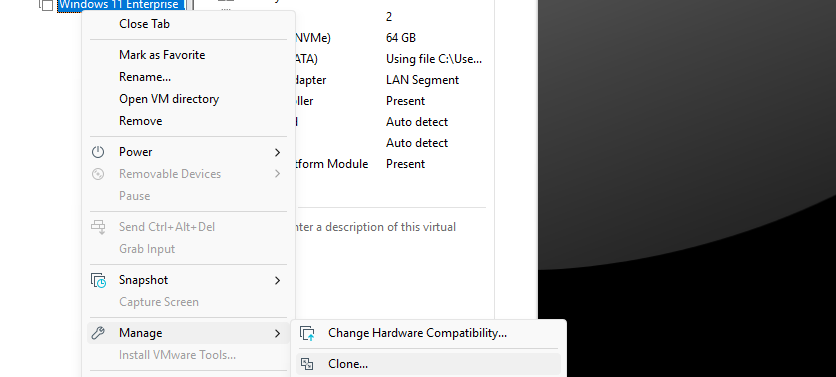
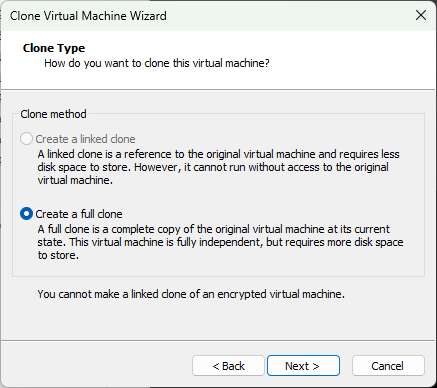
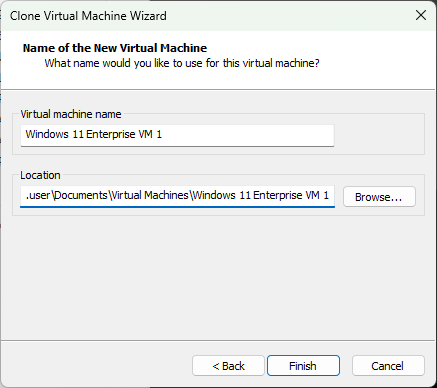
Create the Cloned VMs
Windows Enterprise 11 VM 1

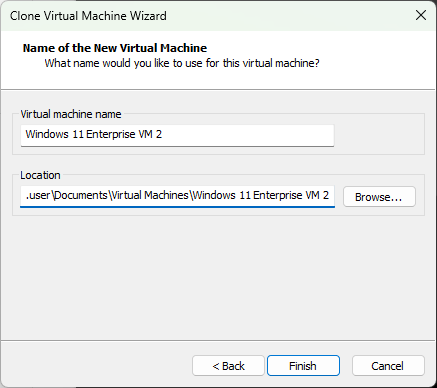
Windows Enterprise 11 VM 2
Repeat the process shown above and create one more clone....
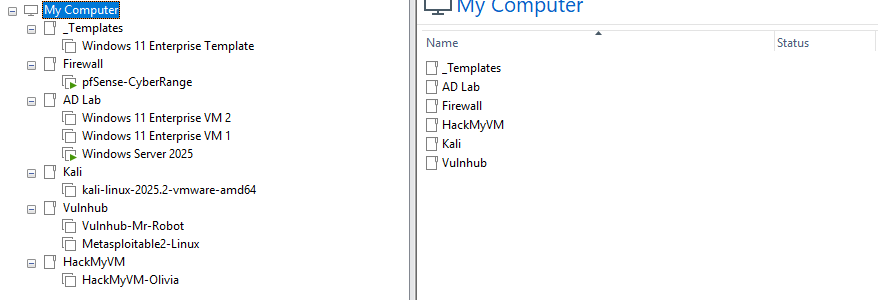
Keeping Things Organized
Now's as good a time as any to begin categorizing our VMs to keep things tidy. We can use the VMware Workstation "folders" feature to sort things out.
Join the PCs to the Domain
Windows 11 Enterprise VM 1
Out-of-Box-Experience (OOBE) when running sysprep on the template — which is the correct choice — we are required to run the through the Windows setup again as a newly issued computer.This is essentially the same thing as receiving a newly imaged Windows computer from your employer and joining it to the local domain.
Go ahead and power on the VM ...
Like you did with the template, make your selections:
- Language
- Region
- Keyboard


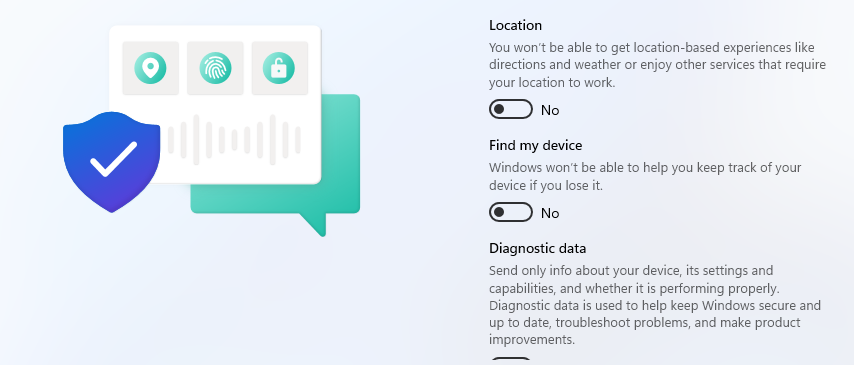
Then, as done previously, disable the selections in the privacy settings. Finally, wait for Windows Updates to finish and you should be directed to the Windows desktop.
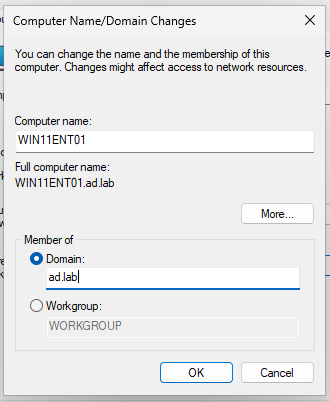

domain.admin credentials created before to approve the domain join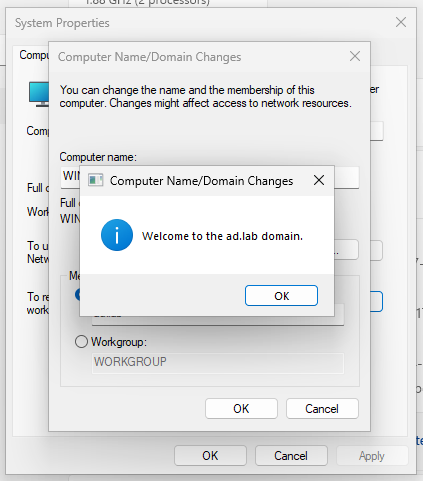
Windows 11 Enterprise VM 2
Follow along with the procedure demonstrated just above to join the second Windows 11 Enterprise VM to the domain.
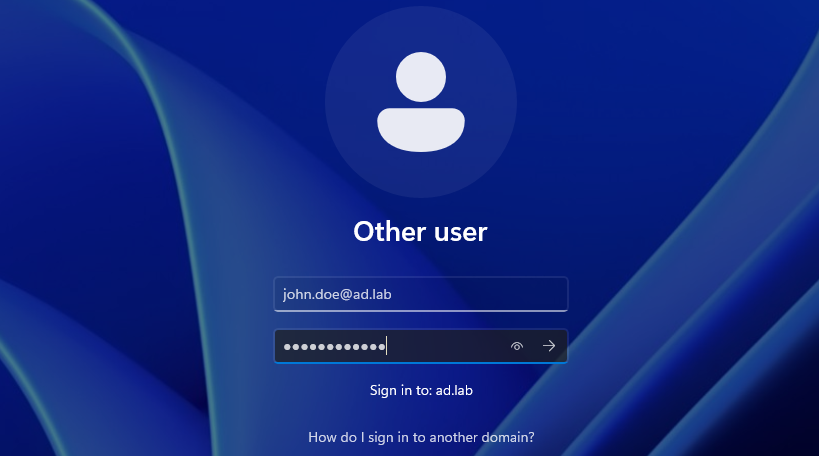
Test Domain User Login
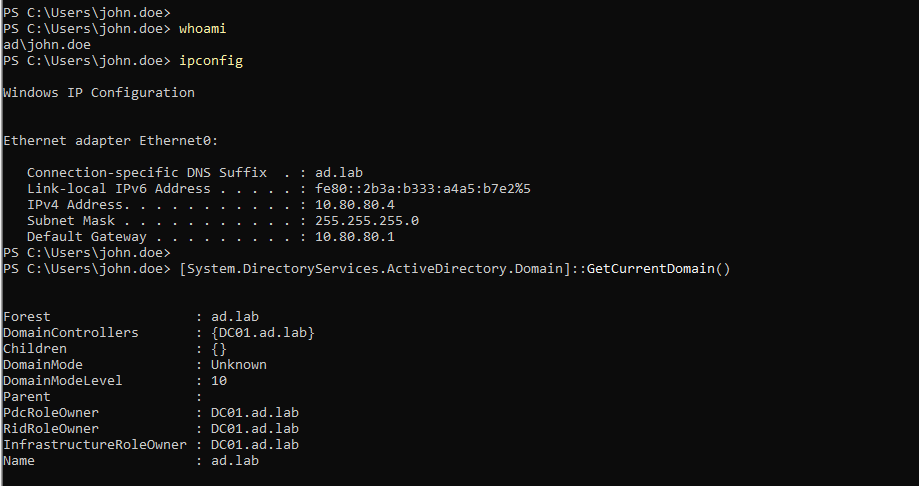
Active Directory Setup Complete
Congratulations! You now have a small Active Directory forest consisting of one domain controller and two Windows 11 Enterprise clients joined to the domain.
If things seem a little sluggish on any of the VMs, you may need to increase the RAM and / or CPU resources.
Start of Authority (SOA) for the ad.lab local domain. If you are having trouble resolving computer hostnames to IP addresses, compare what is in DNS with what is in the DHCP pool.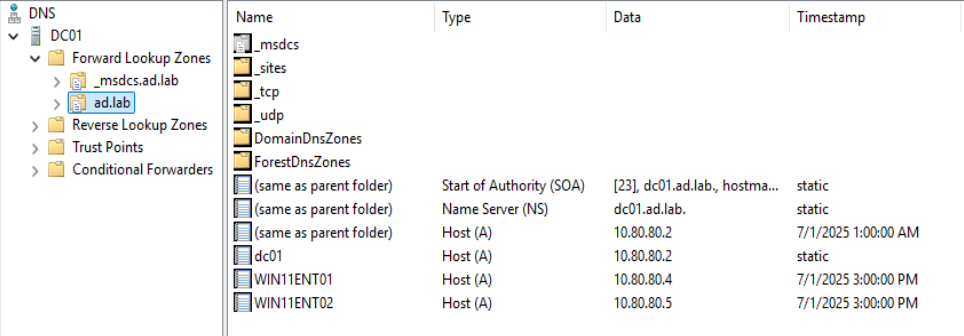
ad.lab Forward Lookup Zone in DNS app on DC01 shows A records for domain-joined hosts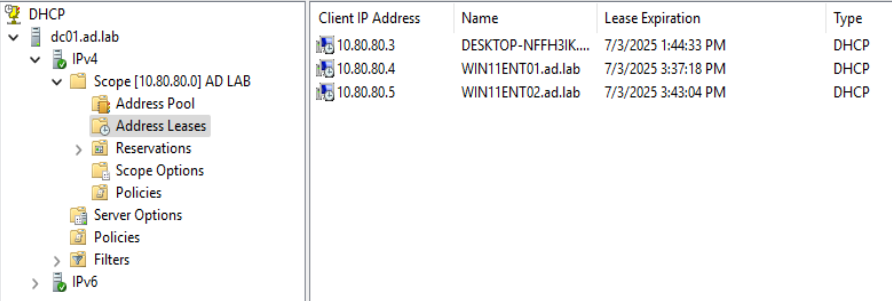
Starting with a Clean Slate
If you want to roll back your Active Directory lab to the very beginning, run these steps in this order:
- Power off the Windows Server 2025VM and both Windows 11 Enterprise VMs
- Delete both Windows 11 Enterprise VMs
- Roll back to the pre-domain snapshot of the domain controller we took before
- Follow the steps to re-provision the
ad.labdomain, the DNS server, and the DHCP server - Clone the Windows 11 Enterprise Template as many times as needed
- Join your clients to the domain
Next Step
A lot of the attacks you'll see in this next section have a lot of overlap with what's in TheCyberMentor's "Practical Ethical Hacking" course. Just bear in mind that your environment and his environment will have different domain names, usernames, etc. But, the substance is in the methodology.