This page is part of the larger series of converting an old laptop into a bare metal home lab server. Click the link to be taken back to the original post.

The Datacenter
In the side panel, you will see:
Datacenter
|
|____Proxmox Node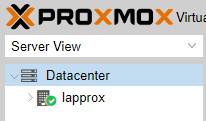
The Datacenter is an overview of any Proxmox nodes you have. You can have one or many nodes under the datacenter. If you have two or more nodes in the datacenter, this is known as a cluster.
The Node
This is where all the fun happens. This is where our virtual machines and containers will reside.

Here we can see:
local
- This is where the Proxmox OS is installed
- This is also where ISO images, VM snapshots, and container templates will reside
local-lvm
- This is where virtual disks for our containers and VMs will reside
I have seen some people recommend deleting local-lvm and putting everything in local. This is not a good idea, as we should not intermingle VM and container data with OS data. That is why we took the extra steps of configuring the disk partitions in the Proxmox installation steps.
Updating the Container Database
Open the Shell

Run this command:
pveam updateDownloading Container Templates
Go to local > CT Templates > Templates

Choose a template and download
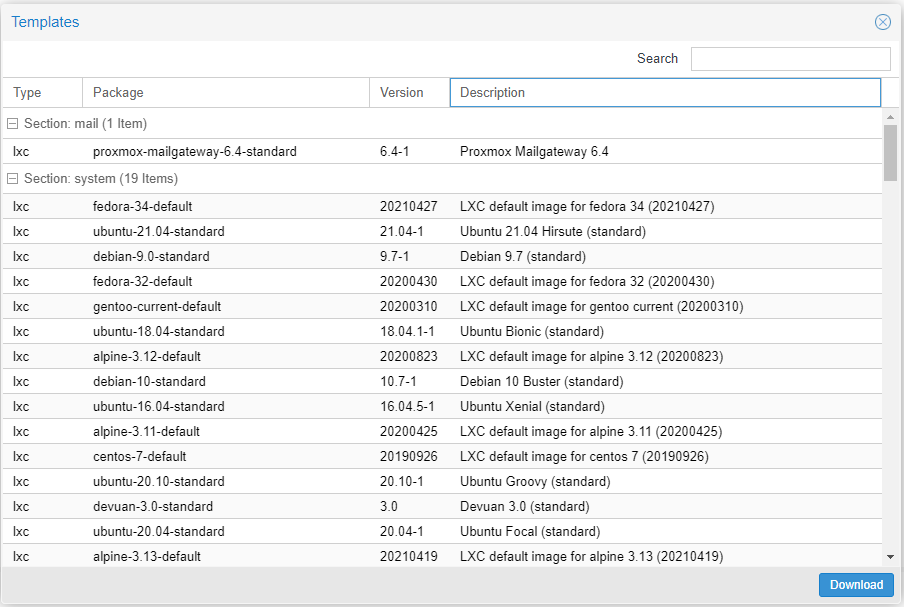
You can now use this template when creating containers
Creating Containers (LXC)
You can click the Create CT button in the top-right. Or, you can right-click the Proxmox node and click Create CT.
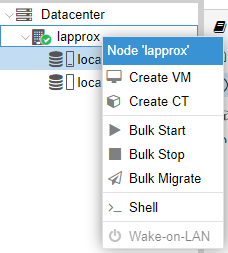
Wait… LXC?
I wrote LXC (Linux Containers) here for a reason. THIS IS NOT DOCKER!
You can run docker inside a Proxmox VM, but that is a different thing entirely. Learn the difference between Docker and LXC.
Step 1
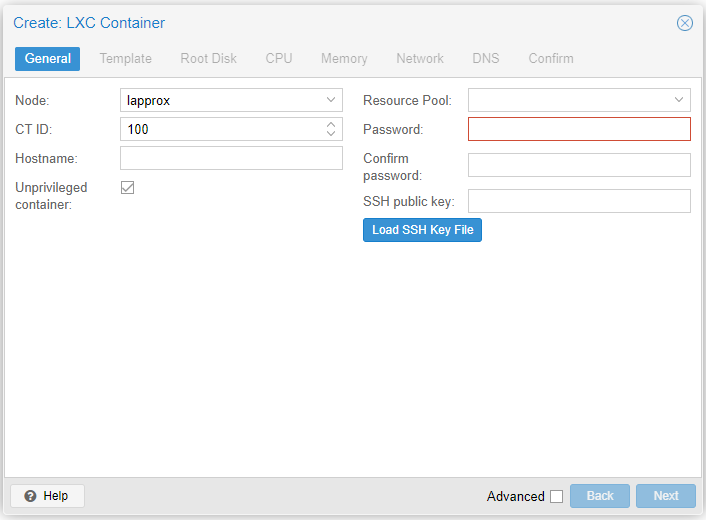
- Node: The target Proxmox node
- CT ID: The numerical container ID
- Hostname: The friendly name of the container
- Unprivileged Container: You should almost always use unprivileged containers
- Resource Pool: Ignore this
- Password: Use this password to login and SSH
- SSH public key: You can paste your SSH public key (you can use along with password)
Step 2
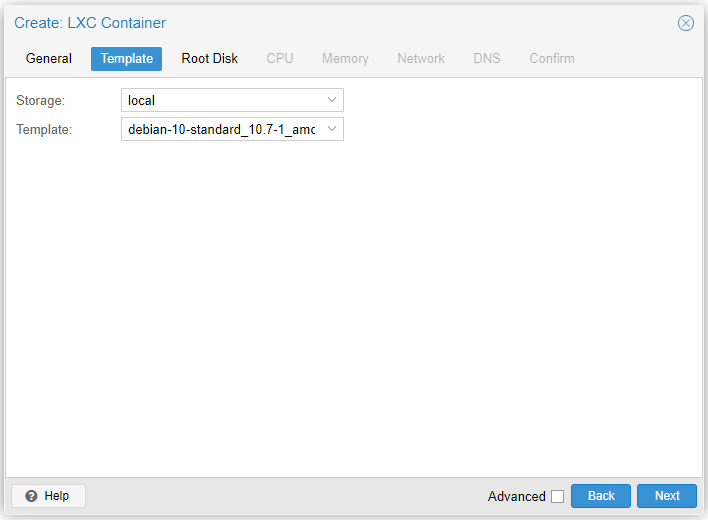
- Storage: Remember container templates are stored in local
- Template: Choose any of the templates you have already downloaded
Step 3
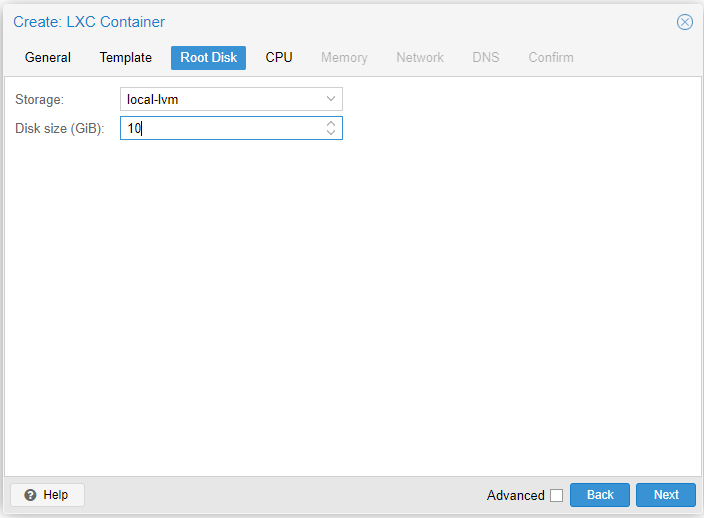
- Storage: Remember container disk are stored in local-lvm
- Disk size: In most cases 10 GiB is sufficient
Step 4
Specify the number of CPU cores. Typically 1 core will suffice.
Step 5
Specify the Memory and Swap. In most cases 512 – 1024 MiB will suffice.
Step 6
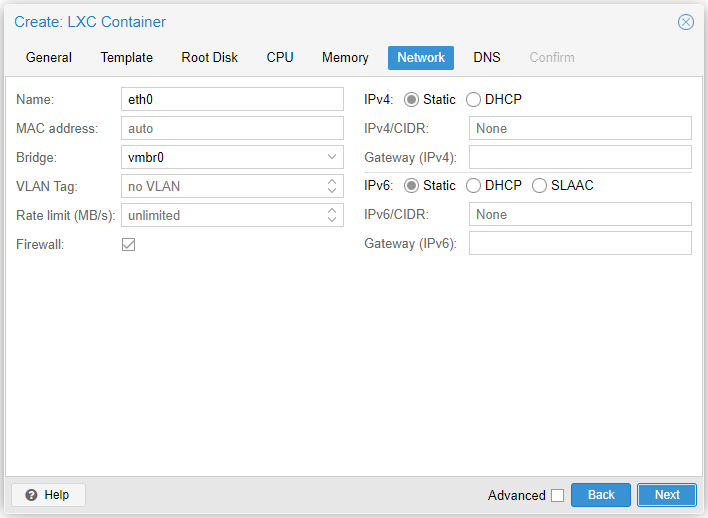
- Name: Name of the interface.
eth0is fine. - MAC address: Leave at auto unless you want to specify otherwise
- Bridge: The switch it will be plugged into
- VLAN Tag: Any VLAN tag
- Rate limit (MB/s): You can ignore this
- Firewall: Uncheck this, unless you are using Proxmox’s internal firewall.
- IPv4: Set to DHCP
- IPv6: Set to Static and leave at None
Step 7
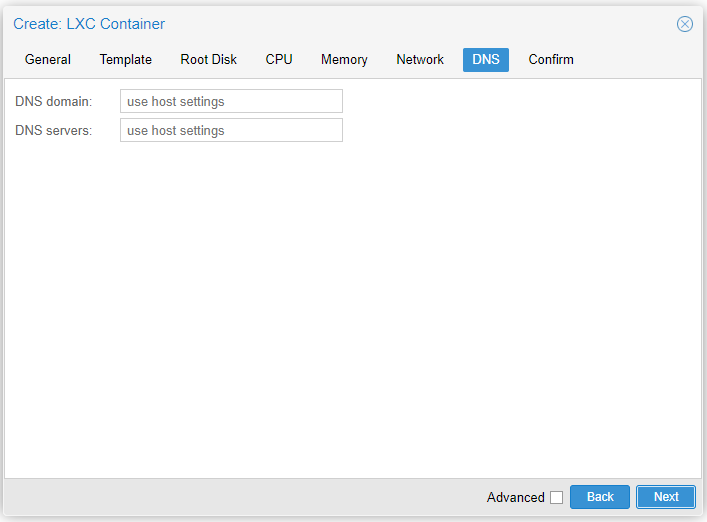
- DNS domain: Leave empty unless desired otherwise
- DNS servers: Leave empty unless desired otherwise
Step 8
Confirm settings and finish
Uploading ISO Images
Click on your local partition. Then, go to ISO Images > Upload.

Creating VMs
You can click the Create VM button in the top-right.

Or, you can right-click the Proxmox node and click Create VM.
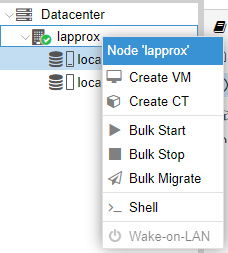
Step 1
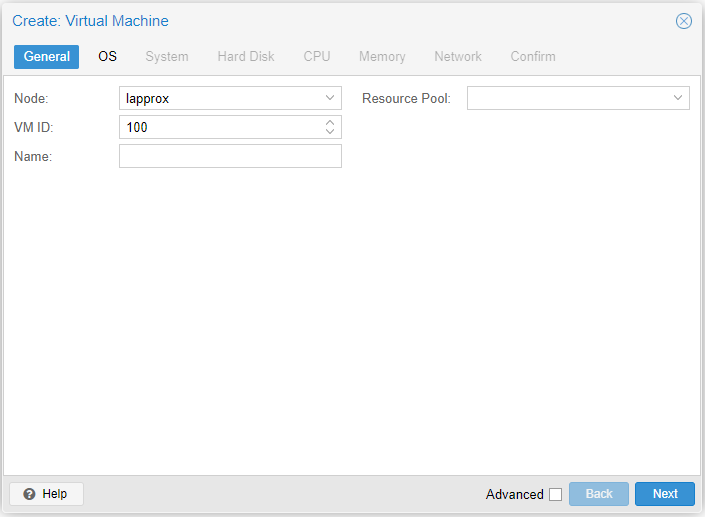
- Node: Target Proxmox node
- VM ID: Numerical ID of the VM
- Name: Friendly name of the VM
- Resource Pool: You can ignore this
Step 2
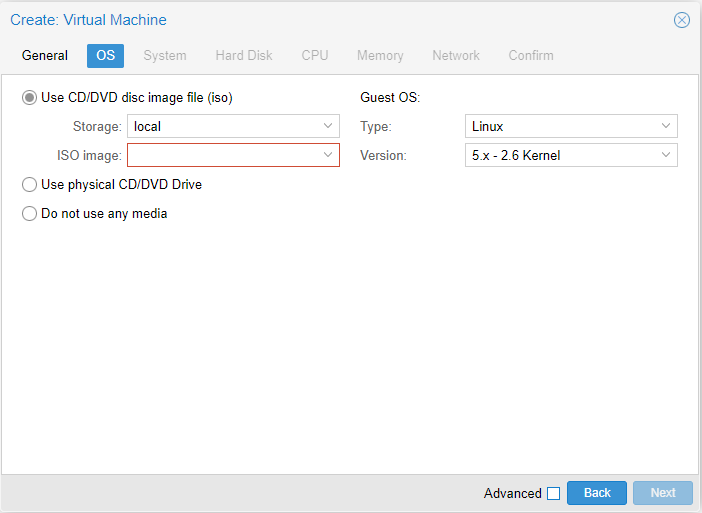
- ISO Image: Use an ISO you have uploaded (remember ISOs are stored in local)
- Guest OS:
- Choose an OS type
- Choose a kernel or version
Step 3
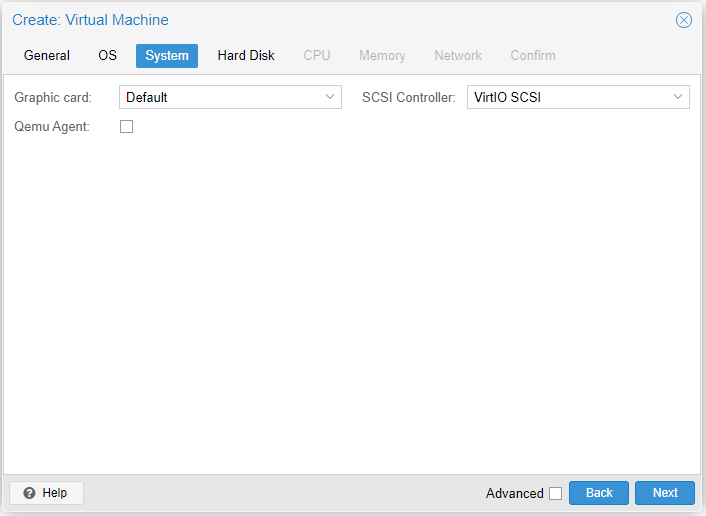
- Graphic card: Choose a graphics driver to use with the VM
- QEMU Agent: If the QEMU agent is installed on the VM, Proxmox has more control over it. For example, rebooting a VM from the Proxmox console.
- SCSI Controller: This is the storage controller for the VM. For the most part, the default is fine.
Step 4
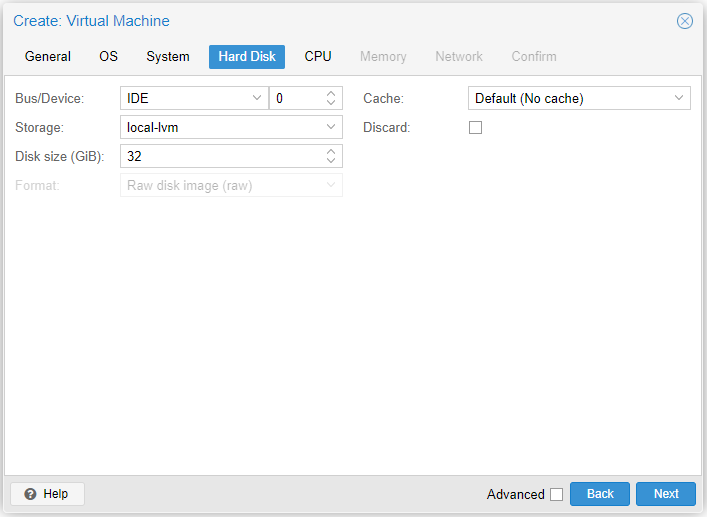
- Bus/Device:
- Choose the standard: IDE, SATA, VirtIO Block, SCSI
- Mostly, SATA or SCSI will be the best choice. IDE for VMs running older OS.
- Then, specify a disk number starting from
0.
- Choose the standard: IDE, SATA, VirtIO Block, SCSI
- Storage: Remember, VM disks are stored on local-lvm
- Disk Size: You know what this is.
Step 5
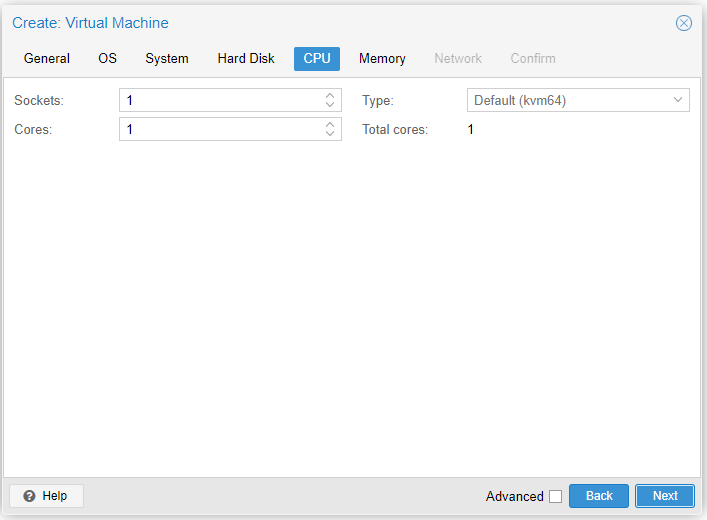
- Sockets: How many virtual CPU sockets
- Cores: How many virtual CPU cores
- Type: Can typically ignore this
Step 6
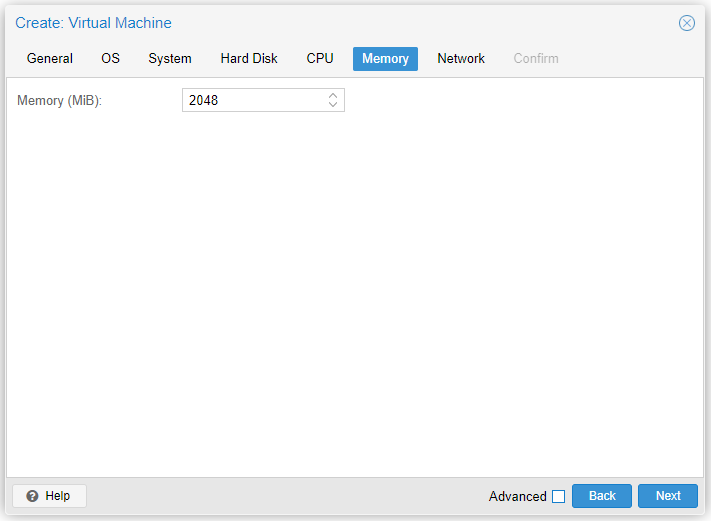
- Memory (MiB): Specify the RAM
Step 7
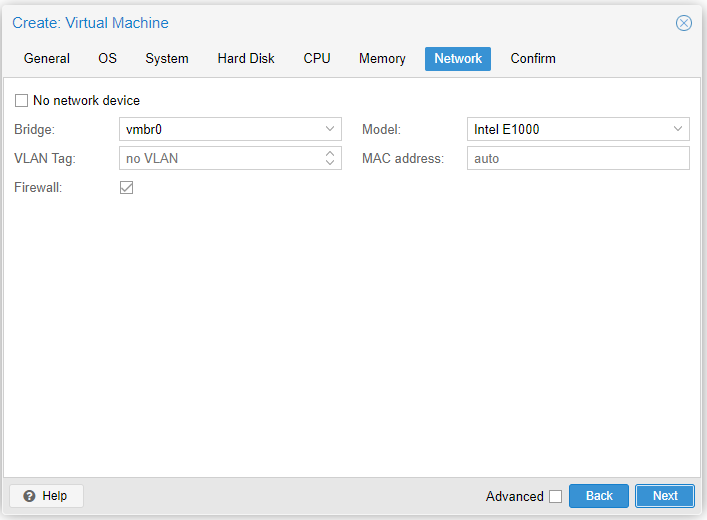
- Bridge: Which switch to attach it to (a bridge is just another name for a switch)
- VLAN Tag: Any VLAN tag
- Firewall: Uncheck this, unless you are using the firewall in Proxmox
- Model: For Linux, VirtIO (Paravirtualized) is the best. For Windows, Intel models usually work the best
- MAC Address: Leave it on auto unless you want to specify a MAC address
Step 8
Confirm all your settings and click finish
Interacting with Containers and VMs
Double clicking on a VM or Container will open a NoVNC console directly in the web browser.
Once you are logged into the VM you could install other remote desktop services at your discretion.
Next Step: Create a pfSense VM for Security Infrastructure


